
Accessory Installation Guide
Installation Instructions
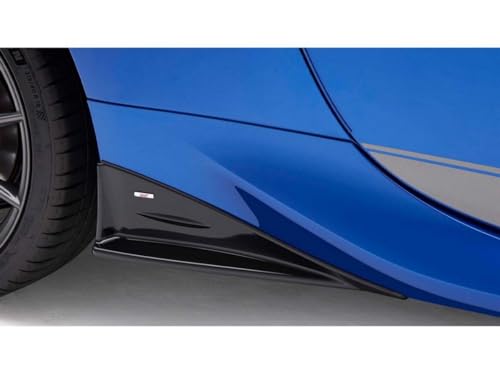
STI Side Under Spoiler
Installation Manual
Genuine part number : E2610CC000
Applicable model : BRZ (ZD),A Type~
– This manual describes how to install and handle the STI Side Under Spoiler.
– Read this manual carefully before work and make sure to install it correctly.
Precautions
– Install the STI Side Under Spoiler by reading the Installation Manual carefully.
– Handle the STI Side Under Spoiler with care and do not let it fall.
– Do not install or use this product in any way other than described in this manual.
– We do not assume any responsibility for any trouble arising from failure to comply with the instructions in this manual.
– Double-sided tape is used to attach the STI Side Under Spoiler. Attach it with care as once it is attached, it is extremely difficult to remove.
Before Work
– When installing this product, park the car on a level ground and apply the parking brake.
– When installing this product, be sure not to damage the car body.
– Before installing this product, wipe off any dirt or oil film from the Spoiler ASSY-Side attachment surface with a soft waste cloth dampened in a neutral detergent. Then, let it dry completely before work.
– The adhesive strength is weakened significantly when the temperature is 15℃ or lower. In this case, use a dryer to warm up the double-sided tape before attachment.(Do not warm up excessively as doing so may result in deformation.)
– Be extremely careful not to let this product get wet by washing, etc. for 24 hours after attaching it. Dosing so may cause the product to come off.
– To protect yourself from burns, make sure to stop the engine and let it cool completely before work
– When jacking up the vehicle, be sure to keep the ground level and a hard place where the jack does not bite, and be sure to support it with a rigid rack before carrying out the work.
Remove the Rear tires
1. Refer to the service manual and remove the rear tires from the vehicle.
(1 places each for RH and LH, 2 places in total)
Drilling holes in the Spoiler ASSY-Side
1. As shown in Fig. 2, apply a drill to the center of the Spoiler ASSY-Side bottom locator, make pilot holes in the order of 3 mm and 6 mm, and finally make a 9.5 mm hole (2 places for each of RH and LH, 4 places in total)
Before drilling, make a stopper with cloth adhesive tape at a point about 5 mm from the tip of the drill so that the drill does not interfere with it.
2. Insert the ② Well Nut into the 9.5 mm hole.
(2 places each for RH and LH, 4 places in total)
Degrease the Spoiler ASSY-Side
1. Degrease the shaded area in Fig. 4.
Sticking the Sponge
1. As shown in Fig. 5, attach masking tape to a height of 110 mm from the lower end of the Spoiler ASSY-Side to mark it.
2. Insert the sponge into the back of the Spoiler ASSY-Side, determine the height position using masking tape as a guide, and attach it so that it does not protrude from the R END of the broken line.
(1 places each for RH and LH, 2 places in total)
3. Peel off the attached Masking tape.
4. Insert the ⑤ BRKT into the ④ Sponge as shown in Fig. 6.
(1 places each for RH and LH, 2 places in total)
Insert ⑤ BRKT firmly as far as it will go.
Installing the STI Side Under Spoiler
1. Peel off the double sided tape release paper of the ① STI Side Under Spoiler by about 30 mm and fix it on the front side with masking tape.
(1 places each for RH and LH, 2 places in total)
Do not remove the release paper more than necessary.
The double-sided tape clings to the peripheral parts, which makes it difficult to position them.
2. As shown in Fig. 8, apply ① STI Side Under Spoiler and temporarily fix it with ③ Bolt. Determine the position by aligning the broken line R in the same way as arrow c.
(2 places each for RH and LH, 4 places in total)
3. As shown in Fig. 9, fix the ① STI Side Under Spoiler to ⑤ BRKT with ⑥ Screw.
(2 places each for RH and LH, 4 places in total) Reference tightening torque : 1.0 N ・ m (0.1 kgf ・ m).
⑥ Screw cannot be reused because they use screw lock material.
4. As shown in Fig. 10, crimp the double-sided tape part while slowly pulling it out in the direction of the arrow so that the paper pattern does not break in the middle.
If the release paper is difficult to pull out, slowly pull it out using radio pliers.
When pulling out the paper pattern, make sure that the Protecter does not turn over.
5. Fully re-bond the double-sided tape with 49N or more.
Install the Rear tires
1.Refer to the service manual and Install the rear tires on the vehicle.
(1 places each for RH and LH, 2 places in total)
This is the end of work.
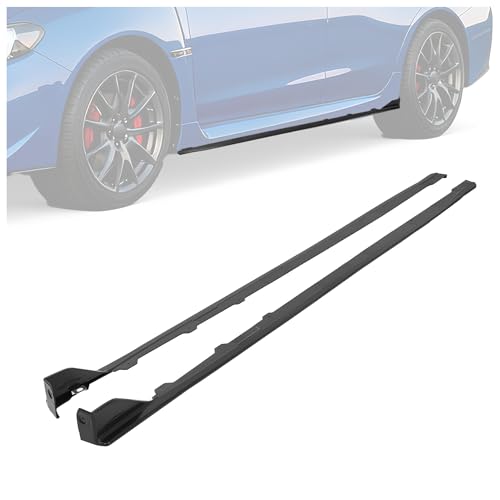
- Fitment: This side skirts are compatible with 2015-2021 Subaru WRX/STI Sedan 4-Door models. Ensures seamless integration with factory body lines, upgrading your vehicle’s sporty aesthetic
- Durable ABS Construction: Crafted from high-strength plastic (ABS) in black. Resists impacts, road debris, and weathering for long-lasting performance and a sleek, unpainted-yet-polished look
- Enhanced Aerodynamic Style: Rocker panels' design adds aggressive styling. Acts as a rocker panel extension to refine your vehicle’s profile, boosting both form and potential airflow efficiency
- Complete Hardware Kit: Includes all necessary screws for installation. Designed for straightforward bolt-on setup—no drilling required (professional installation recommended for optimal fit). No manual
- Protective & Functional: Shields your vehicle’s lower body from scratches, rocks, and road hazards. Provides a stable, low-profile extension that complements daily driving and spirited rides alike


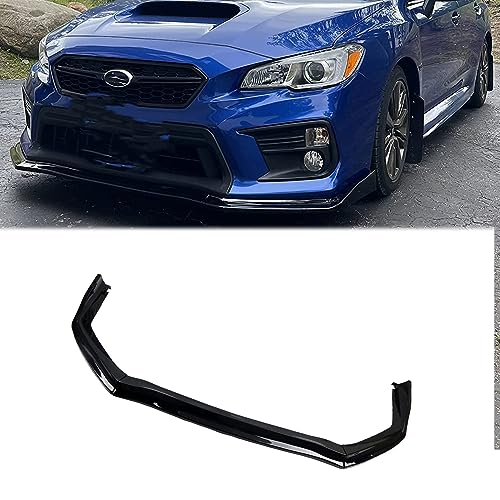
- 【Fit For】fits for Subaru WRX STi Sedan 2015 2016~2018 2019 2020
- 【 High Quality】Made of high quality ABS material .100% brand new and high quality guaranteed .
- 【Advantage】Provide an elegant and personalized appearance, Front bumper guard anti-collision protective, protect from scrapes from driveways, speed bumps and curbs.
- 【Easy Installation】Installation can be easily done, no modification required. Note : Package does not come with instructions. Professional installation is always recommended.
- 【Intimate Customer Service】If you have any quality problems, please don't hesitate to contact us with e-mail.It is our pleasure to solve any problems for you .

- Fitment: The rear trunk spoiler is compatible with 2015-2021 Subaru WRX 4 Door Sedan; Compatible with 2015-2021 Subaru WRX STI 4 Door Sedan. Please check if this spoiler is suitable for your vehicle before purchasing
- Superior Material: Made of ABS plastic, wear against, stable and reliable, high strength, good impact against, not easy to damage, good long time performance. The painted finish provides protection for the surface and improves durability
- Enhance Performance: The rear trunk spoiler will provide a downward pressure to improve vehicle stability when the vehicle is running. At the same time, it brings a strong sense of impact visually and endows the whole vehicle with a sporty appearance
- Package Included: 1 x Rear Trunk Spoiler (Matte Black) and mounting hardware. Instructions are NOT included
- Easy Installation: Easy and quick to install with screws. You may need some additional drilling
SEOCONTENT-START
– Install the STI Side Under Spoiler by reading the Installation Manual carefully. – Handle the STI Side Under Spoiler with care and do not let it fall. – Do not install or use this product in any way other than described in this manual. – We do not assume any responsibility for any trouble arising from failure to comply with the instructions in this manual. – Double-sided tape is used to attach the STI Side Under Spoiler.Attach it with care as once it is attached,it is extremely difficult to remove. -1- Genuine part number : E2610CC000 Applicable model : BRZ (ZD),A Type~ STI Side Under Spoiler Installation Manual △00 – This manual describes how to install and handle the STI Side Under Spoiler. – Read this manual carefully before work and make sure to install it correctly. ! △ Precautions Installation Completion Illustration ① ② ③ ④ ⑤ Components Tools -2- Before Work ① ② RH:1 /LH:1 No. Part Name Qty STI Side Under Spoiler 4 – Make sure to check the components below before installation. – When installing this product,park the car on a level ground and apply the parking brake. – When installing this product,be sure not to damage the car body. – Before installing this product,wipe off any dirt or oil film from the Spoiler ASSY-Side attachment surface with a soft waste cloth dampened in a neutral detergent.Then,let it dry completely before work. – The adhesive strength is weakened significantly when the temperature is 15℃ or lower.In this case, use a dryer to warm up the double-sided tape before attachment.(Do not warm up excessively as doing so may result in deformation.) – Be extremely careful not to let this product get wet by washing,etc.for 24 hours after attaching it. Dosing so may cause the product to come off. – To protect yourself from burns,make sure to stop the engine and let it cool completely before work – When jacking up the vehicle, be sure to keep the ground level and a hard place where the jack does not bite, and be sure to support it with a rigid rack before carrying out the work. ③ ④ ⑤ Sponge BRKT 4 2 φ3mm φ6mm φ9.5mm 2 ⑥ Well Nut Bolt ⑥ Screw 4 -3- 1 Remove the Rear tires Remove 2 Fr RH UP Rear tires 1.Refer to the service manual and remove the rear tires from the vehicle. (1 places each for RH and LH, 2 places in total) Bottom View a LH Fr UP b Fr RH UP 3mm → 6mm→ 9.5mm < Detail View a > < Detail View b > Locator center Locator center ※Don’t use 1.As shown in Fig. 2, apply a drill to the center of the Spoiler ASSY-Side bottom locator, make pilot holes in the order of 3 mm and 6 mm, and finally make a 9.5 mm hole (2 places for each of RH and LH, 4 places in total) Before drilling, make a stopper with cloth adhesive tape at a point about 5 mm from the tip of the drill so that the drill does not interfere with it. Drill cloth adhesive tape Drilling holes in the Spoiler ASSY-Side -4- 3 4 LH Fr UP ② Well Nut 2.Insert the ② Well Nut into the 9.5 mm hole. (2 places each for RH and LH, 4 places in total) //////////////////////// Fr RH UP < Fender side > ////// Clean the Fender side as well Degrease the Spoiler ASSY-Side 1.Degrease the shaded area in Fig. 4. -5- 5 1.As shown in Fig. 5, attach masking tape to a height of 110 mm from the lower end of the Spoiler ASSY-Side to mark it. 2.Insert the sponge into the back of the Spoiler ASSY-Side, determine the height position using masking tape as a guide, and attach it so that it does not protrude from the R END of the broken line. (1 places each for RH and LH, 2 places in total) 3.Peel off the attached Masking tape. 6 4.Insert the ⑤ BRKT into the ④ Sponge as shown in Fig. 6. (1 places each for RH and LH, 2 places in total) Insert ⑤ BRKT firmly as far as it will go. Fr RH UP < Cross-sectional view of the sponge pasting part > Sticking the Sponge About 15mm ④ Sponge Don’t stick out from the R END Masking tape ④ Sponge Mudguard Spoiler ASSY-Side 110mm from the bottom of the Spoiler ASSY-Side Fr RH UP ④ Sponge ⑤ BRKT < Cross-sectional view of the BRKT sandwiched part > Spoiler ASSY-Side Mudguard ④ Sponge ⑤ BRKT -6- 7 8 2.As shown in Fig. 8, apply ① STI Side Under Spoiler and temporarily fix it with ③ Bolt. Determine the position by aligning the broken line R in the same way as arrow c. (2 places each for RH and LH, 4 places in total) Masking tape ① STI Side Under Spoiler Installing the STI Side Under Spoiler 1.Peel off the double sided tape release paper of the ① STI Side Under Spoiler by about 30 mm and fix it on the front side with masking tape. (1 places each for RH and LH, 2 places in total) Do not remove the release paper more than necessary. The double-sided tape clings to the peripheral parts, which makes it difficult to position them. Fr RH UP c ① STI Side Under Spoiler Spoiler ASSY-Side < Arrow view c > Match to R ③ Bolt 5.Fully re-bond the double-sided tape with 49N or more. -7- 9 3.As shown in Fig. 9, fix the ① STI Side Under Spoiler to ⑤ BRKT with ⑥ Screw. (2 places each for RH and LH, 4 places in total) Reference tightening torque : 1.0 N ・ m (0.1 kgf ・ m). ⑥ Screw cannot be reused because they use screw lock material. Fr RH UP ⑥ Screw ① STI Side Under Spoiler ⑥ Screw ⑤ BRKT ④ Sponge Spoiler ASSY-Side < Cross section of screw mounting part > 10 Fr RH c UP ① STI Side Under Spoiler Spoiler ASSY-Side < Arrow view c > Match to R 4.As shown in Fig. 10, crimp the double-sided tape part while slowly pulling it out in the direction of the arrow so that the paper pattern does not break in the middle. If the release paper is difficult to pull out, slowly pull it out using radio pliers. When pulling out the paper pattern, make sure that the Protecter does not turn over. -8- 11 Fr RH UP Rear tires Install Install the Rear tires This is the end of work. 1.Refer to the service manual and Install the rear tires on the vehicle. (1 places each for RH and LH, 2 places in total)
**************************************************************************************************************
SEOCONTENT-END
This product presentation was made with AAWP plugin.