
Accessory Installation Guide
STI FRONT UNDER SPOILER
INSTALLATION MANUAL
Genuine part number: E2410VC210, E2410VC220
Applicable model: WRX (VB), 2022MY and later models
This manual describes how to install and handle the STI front under spoiler.
Before installing the part, please be sure to read this manual for proper installation.
Precautions
1. Be sure to observe the content in CAUTION for installation described in the main text during the work. Neglecting it may cause dropping of or peeling-off on the part, and also may prevent the vehicle from functioning.
2. Before the installation, turn the ignition switch to OFF, and apply the parking brake without fail.
3. Do not use thinner or the like, otherwise the surface of the STI front under spoiler may be corroded.
Also, keep the spoiler away from fire, otherwise it may be deformed.
4. When the ambient temperature is 15°C or lower, warm up all strips of the double-sided tape and around the installation portion of the STI front under spoiler to approximately 25 to 40°C using a dryer or infrared lamp. Local warming may deform the part.
Do not use an industrial dryer.
5. Firmly press the double-sided tape to adhere well.
If it is reattached, the adhesive performance will extremely decrease. To avoid redoing, position the tape correctly before attachment.
6. The adhesive strength of the double-sided tape increases gradually after the attachment.
Do not wash the vehicle within 24 hours after attaching the part.
When washing the vehicle or applying wax to the vehicle is required on the day when the part is attached, leave the vehicle for at least 1 hour, and seal the double-sided tape attached portions with tape or the like to prevent water intrusion.
In addition, be careful not to apply an excessive force to the STI front under spoiler.
(Do not perform a high-pressure or automatic car wash on the day when the part is installed.)
7. When performing an air blow after the installation of the part, keep the nozzle 300 mm or more away from the part. If it is too close, the surface of the part may be peeled off.
8. Perform degreasing so as not to allow any solvent to accumulate in a gap of a component. A liquid pool may adversely affect the coated surfaces, rubber materials, and the like. Use a soft waste cloth to absorb the solvent and wipe the necessary portion.
Then, wipe off completely with a dry waste cloth.
Tools to be used
Clip remover, Gloves, Scale, Awl, Torque wrench, Phillips screwdriver, Ratchet wrench (8 mm), Drill bits (3 mm, 6 mm, 9.5 mm, 10 mm), Fabric adhesive tape, Masking tape, Degreaser (Recommended: Nonane), Waste cloth, Sandpaper, Safety goggles
WARNING
Refer to the vehicle manual for jacking up. Before jacking up a vehicle, park the vehicle on a flat and solid ground where a jack will not sink, and use rigid racks or the like to support the vehicle without fail.
Installation procedure
1. Preparation for installation
(1) On the bottom surface of the front bumper, align the template A ⑩ with the parting line, and attach it with 4 pieces of masking tape. (Fig. 1)
(1 location each on RH and LH, 2 locations in total)
(2) Make a mark with an awl or the like at the center of each hole on the template A. (Fig. 1)
(2 locations each on RH and LH, 4 locations in total)
(3) Remove the template A.
(4) Remove the vehicle clips. (Fig. 2)
(2 locations each on RH and LH, 4 locations in total)
CAUTION
The removed vehicle clips will not be reused.
(5) Apply a drill to each concaved position on the bottom surface of the front bumper and the center of each position marked in Section 1. (2) to make a hole. Referring to the figure on the left, make a prepared hole first and then a final hole. (Fig. 3)
(6→9.5 mm: 3 locations at center)
(6→10 mm: 2 locations each on RH and LH, 4 locations in total)
(3→6 mm: 2 locations each on RH and LH, 4 locations in total)
CAUTION
When making holes, wear safety goggles.
CAUTION
Before the work, make a stopper with fabric adhesive tape to a position approximately 5 mm away from the tip of the drill bit to prevent interference with the drill.
(6) Remove burrs around the holes completely using sandpaper or the like.
(7) Degrease the portions indicated in the figure for the bottom surface of the front bumper with a waste cloth soaked with a degreaser (recommended: Nonane). (Fig. 4)
(1 location at center and 3 locations each on RH and LH, 7 locations in total)
(8) On the bottom center surface of the front bumper, align the template B ⑩ with the parting line, and attach it with 3 pieces of masking tape. (Fig. 5)
(1 location each on RH and LH, 2 locations in total)
(9) Attach non-woven fabric tape ⑪ along the shape of the template B ⑩.
(1 location at center, RH, and LH, 3 locations in total)
(10) Remove the template B.
(11) On the bottom surface of the front bumper, align the template C ⑩ with the parting line, and attach it with 2 pieces of masking tape. (Fig. 6)
(1 location each on RH and LH, 2 locations in total)
(12) Attach non-woven fabric tape ⑪ along the shape of the template C ⑩. (Fig. 6)
(1 location each on RH and LH, 2 locations in total)
(1 location each on RH and LH, 2 locations in total)
(13) Remove the template C.
(14) Insert the well nut ③ to each hole made in Section 1. (5) on the bottom surface of the front bumper. (Fig. 7)
(1 location each at center, RH, and LH, 3 locations in total)
(15) Insert the spring nut ⑤ to each hole made in Section 1. (5) on the bottom surface of the front bumper. (Fig. 8)
(1 location each on RH and LH, 2 locations in total)
*NOTICE
– Be sure to degrease and clean the attachment surface of the front bumper before the works.
– All illustrations in this manual show the parts on the LH side. Perform the same works on the RH side of the vehicle as well.
– Perform the works in a room at an ambient temperature of 15°C or higher.
(When the temperature is lower than 15°C, the double-sided tape will not adhere sufficiently. Warm up the attachment surface and double-sided tape with a heating device or the like. Guide: 25 to 50°C)
– If air enters between the tape and the attachment surface, the adhesive strength will become weak.
Be sure to firmly press it.
2. Spoiler installation work
(1) Peel off the strips of the backing paper from the double-sided tape attached on the front under spoiler ① by approximately 15 mm each from the inner end as shown in the figure on the left, fold them backward, and apply a piece of masking tape to each of them. (Fig. 9)
(2 locations each on RH and LH, 4 locations in total)
(2) Place the front under spoiler ① onto the front bumper bottom surface, and temporarily fix them with the clips A ⑥. (Fig. 10)
(2 locations each on RH and LH, 4 locations in total)
(3) Fix the front under spoiler ① first with the clip B ⑦ and then clips C ⑧. (Fig. 11)
(3 locations each on RH and LH, 6 locations in total)
CAUTION
Push the clip B ⑦ with the tip of a Phillips screwdriver.
(4) Temporarily fix the front under spoiler ① with the bolts ②. For the center portion, insert the washer ⑨ in-between before fixing temporarily. (Fig. 12)
(1 location each at center, RH, and LH, 3 locations in total)
(5) Temporarily fix the front under spoiler ① with the tapping screw ④. (Fig. 13)
(1 location each on RH and LH, 2 locations in total)
(6) Install the front under spoiler ① while paying attention not to allow its molding to be caught in the bumper. (Fig. 14)
*How to correct when the molding is caught
– When the molding is caught, correct the position while paying attention not to scratch the bumper or peel off the double-sided tape.
– The molding can be returned to the correct position by catching the caught molding with a finger.
(7) Remove the backing paper from the double-sided tape attached on the front under spoiler ① in the directions shown by the arrows in the order of 1 and 2 shown in the figure, and firmly press the double-sided tape portions with a force that can move the vehicle slightly. (Fig. 15)
(2 locations each on RH and LH, 4 locations in total)
Firmly press the double-sided tape to the bumper by pressing it from the bottom side.
CAUTION
When removing the backing paper, be careful not to allow the backing paper to break at midpoint.
(8) Finally tighten the bolts ② and tapping screw ④ temporarily fixed in the steps (4) and (5). (Fig. 16) Tightening torque for reference: 1.0 N•m (0.1 kgf•m)
(9) Finally, check for lifting or tilting of the installation portion, missing of any clip or bolt, and omission of tightening.
The installation work has been completed.
E2410VC210
2022MY WRX Front Under Spoiler

- Fitment:Compatible with 2015 2016 2017 2018 2019 2020 2021 SUBARU WRX Base,Premium,STI,Limited All Models.(you can contact us if you have any concerns)
- Durable Material:NEESPOC Front lip splitter spoiler for car is made of durable strong ABS plastic which has excellent impact resistance,heat resistance,and low-temperature resistance.Streamlined and lightweight design with low noise
- Installation type:Bolt screws installation,with pre-drilled holes,easy installation,no installation instructions, professional installation is strongly recommended
- Sport and Performance:The front splitter of the car can effectively promote motion appearance,improve driving stability and safety.It perfectly decorates your car and improves its sporty appearance
- Service:If you have any questions before or after purchasing,please contact our customer service support team.We are willing to assist your

- Fitment - Fit for 2015 2016 2017 2018 2019 2020 2021 Subaru WRX STI Sedan
- Design and Material - High Quality ABS material with Black Painted Finished
- Package includes: three pieces front body bumper kit, comes with installation screws
- Brand new item and never installed before
- Guarantee - 30-day free return policy - if you have any question about products please feel free to contact us
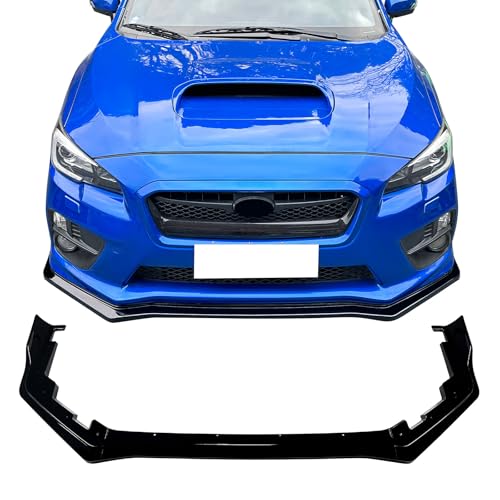
- Custom Fitment: IKON MOTORSPORTS custom fit front bumper lip Fits 2015-2021 Subaru WRX & WRX STI, precision injection molded for an perfect fit with no modifications required, which makes it an ideal upgrade for your vehicle.
- Superior Protection: This automotive vehicle front bumper spoiler made of high-quality PP Injection, light-weight, durable and impact resistance, perfectly protects the original bumper from bumps and scratches on the road.
- Aerodynamic Design: Classic CS2 Style design front spoiler lip visually enhances the car's performance appearance; Improves aerodynamic efficiency by reducing lift and enhancing stability at high speeds, ensuring driving safety and reducing fuel consumption.
- Ready to Install: Ships in Gloss Black front chin splitter protector, ready to install, no need to painting; UV-protected clear coated, resistant to fading for longer life-span.
- Easy to Install: Comes with 1x Front Bumper Lip (3PCS) and needed mounting hardwares. If you want to install it yourself, you can watch the installation video on web for some installation tips. Of course, professional installation is highly recommended. Do not forget to keep your vehicle clean and dry before start.
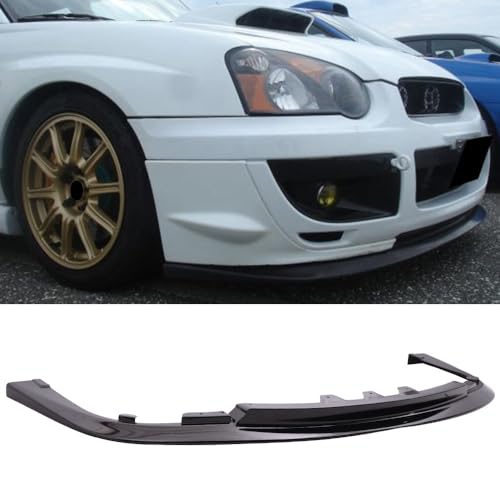
- Custom Fitment: Compatible with 2004-2005 Subaru Impreza WRX STI (NOTE: DOES NOT FIT Base and WRX models)
- Specification: Style: STI Style | Material: High Quality Polypropylene (PP) | Color: Painted Glossy Black | Package includes: 1x Front Bumper Lip
- Aerodynamic Design: Classic STI Style design front spoiler lip visually enhances the car's performance appearance; Improves aerodynamic efficiency by reducing lift and enhancing stability at high speeds, ensuring driving safety and reducing fuel consumption
- Ready to Install: Painted Glossy Black front chin splitter protector, ready to install; UV-protected clear coated, resistant to fading for longer life-span
- Installation: Bolt-on installation and comes with needed mounting hardwares. If you want to install it yourself, you can watch the installation video on web for some installation tips. Of course, professional installation is highly recommended. Do not forget to keep your vehicle clean and dry before start

- Custom Fitment: Compatible With 2015-2021 Subaru WRX & WRX STI
- Specification: Style: CS Style | Material: PP - Polypropylene (Factory Grade Plastic) | Color: Unpainted Black | Package includes: 1x Front Bumper Lip
- Aerodynamic Design: Classic CS Style design front spoiler lip visually enhances the car's performance appearance; Improves aerodynamic efficiency by reducing lift and enhancing stability at high speeds, ensuring driving safety and reducing fuel consumption
- Superior Protection: This automotive vehicle front bumper spoiler made of high-quality Polypropylene (PP), light-weight, durable and impact resistance; perfectly protects the original bumper from bumps and scratches on the road
- Installation: Bolt-on installation and comes with needed mounting hardwares. If you want to install it yourself, you can watch the installation video on web for some installation tips. Of course, professional installation is highly recommended. Do not forget to keep your vehicle clean and dry before start
SEOCONTENT-START
1 △0 STI FRONT UNDER SPOILER INSTALLATION MANUAL Genuine part number: E2410VC210, E2410VC220 Applicable model: WRX (VB), 2022MY and later models Precautions 1. Be sure to observe the content in CAUTION for installation described in the main text during the work. Neglecting it may cause dropping of or peeling-off on the part, and also may prevent the vehicle from functioning. 2. Before the installation, turn the ignition switch to OFF, and apply the parking brake without fail. 3. Do not use thinner or the like, otherwise the surface of the STI front under spoiler may be corroded. Also, keep the spoiler away from fire, otherwise it may be deformed. 4. When the ambient temperature is 15°C or lower, warm up all strips of the double-sided tape and around the installation portion of the STI front under spoiler to approximately 25 to 40°C using a dryer or infrared lamp. Local warming may deform the part. Do not use an industrial dryer. 5. Firmly press the double-sided tape to adhere well. If it is reattached, the adhesive performance will extremely decrease. To avoid redoing, position the tape correctly before attachment. 6. The adhesive strength of the double-sided tape increases gradually after the attachment. Do not wash the vehicle within 24 hours after attaching the part. When washing the vehicle or applying wax to the vehicle is required on the day when the part is attached, leave the vehicle for at least 1 hour, and seal the double-sided tape attached portions with tape or the like to prevent water intrusion. In addition, be careful not to apply an excessive force to the STI front under spoiler. (Do not perform a high-pressure or automatic car wash on the day when the part is installed.) 7. When performing an air blow after the installation of the part, keep the nozzle 300 mm or more away from the part. If it is too close, the surface of the part may be peeled off. 8. Perform degreasing so as not to allow any solvent to accumulate in a gap of a component. A liquid pool may adversely affect the coated surfaces, rubber materials, and the like. Use a soft waste cloth to absorb the solvent and wipe the necessary portion. Then, wipe off completely with a dry waste cloth. Tools to be used Clip remover, Gloves, Scale, Awl, Torque wrench, Phillips screwdriver, Ratchet wrench (8 mm), Drill bits (3 mm, 6 mm, 9.5 mm, 10 mm), Fabric adhesive tape, Masking tape, Degreaser (Recommended: Nonane), Waste cloth, Sandpaper, Safety goggles This manual describes how to install and handle the STI front under spoiler. Before installing the part, please be sure to read this manual for proper installation. ① ② ③ ④ ⑤ ⑥ ⑦ ⑧ 2 Front under spoiler Bolt Well nut Tapping screw Spring nut Clip A Clip B Clip C Washer Template set (Templates A, B, and C. a pair of LH and RH) Non-woven fabric tape 1 1 Small bag ②③④⑤⑥⑦ ⑧ ⑨ ⑩ ⑩ 3 3 2 2 4 2 4 ⑨ 1 ⑪ 5 ⑪ ① No. Components Part name Qty. 3 ① STI front under spoiler 1. Preparation for installation UP RH LH Ft UP RH LH Ft Front bumper Front bumper Front bumper Marking position Masking tape Masking tape Masking tape WARNING Refer to the vehicle manual for jacking up. Before jacking up a vehicle, park the vehicle on a flat and solid ground where a jack will not sink, and use rigid racks or the like to support the vehicle without fail. Completion image Installation procedure (1) On the bottom surface of the front bumper, align the template A ⑩ with the parting line, and attach it with 4 pieces of masking tape. (Fig. 1) (1 location each on RH and LH, 2 locations in total) (2) Make a mark with an awl or the like at the center of each hole on the template A. (Fig. 1) (2 locations each on RH and LH, 4 locations in total) (3) Remove the template A. (4) Remove the vehicle clips. (Fig. 2) (2 locations each on RH and LH, 4 locations in total) CAUTION The removed vehicle clips will not be reused. Fig. 2 Fig. 1 ⑩ Template A ⑩ Template A Awl Vehicle clips Enlarged view of template A ⑩ alignment portion Align with parting line. 4 6㎜→9.5㎜ 5mm 3㎜→6㎜ 6㎜→10㎜ Drill Drill Drill bit Drill Drill A A UP RH LH Ft UP UP RH LH Ft Fr UP RH LH Ft Fig. 3 Fig. 4 Fig. 5 (6) Remove burrs around the holes completely using sandpaper or the like. (7) Degrease the portions indicated in the figure for the bottom surface of the front bumper with a waste cloth soaked with a degreaser (recommended: Nonane). (Fig. 4) (1 location at center and 3 locations each on RH and LH, 7 locations in total) (8) On the bottom center surface of the front bumper, align the template B ⑩ with the parting line, and attach it with 3 pieces of masking tape. (Fig. 5) (1 location each on RH and LH, 2 locations in total) (9) Attach non-woven fabric tape ⑪ along the shape of the template B ⑩. (1 location at center, RH, and LH, 3 locations in total) (10) Remove the template B. (5) Apply a drill to each concaved position on the bottom surface of the front bumper and the center of each position marked in Section 1. (2) to make a hole. Referring to the figure on the left, make a prepared hole first and then a final hole. (Fig. 3) (6→9.5 mm: 3 locations at center) (6→10 mm: 2 locations each on RH and LH, 4 locations in total) (3→6 mm: 2 locations each on RH and LH, 4 locations in total) CAUTION CAUTION Front bumper Front bumper Front bumper Front bumper Masking tape Degreaser (Recommended: Nonane) Waste cloth Surface to be degreased and cleaned Align with parting line. ⑩ Template B-RH ⑩ Template B-LH ⑪ Non-woven fabric tape Align with templates. Reference on LH side When making holes, wear safety goggles. Before the work, make a stopper with fabric adhesive tape to a position approximately 5 mm away from the tip of the drill bit to prevent interference with the drill. Fabric adhesive tape Sectional view of A-A Inner part 5 B B UP RH LH Ft UP RH LH UP RH Ft UP RH LH Ft Fig. 6 Fig. 7 Fig. 8 (11) On the bottom surface of the front bumper, align the template C ⑩ with the parting line, and attach it with 2 pieces of masking tape. (Fig. 6) (1 location each on RH and LH, 2 locations in total) (12) Attach non-woven fabric tape ⑪ along the shape of the template C ⑩. (Fig. 6) (1 location each on RH and LH, 2 locations in total) (1 location each on RH and LH, 2 locations in total) (13) Remove the template C. (14) Insert the well nut ③ to each hole made in Section 1. (5) on the bottom surface of the front bumper. (Fig. 7) (1 location each at center, RH, and LH, 3 locations in total) (15) Insert the spring nut ⑤ to each hole made in Section 1. (5) on the bottom surface of the front bumper. (Fig. 8) (1 location each on RH and LH, 2 locations in total) Front bumper Front bumper Front bumper Front bumper Masking tape Masking tape ⑩ Template C ⑪ Non-woven fabric tape Align with template. Align with parting line. ③ Well nuts ⑤ Spring nut ⑤ Spring nut Sectional view of B-B Insert. ①Front under spoiler ①Front under spoiler ①Front under spoiler ①Front under spoiler α β 6 C C CAUTION UP RH LH UP RH Ft UP RH LH Ft *NOTICE – Be sure to degrease and clean the attachment surface of the front bumper before the works. – All illustrations in this manual show the parts on the LH side. Perform the same works on the RH side of the vehicle as well. – Perform the works in a room at an ambient temperature of 15°C or higher. (When the temperature is lower than 15°C, the double-sided tape will not adhere sufficiently. Warm up the attachment surface and double-sided tape with a heating device or the like. Guide: 25 to 50°C) – If air enters between the tape and the attachment surface, the adhesive strength will become weak. Be sure to firmly press it. 2. Spoiler installation work (1) Peel off the strips of the backing paper from the double-sided tape attached on the front under spoiler ① by approximately 15 mm each from the inner end as shown in the figure on the left, fold them backward, and apply a piece of masking tape to each of them. (Fig. 9) (2 locations each on RH and LH, 4 locations in total) (2) Place the front under spoiler ① onto the front bumper bottom surface, and temporarily fix them with the clips A ⑥. (Fig. 10) (2 locations each on RH and LH, 4 locations in total) (3) Fix the front under spoiler ① first with the clip B ⑦ and then clips C ⑧. (Fig. 11) (3 locations each on RH and LH, 6 locations in total) Push the clip B ⑦ with the tip of a Phillips screwdriver. Fig. 9 Fig. 10 Fig. 11 Front bumper Front bumper Front bumper Masking tape Enlarged view of portion α Backing paper Backing paper Backing paper Insert it to square hole. Fold it backward. Enlarged view of portion β ⑦ Clip B ⑥ Clips A ⑥ Clip A ⑧ Clips C Air flap Mud guard Sectional view of C-C 7 UP RH LH Ft UP RH LH Ft UP UP LH LH UP LH UP LH RH Ft (4) Temporarily fix the front under spoiler ① with the bolts ②. For the center portion, insert the washer ⑨ in-between before fixing temporarily. (Fig. 12) (1 location each at center, RH, and LH, 3 locations in total) (5) Temporarily fix the front under spoiler ① with the tapping screw ④. (Fig. 13) (1 location each on RH and LH, 2 locations in total) (6) Install the front under spoiler ① while paying attention not to allow its molding to be caught in the bumper. (Fig. 14) Fig. 14 Fig. 13 Fig. 12 *How to correct when the molding is caught – When the molding is caught, correct the position while paying attention not to scratch the bumper or peel off the double-sided tape. – The molding can be returned to the correct position by catching the caught molding with a finger. Front bumper Front bumper Front bumper Front bumper Front bumper Front bumper ①Front under spoiler ①Front under spoiler ①Front under spoiler ①Front under spoiler ①Front under spoiler ①Front under spoiler Portions marked with ▼: Be careful not to catch the molding. ⑨ Washer ② Bolts ④ Tapping screw Sectional view Sectional view Sectional view Accepted Not caught Not accepted Caught Opening Use a finger to catch the caught molding to correct it. 1 2 8 D D CAUTION UP RH LH Ft UP RH LH Fig. 16 Ft Fig. 15 (7) Remove the backing paper from the double-sided tape attached on the front under spoiler ① in the directions shown by the arrows in the order of 1 and 2 shown in the figure, and firmly press the double-sided tape portions with a force that can move the vehicle slightly. (Fig. 15) (2 locations each on RH and LH, 4 locations in total) (8) Finally tighten the bolts ② and tapping screw ④ temporarily fixed in the steps (4) and (5). (Fig. 16) Tightening torque for reference: 1.0 N•m (0.1 kgf•m) (9) Finally, check for lifting or tilting of the installation portion, missing of any clip or bolt, and omission of tightening. The installation work has been completed. When removing the backing paper, be careful not to allow the backing paper to break at midpoint. Revision history Content Newly created Date June 17, 2021 Front bumper Front bumper Front bumper ①Front under spoiler ①Front under spoiler ①Front under spoiler Backing paper Backing paper Final tightening Sectional view of D-D Firmly press it. Firmly press the double-sided tape to the bumper by pressing it from the bottom side.
**************************************************************************************************************
SEOCONTENT-END
This product presentation was made with AAWP plugin.