
Accessory Installation Guide
| 2024MY Crosstrek – Window Deflector | F0010FN000 |
INSTALLATION INSTRUCTION
DOOR VISOR
Genuine part number : F001 0FN000
Applicable model : CROSSTREK
This manual explains about the attachment procedure of the door visor.
Attention
1. Read this manual thoroughly first in order to attach the door visor correctly.
Never attach the modified door visors.
2. Caution marks used in this manual indicate the safety caution for the attachment. Be sure to observe these cautions.
3. Please note that we may not accept responsibilities for troubles occurred by neglecting to observe the cautions.
CAUTION
1. Before starting the attachment procedure, turn off the ignition switch and be sure to operate the parking brake.
2. For attaching this product, we are adopting the adhesion method by using double-sided tape. Before attaching the product, wipe dirt, dust, and oil with clean cloth from the attaching surface.
The oil can be wiped well by using neutral detergent, etc.
3. This product is made of resin. Be careful when handling for not forcibly bending or damaging.
4. When the ambient temperature is low (15°C or lower), warm the surface of double-sided tape to approximately 40°C with an infrared lamp or a dryer (do not use an industrial dryer).
5. The double-sided tape needs to be pressed in order to make it adhere well. Pressure-bond the visor as strongly as the vehicle shakes a little. In addition, if the visor is removed and attached again, the adhesion power significantly deteriorates. In order to avoid repetitive attachment, decide the position before the first attachment.
6. The adhesion power of the double-sided tape gradually increases after pasting. Avoid washing the vehicle for 24 hours from the attachment.
7. After checking the attachment, open and close the window glass for a few times. Check that the window opens/closes smoothly.
Tools to be used
- Neutral detergent
- Cloth
- Scale
- Masking tape
- Infrared lamp or dryer (when the environment temperature is 15°C or lower)
Installation procedure
Caution
- Park the vehicle at a level and sufficiently open space for the safe operations.
- Stop the engine and operate the parking brake, so the vehicle does not move during the operation.
- This procedure describes the operation for the left side.
- Conduct the same operation for the right side as well.
1. Preparation for installation
(1) Open the door, open the window glass, and remove the glass run. [Fig. 1]
Caution
- Remove the glass run according to the explanation in the service manual.
- Do not remove the corner sections of the glass run. Otherwise, the recovery becomes difficult.
(2) Be sure to wipe water, oil, and dirt on the door visor attachment surfaces (sections on the door sash) by a cloth soaked with neutral detergent. Then, dry the wiped surfaces completely. [Fig. 2]
Caution
- Attach the main body by the double-sided tape.
- Make sure that the attachment surfaces are clean.
2. Preparation for installation of door visor
(1) Apply sealer to the pillar cover bumps on the front door sash.
Start from the bottom side, aligning with the border between the door sash and the glass-run, and apply it carefully so as not to ride up on the grass run.
(2) Apply sealer to the pillar cover bumps on the rear door sash.
Start from the bottom side, aligning with the border between the door sash and the glass-run, and apply it carefully so as not to ride up on the grass run.
Caution
- Attach the cushion so that no gap will be made on the pillar cover and also the upper side of the cushion will not protrude from the door visor.
3. Installing the brackets
(1) Insert the bracket into the mounting boss on the back of the door visor and push it in until it hits the door visor surface. [Fig.4]
Caution
- Do not turn reattach the bracket as this may cause it to come off.
- If bracket A and bracket b are installed backwards, correct installation will not be possible.
4. Preparation for door visor installation
(1) Remove about 30mm of tape liner from the front and rear edge of the door visor from the terminal. [Fig.5]
*The removed tape liner can be attached to the surface with masking tape to facilitate further work.
5. Temporary attachment of the door visor Front
Front
(1) Align the rear edge with the outer edge of the pillar cover (2mm inside from the terminal) and temporarily adhere. [Fig. 6]
(2) Align the top edge with the outer edge of the door sash (1 mm inside from the terminal) and temporarily adhere. [Fig. 6]
(3) Insert the bracket into the door sash. [Fig. 6]
Caution
- Repeated temporary installation will significantly reduce the adhesive strength double-sided tape.
- Be careful not to turn the bracket when inserting it into the door sash.
- Make sure that the door visor does not extend beyond the outer edge of the door sash.
If the product is installed overhung, it may interfere with the vehicle or cause injury. - Glue the bracket in place with the bracket securely inserted all the way to the back of the door sash.
If not securely plugged in, it may cause water to enter.
6. Temporary attachment of the door visor Rear
Rear
(1) Align the front edge with the outer edge of the pillar cover (2mm inside from the terminal) and temporarily adhere. [Fig. 7]
(2) Align the top edge with the outer edge of the door sash (1 mm inside from the terminal) and temporarily adhere. [Fig. 7]
(3) Insert the bracket into the door sash. [Fig. 7]
Caution
- Repeated temporary installation will significantly reduce the adhesive strength double-sided tape.
- Be careful not to turn the bracket when inserting it into the door sash.
- Make sure that the door visor does not extend beyond the outer edge of the door sash.
If the product is installed overhung, it may interfere with the vehicle or cause injury. - Glue the bracket in place with the bracket securely inserted all the way to the back of the door sash.
If not securely plugged in, it may cause water to enter.
7. Adhesion of door visor
(1) Remove all masking tapes which were temporarily pasted. [Fig. 8]
(2) After checking that the positioning is securely conducted, remove the release paper of the double-sided tape to the arrow ⇐ direction without twisting, and adhere the door visor to the door panel. [Fig. 8]
Caution
- If it is attached without being properly aligned, it may cause interference with the vehicle, injury, peeling, water intrusion, and abnormal sound.
- Always hold the root of the releasing paper and remove slowly.
- Please note that twisting the releasing paper may cause the paper to tear.
- When a clearance is made between the release paper and the vehicle, it becomes easier to remove the release paper.
8. Recovery of glass run
(1) Attach the glass run and accustom to the door panel and the bracket. [Fig. 9]
Caution
- When recovering the glass run, the bracket sections are especially difficult to be recovered. Use fingers to accustom the glass run.
If not fitted correctly, the glass run may get damaged due to up/down movement of the window glass.
9. Pressure-bonding of door visor
(1) Press bond the adhesion surface of the double-sided tape in the arrow ⇐ direction evenly with a force of 49N or more (at least the force which shakes the vehicle). [Fig.10]
Caution
- Securely pressure-bond the adhesion surface of the double-sided tape, especially the ends (~-)section).
In addition, when pressure bonding the double-sided tape to the pillar, directly hold the rear side of the double-sided tape adhering surface of the door visor.
If there is any floated section due to insufficient pressure-bonding, it may cause injury, peeling, water intrusion, and abnormal sound. - If the ambient temperature is 15°C or lower, warm up the door panel at which the door visor is adhered to and the double-sided tape of the door visor to a body temperature (approx. 40°C) by using a dryer, etc.
- Be very careful with a burn.
10. Check after attaching of the door visor
(1) Look at the door visor from above and from underneath to check the adhesion section ( – section) of the double-sided tape is tightly adhered to the entire attachment surface. [Fig. 11]
(2) Make sure the door visor does not extend beyond the vehicle components.
(3) Always check that the window glass opens and closes smoothly by opening and closing it several times.
(4) Lightly pull the door visor to check that the door visor is securely adhered. [Fig. 9]
(5) Check that the door visor is properly attached. If any part is dirty, clean with a cloth, etc.
Caution
- Make sure that the attached visors can be protected from getting wet by rain or water for 24 hours from the attachment.
Peeling of the double-sided tapes may occur.
(6) The operation completes.
F0010FN000

- 【Fitment】Window Wind Deflector Outside adhensive/ Outside-Mount for Subaru Forester 2014-2018.(2014 2015 2016 2017 2018 14 15 16 17 18)
- 【Durable Material】Made of high quality modified acylic material, the set of rain guards will not be easy to crack, break, or chip.
- 【Effective Design】The window visors are designed for the exact model of each vehicle, which helps reduce interior wind noise and mirror fogging, letting fresh air in and keeping the rain drops out at the same time.
- 【Installation Tips】Outside Mount(External) out-channel/ outside adhensive Style. Use the heat gun or hair dryer to heat the mounting edge after you put on the visors. This is highly recommended and helpful to stick the visors firmly, espcially in cold days.【NOTE】Test fit the visors first to make sure it's the right model before you tape the visors on.
- 【Warranty & Support】1-YEAR WARRANTY.We strictly follow Amazon Return & Refund policy. Please feel free to contact us if you have any questions, and we will reply ASAP.

- ✅COMPATIBLE WITH Subaru Outback 2020-2025 Premium, Limited, Touring. Please check your vehicle’s make, model and year with fitment details to ensure accurate fitment as all visors are vehicle specific.
- ✅Heavy Duty Reinforced Acrylic Material. Olltoz side window visors are made with an ultra-strong, reinforced acrylic material to protect against heat, wind, rain, and environmental damage when you’re on the road.
- ✅Easy and Quick Installation. Affix to the window frame with strips of pre-applied 3M automotive-grade adhesive tape. No drilling or special hardware required. It mounts in minutes without hassles and provides long-lasting protection.
- ✅Enhance Ventilation and Air Flow – Great for all types of weather conditions. Our window visors help improve ventilation inside your vehicle to reduce window fogging while increasing air circulation. It also lets out that unwanted odors to keep your vehicle fresh and clean.
- ✅Designed with Top-Notch Engineering. All fitments are measured with state-of-the-art equipment to ensure proper fitment. A layer of dark smoke finish tint is applied to each visor to help reduce UV rays and also gives you the sleek and streamlined look on your vehicle.
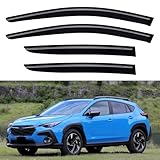
- 【Perfect Fit】YQAUTEC Out-Channel/Outside Adhensive Window Visors Rain Guards Shield fit for 2024 2025 2026 24 25 26 Subaru Crosstrek & Subaru Impreza Base Premium Sport Limited RS, Side Window Vent Wind Deflectors Visors Shades.
- 【Premium Quality】Made from high-quality and durable anti-shatter material, these Rain Guards have great performance in UV & scratch resistance test. And those 3M-graded tape helps stick firmly.
- 【Fully Functional】You could enjoy the fresh air and keep the rain drops out after installing the vent visors and keeping the window cracked open, no foggy worries.
- 【Easy Installation】Outside Mount Style. No drilling or special hardwares required. Test fit the visors first to make sure it's the right model before you tape them on.[NOTE: Don't wash your car 24 hours after installation.]
- 【Warranty& Support】1-YEAR WARRANTY. LIFETIME SUPPORT. If you have any questions, just let us know and we will reply ASAP.

- ✅COMPATIBLE WITH Subaru Forester SK 2019-2024 Premium Sport Limited Touring. Please check your vehicle’s make, model and year with fitment details to ensure accurate fitment as all visors are vehicle specific.
- ✅Heavy Duty Reinforced Acrylic Material. Olltoz side window visors are made with an ultra-strong, reinforced acrylic material to protect against heat, wind, rain, and environmental damage when you’re on the road.
- ✅Enhance Ventilation and Air Flow – Great for all types of weather conditions. Our window visors help improve ventilation inside your vehicle to reduce window fogging while increasing air circulation. It also lets out that unwanted odors to keep your vehicle fresh and clean.
- ✅Easy and Quick Installation. Affix to the window frame with strips of pre-applied 3M automotive-grade adhesive tape. No drilling or special hardware required. It mounts in minutes without hassles and provides long-lasting protection.
- ✅Designed with Top-Notch Engineering. All fitments are measured with state-of-the-art equipment to ensure proper fitment. A layer of dark smoke finish tint is applied to each visor to help reduce UV rays and also gives you the sleek and streamlined look on your vehicle.

- 【Perfect Fit】YQAUTEC Out-Channel Window Visors Rain Guards Shield for 2018 2019 2020 2021 2022 2023 18 19 20 21 22 23 Subaru Crosstrek, Side Window Vent Wind Deflectors Visors Shades for 2017-2023 Subaru Impreza Hatchback.
- 【Premium Quality】Made from high-quality and durable anti-shatter material, these Rain Guards have great performance in UV & scratch resistance test. And those 3M-graded tape helps stick firmly.
- 【Fully Functional】You could enjoy the fresh air and keep the rain drops out after installing the vent visors window shade and keeping the window cracked open, no foggy worries.
- 【Easy Installation】Outside Mount Style. No drilling or special hardwares required. Test fit the visors first to make sure it's the right model before you tape them on.[NOTE: Don't wash your car 24 hours after installation.]
- 【Warranty& Support】1-YEAR WARRANTY. LIFETIME SUPPORT.If you have any questions, just let us know and we will reply ASAP.
SEOCONTENT-START
c+. ♦tD DOOR VISOR SUBARU INSTALLATION INSTRUCTION Genuine part number : F001 0FN000 Applicable model : CROSSTREK This manual explains about the attachment procedure of the door visor. ~ Attention 1. Read this manual thoroughly first in order to attach the door visor correctly. Never attach the modified door visors. 2. & Caution marks used in this manual indicate the safety caution for the attachment. Be sure to observe these cautions. 3. Please note that we may not accept responsibilities for troubles occurred by neglecting to observe the cautions. I /n,CAUTION I 1. Before starting the attachment procedure, turn off the ignition switch and be sure to operate the parking brake. 2. For attaching this product, we are adopting the adhesion method by using double-sided tape.Before attaching the product, wipe dirt, dust, and oil with clean cloth from the attaching surface. The oil can be wiped well by using neutral detergent, etc. 3. This product is made of resin. Be careful when handling for not forcibly bending or damaging. 4. When the ambient temperature is low (15°C or lower), warm the surface of double-sided tape to approximately 40°C with an infrared lamp or a dryer (do not use an industrial dryer). 5. The double-sided tape needs to be pressed in order to make it adhere well. Pressure-bond the visor as strongly as the vehicle shakes a little. In addition, if the visor is removed and attached again, the adhesion power significantly deteriorates. In order to avoid repetitive attachment, decide the position before the first attachment. 6. The adhesion power of the double-sided tape gradually increases after pasting. Avoid washing the vehicle for 24 hours from the attachment. 7. After checking the attachment, open and close the window glass for a few times. Check that the window opens/closes smoothly. Revision content 1:::,. 1:::..0 Create a new entry Content Distribution source SUBARU Corporation 1 Date of creation 2022.6.10 E-54 I Component parts I CD @~ A C @~ Sagged @ G—, I -;:, F0010AN000 only caution label Sagged No. CD ® @ @ @ @ (!) Part name Quantity Front door visor RH 1 Front door visor LH 1 Rear door visor RH 1 Rear door visor LH 1 Bracket A 2 Bracket B 6 Sealer (a set of 4pcs) 1 I Tools to be used I Completion drawing after the installation • Neutral detergent • Cloth • Scale • Masking tape • Infrared lamp or dryer (when the environment temperature is 15°C or lower) Installation procedure & Caution——————————~ Park the vehicle at a level and sufficiently open space for the safe operations. Stop the engine and operate the parking brake, so the vehicle does not move during the operation. This procedure describes the operation for the left side. Conduct the same operation for the right side as well. Remove the glass runs ;; • [Fig. 1] 2 1. Preparation for installation (1) Open the door, open the window glass, and remove the glass run. [Fig. 1] &caution———— • Remove the glass run according to the explanation in the service manual. · Do not remove the corner sections of the glass run. Otherwise, the recovery becomes difficult. E-54 [Fig. 2] Front Door sash A \ Sealer —~. B .. Rear Door sash Start attaching from the between the door sash and the gless run ~ Glass run A-A section ___________ <~Sealer attachment position> Pillar cover ~ ;Ct\ Door sash Sealer D-D section Sealer Door sash [Fig. 3] 3 (2) Be sure to wipe water, oil, and dirt on the door visor attachment surfaces(• sections on the door sash) by a cloth soaked with neutral detergent. Then, dry the wiped surfaces completely. [Fig. 2] &caution———— • Attach the main body by the double-sided tape. Make sure that the attachment surfaces are clean. 2. Preparation for installation of door visor (1) Apply sealer to the pillar cover bumps on the front door sash. Start from the bottom side, aligning with the border between the door sash and the glassrun, and apply it carefully so as not to ride up on the grass run. (2) Apply sealer to the pillar cover bumps on the rear door sash. Start from the bottom side, aligning with the border between the door sash and the glassrun, and apply it carefully so as not to ride up on the grass run. &caution———-. Attach the cushion so that no gap will be made on the pillar cover and slso the upper side of the cushion will not protrude from the door visor. E-54 Mounting boss (With anti-rotation rib) X Do not reinstall I Back view of door visor I BcacketB f [Fig. 4] Front front end Front back end Fold to surface Tape liner Tape liner~ 0 h h A” Masking ~ tape Tape liner Fold to surface nTape liner ~~ Masking tape 4 3. Installing the brackets (1) Insert the bracket into the mounting boss on the back of the door visor and push it in until I it hits the door visor surface. [Fig.4] &caution———-. Do not turn reattach the bracket as this may cause it to come off. · If bracket A and bracket b are installed backwards, correct installation will not be possible. I it you try to install bracket B incorrectly I X Bracket A 1/J (Has a notch•:~ X Normal c•–, position~ I ~ .. It attaches in t opposite directi I I 4. Preparation for dooa visor installation (1) Remove about 30mm of tape liner from the front and rear edge of the door visor from the terminal. [Fig.5] *The removed tape liner can be attached to the surface with masking tape to facilitate further work. E-54 Front racket (No protrusion from the outer edge of sash) ~ Doorvisor Bracket mounting dia ounting diagram ~ ~ Door visor Glass run (Dimension ====—. from the outer edge of piller cover) 7 ____.,,,…..,-Approx.2mm Pillar cover Rend ~ ~ h Door sash [Fig. 6] 5 5. Temporary attachment of the door visor Front Front (1) Align the rear edge with the outer edge of the pillar cover (2mm inside from the terminal) and temporarily adhere. [Fig. 6] (2) Align the top edge with the outer edge of the door sash (1 mm inside from the terminal) and temporarily adhere. [Fig. 6] (3) Insert the bracket into the door sash. [Fig. 6] & Caution———- . Repeated temporary installation will significantly reduce the adhesive strength double-sided tape. • Be careful not to turn the braket when inserting it into the door sash. • Make sure that the door visor does not extend beyond the outer edge of the door sash. If the product is installed overhung, it may interfere with the vehicle or cause injury. • Glue the bracket in placewith the bracket securely inserted all the way to the back of the door sash. If not securely plugged in, it may cause water to enter. E-54 Rear (No protrusion from the outer edge of sash} Door visor ~ Door sash -w—~ -==~~r;;, ~¾p-5-7- Bracket mounting diagram (Dimension from the outer edge of piller cover) 2Lr;.==3:;~~o=o=r v=is=o”\l::!r “‘ Pillar cover ——–~ 1 Door sash [Fig. 7] [Fig. 8] 6 6. Temporary attachment of the door visor Rear I Rear I (1) Align the front edge with the outer edge of the pillar cover (2mm inside from the terminal) and temporarily adhere. [Fig. 7] (2) Align the top edge with the outer edge of the door sash (1 mm inside from the terminal) and temporarily adhere. [Fig. 7] (3) Insert the bracket into the door sash. [Fig. 7] & Caution————. • Repeated temporary installation will significantly reduce the adhesive strength double-sided tape. • Be careful not to turn the braket when inserting it into the door sash. • Make sure that the door visor does not extend beyond the outer edge of the door sash. If the product is installed overhung, it may interfere with the vehicle or cause injury. • Glue the bracket in placewith the bracket securely inserted all the way to the back of the door sash. If not securely plugged in, it may cause water to enter. 7. Adhesion of door visor (1) Remove all masking tapes which were temporarily pasted. [Fig. 8] (2) After checking that the positioning is securely conducted, remove the release paper of the double-sided tape to the arrow .. direction without twisting, and adhere the door visor to the door panel. [Fig. 8] & Caution————. • If it is attached without being properly aligned, it may cause interference with the vehicle, injury, peeling, water intrusion, and abnormal sound. • Always hold the root of the releasing paper and remove slowly. • Please note that twisting the releasing paper may cause the paper to tear. • When a clearance is made between the release paper and the vehicle, it becomes easier to remove the release paper. E-54 [Fig. 9] Pressure-bond the adhesion surface ( – section) of the Dryer double-sided tape. ______________ L____ ————- X The adhesion surface of the double-sided tape is not pressure bonded. Pressure-bond the entire circumference of the door visor. Door visor -~ Hold the rear side directly when pressure-bonding. I>= [Fig. 1 O] 7 8. Recovery of glass run (1) Attach the glass run and accustom to the door panel and the bracket. [Fig. 9] & Caution————- • When recovering the glass run, the bracket sections are especially difficult to be recovered. Use fingers to accustom the glass run. If not fitted correctly, the glass run may get damaged due to up/down movement of the window glass. 9. Pressure-bonding of door visor (1) Press bond the adhesion surface of the double-sided tape in the arrow .. direction evenly with a force of 49N or more (at least the force which shakes the vehicle). [Fig.1 O] & Caution———. Securely pressure-bond the adhesion surface of the double-sided tape, especially the ends (~-)section). In addition, when pressure bonding the double-sided tape to the pillar, directly hold the rear side of the double-sided tape adhering surface of the door visor. If there is any floated section due to insufficient pressure-bonding, it may cause injury, peeling, water intrusion, and abnormal sound. • If the ambient temperature is 15°C or lower, warm up the door panel at which the door visor is adhered to and the double-sided tape of the door visor to a body temperature (approx. 40°C) by using a dryer, etc. · Be very careful with a burn. E-54 Check whether the adhesion area ( – section) is tightly adhered. [Fig. 11] 8 10. Check after attaching of the door visor (1) Look at the door visor from above and from underneath to check the adhesion section ( – section) of the double-sided tape is tightly adhered to the entire attachment surface. [Fig. 11] (2) Make sure the door visor does not extend beyond the vehicle components. (3) Always check that the window glass opens and closes smoothly by opening and closing it severral times. (4) Lightly pull the door visor to check that the door visor is securely adhered. [Fig. 9] (5) Check that the door visor is properly attached. If any part is dirty, clean with a cloth, etc. & Caution———. Make sure that the attached visors can be protected from getting wet by rain or water for 24 hours from the attachment. Peeling of the double-sided tapes may occur. (6) The operation completes. E-54
SEOCONTENT-END
This product presentation was made with AAWP plugin.