
Accessory Installation Guide
| 2025MY Forester – FRONT BUMPER TRIM | E5510SL000 |
Installation manual
FRONT BUMPER TRIM
Genuine SUBARU part numbers:
E5510SL000 (Turquoise blue)
E5510SL020 (Silver)
Vehicle model: FORESTER 2025MY~
To installation worker
This manual describes how to install and handle FRONT BUMPER TRIM.
1.Before installation, be sure to read thismanual for proper work.
2.The caution mark ⚠in this manualindicates important instructions. Strictly follow them.
3.SUBARUmay not be held responsible for problems that occur due to your failure to follow thisinstallation manual.
⚠Important instructions
1.Before starting installation work, move the vehicle to a safe location.
2.To work safely, make sure that the vehicle does not move. (Make sure to apply parking brake.)
3.After turning the ignition off, disconnect the battery ground terminal.
4.Handlethis product with care not to damage it or the vehicle.
Work outline
Replacementof Front Bumper Molding
①Unpack the box and check that theproduct has no defect.
②Remove the front bumper.And then remove the bumper guard.
③Replace the molding of the bumper guard with this product.
④Install thebumper guard to the front bumper. And then install it to the vehicle.
⑤After completing theabove, check the appearance to ensure there is no scratch and such.
Work procedures
1.Remove the front bumper.
(1)To replace the molding with this product, remove the front bumper from the vehicle.
・Read the service manual todo this work.
・Theremovedparts are reused.
Be careful not to lose or damagethem during work.
・Be careful of harness connectors including sensors.
Ifexcessive load is applied to them, wire breakage or connector failure could occur.
2.Remove the bumper guard.
(1)To replace the molding with this product, remove the bumper guard from the bumper.
①.Removethe clips (one side: 3 places) that fasten the bumper guard side LH
(RH).
②.Loosen theclaws (one side: 3 places) and remove the bumper guard side LH (RH).
③.Remove the clips (one side: 2 places) that fasten the bumper guard.
④.Loosenthe claws (18 places) and remove the bumper guard.
⚠Importantinstructions
Withoutremoving the bumper, you cannot access some screws that fasten the molding.
3.Replace the molding with this product.
(1)Remove the screw (1 place) that fastens the molding to the bumper guard.
(2)While widening the claw fitting portion (on bumper guard), remove the claws (8 places) on the molding from the vehicle inside.
(A plastic remover helps remove claws easily.)
(3)After removing all the claws, install this product to the bumper guard. Make sure that all the fitting portions are inserted.
(4)After the replacement, fasten this product with the removed screws. (Tightening torque: 0.8 N・m)
⚠Importantinstructions
・Theremoved screws are used again. Be careful not to lose them.
・Be care notto damage the vehicle, this product, or surrounding parts.
4.Install the bumper again.
(1)Install the front bumper guard to the bumper.
(2)Install the front bumper to the vehicle.
*Installthem in the reverse order to removal.
*Be care not to damage thevehicle, this product, or surrounding parts.
5.Check after replacement completion
(1) Make sure that there is no scratch on thisproduct or surrounding areas, and that this product is surely installed.
(2)Return the removed parts to the customer.
Thisis the completion of molding replacement.
E5510SL000
https://techinfo.subaru.com/stis/doc/accInstallGuide/ixi%20E5510SL000,020_00.pdf
https://static.oemdtc.com/Recall/ixi%20E5510SL000,020_00.pdf
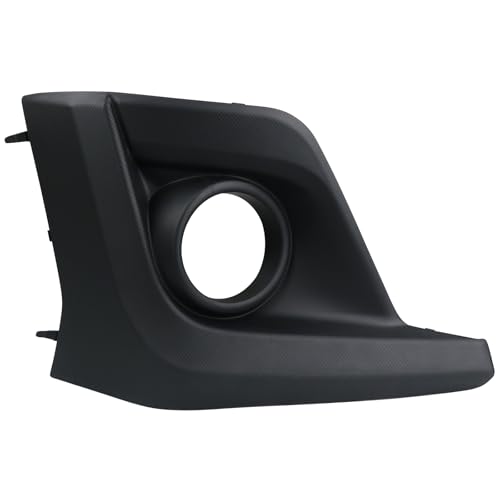
- REPLACEMENT PART NUMBER:57731FL082 SU1039121
- COMPATIBLE WITH:This fog lamp bezel cover with fog light hole compatible with Subaru Crosstrek 2018 2019 2020 18 19 20 ,Please refer to the vehicle compatibility above to ensure proper part
- FEATURES:The front bumper gog lamp panel trim is made of high-quality plastic with features such as heat, wear and corrosion resistance Replacement new parts fit perfectly with the car and help provide a safer driving experience
- SERVICE LIFE&EASY INSTALLATION:This right passenger side fog Lamp molding trim is not the real original parts, but it uses advanced technology and high-quality materials in line with oem standards, more effective extension of service life, directly replace the old fog light cover, easy to install can save you time and money
- BUY WITH CONFIDENCE:1-Year Warranty.If you have any questions or concerns about the front fog light housing w/ fog lamp hole ,please contact us by email and we will provide you with satisfactory service support

- REPLACEMENT PART NUMBER:57731FL092 SU1038121
- COMPATIBLE WITH:This fog lamp bezel cover with fog light hole compatible with Subaru Crosstrek 2018 2019 2020 18 19 20 ,Please refer to the vehicle compatibility above to ensure proper part
- FEATURES:The front bumper gog lamp panel trim is made of high-quality plastic with features such as heat, wear and corrosion resistance Replacement new parts fit perfectly with the car and help provide a safer driving experience
- SERVICE LIFE&EASY INSTALLATION:This left driver side fog Lamp molding trim is not the real original parts, but it uses advanced technology and high-quality materials in line with oem standards, more effective extension of service life, directly replace the old fog light cover, easy to install can save you time and money
- BUY WITH CONFIDENCE:1-Year Warranty.If you have any questions or concerns about the front fog light housing w/ fog lamp hole ,please contact us by email and we will provide you with satisfactory service support
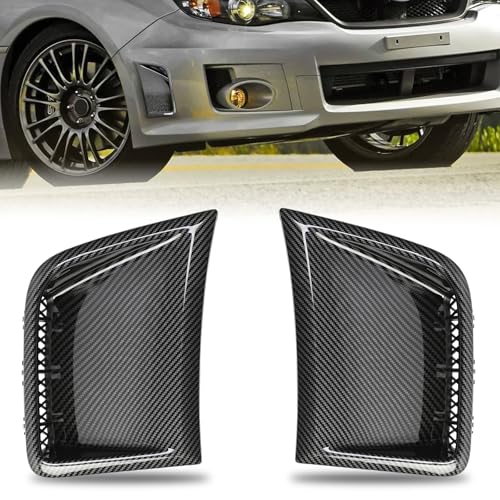
- Perfect Fit: Customized for Subaru Impreza WRX & WRX STI 2008-2014. Fits 2.0L H4 (2012-2014) and 2.5L H4 Turbo (2008-2014, including WRX, WRX Premium, WRX STI, WRX GT, WRX Limited, WRX SE, and STI Special Edition)
- Replacement Partslink Numbers (LH): SU1038140C, 57739FG020, SU1038140DSC, SU1038140N, SU1038140P. (RH): SU1039140C, 57739FG010, SU1039140DSC, SU1039140N, SU1039140P.
- Multi-Function: Guides airflow to optimize aerodynamics. Blocks road debris like stones and gravel, preventing internal damage and extending service life.
- Stable Installation: Thickened ABS side vent cover with embedded buckle. Strong impact resistance, stays firmly attached on rough roads
- Quality Assurance: Made of ABS with excellent strength and toughness, resistant to deformation. This side vent cover offers good heat and chemical resistance, ensuring long-term use in harsh environments
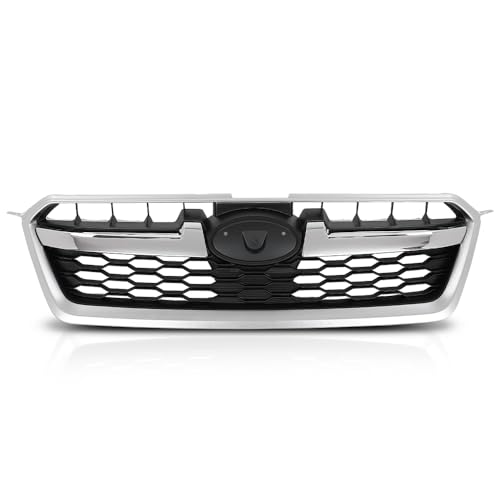
- COMPATIBILITY: Compatible with Subaru Impreza 2012-2014
- OE STANDARD: Meets the Original Equipment (OE) standards, ensuring replacement fit just like the original. Interchange part number: 91122FJ010, SU1200145
- PROTECTION: When the vehicle is traveling, the grille can block the impact of debris and sundries on the road to the bumper, which plays the first layer of protection and reduces the risk of damage to the parts.
- DURABLE: The use of advanced manufacturing processes ensures that the front grille has excellent durability and reliability. Our grille can withstand high and low temperatures, road debris, etc. and are not easily deformed or damaged.
- INSTALLATION: No installation instructions. Professional installation is highly recommended
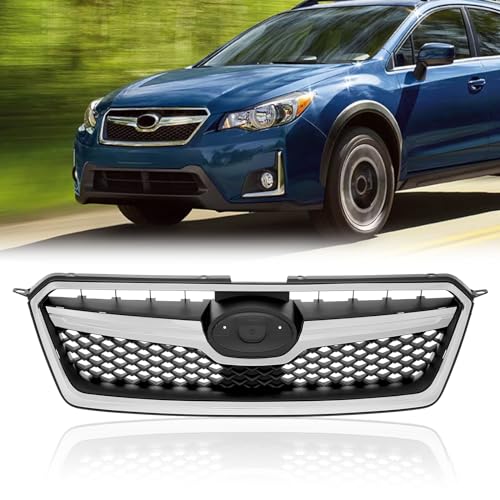
- Perfect Fit: Specifically designed for the your models, our Front Bumper Grille is easy to install and seamlessly blends into the vehicle's design. Compatible with 2016 2017 Subaru XV Crosstrek Replacement 91122FJ020 SU1200151C 91123FJ040 SU1210100.
- Durability: Made from high-quality plastic, This Front Bumper Grille is built to last and can withstand exposure to the elements without degrading or fading over time.
- Enhanced Style: Our Front Bumer Grille with Mesh design adds a sleek and sophisticated look to your car Compatible with 2016 2017 Subaru XV Crosstrek Replacement 91122FJ020 SU1200151C 91123FJ040 SU1210100.
- Easy Installation: Direct replacement of your 2016 2017 Subaru XV Crosstrek 91122FJ020 SU1200151C 91123FJ040 SU1210100. Perfectly match with original mounting holes & light cutouts. No drilling required.
- Warranty: This is an Aftermarket Part and Covered by Our 12 Months Unlimited Mileage Warranty. 1 - 3 Months 100% Refund or Replacement. 4 - 12 Months 90%-10% Refund. Over 12 Months Not refund.
SEOCONTENT-START
1
Δ00
Rev. No.
Revision content
Date
00
New establishment
2023/8/9
FRONT BUMPER TRIM
Installation manualGenuine SUBARU part numbers: E5510SL000 (Turquoise blue) E5510SL020 (Silver)Vehicle model: FORESTER 2025MY~
This manual describes how to install and handle FRONT BUMPER TRIM.
1.Before installation, be sure to read thismanual for proper work.
2.The caution mark ⚠in this manualindicates important instructions.
Strictly follow them.
3.SUBARUmay not be held responsible for problems that occur due to
your failure to follow thisinstallation manual.
To installationworker
⚠Important instructions
1.Before starting installation work, move the vehicle to a safe location.
2.To work safely, make sure that the vehicle does not move.
(Make sure to apply parking brake.)
3.After turning the ignition off, disconnect the battery ground terminal.
4.Handlethis product with care not to damage it or the vehicle.
Distributor: SUBARU Co., Ltd.
2
Completed installation sketch
Componentparts
Tools required for work
Workoutline
Replacementof Front Bumper Molding
①Unpack the box and check that theproduct has no defect.
②Remove the front bumper.And then remove the bumper guard.
③Replace the molding of the bumper guard with this product.
④Install thebumper guard to the front bumper. And then install it to the vehicle.
⑤After completing theabove, check the appearance to ensure there is no scratch
and such.
①
②
Gloves
Phillips head screwdriver
Cleaner
(Nonaneis recommended.)
Plastic remover
Front Bumper Trim
Protective tape■E5510SL000 (turquoise blue) / E5510SL020 (silver)No.Item nameQty①Front Bumper Trim RH1②Front Bumper Trim LH1
3
2.Remove the bumper guard.
(1)To replace the molding with this product,
remove the bumper guard from the bumper.
①.Removethe clips (one side: 3 places) that fasten the bumper guard side LH
(RH).
②.Loosen theclaws (one side: 3 places) and remove the bumper guard side LH
(RH).
③.Remove the clips (one side: 2 places) that fasten the bumper guard.
④.Loosenthe claws (18 places) and remove the bumper guard.
Work procedures
⚠Importantinstructions
Withoutremoving the bumper, you cannot access some screws that fasten the molding.
Bumper guard side LH (RH)
Bumperguard
④Whilewidening, remove the claw.
①Removethe clips.
③Removethe clips.
Vehiclecenter
Fig. 2 Front bumper LH when seen from the back side
Removingdirection
Removingdirection
Removingdirection
②Whilewidening, remove the claw.
1.Remove the front bumper.
(1)To replace the molding with this product,
remove the front bumper from the vehicle.
・Read the service manual todo this work.
・Theremovedparts are reused.
Be careful not to lose or damagethem during work.
・Be careful of harness connectors including sensors.
Ifexcessive load is applied to them, wire breakage or connector failure could
occur.
4
3.Replace the molding with this product.
(1)Remove the screw (1 place) that fastens the molding
to the bumper guard.
(2)While widening the claw fitting portion (on bumper guard),
remove the claws (8 places) on the molding from the vehicle inside.
(A plastic remover helps remove claws easily.)
(3)After removing all the claws, install this product to the bumper guard.
Make sure that all the fitting portions are inserted.
(4)After the replacement, fasten this product with the removed screws.
(Tightening torque: 0.8 N・m)
4.Install the bumper again.
(1)Install the front bumper guard to the bumper.
(2)Install the front bumper to the vehicle.
*Installthem in the reverse order to removal.
*Be care not to damage thevehicle, this product, or surrounding parts.
⚠Importantinstructions
・Theremoved screws are used again. Be careful not to lose them.
・Be care notto damage the vehicle, this product, or surrounding parts.
Bumper guard
Molding
(2)Whilewidening, remove the claws.
(1) Removethe screw.
Fig. 3 Frontbumper molding LHwhen seen from the back side
5.Check after replacement completion
(1) Make sure that there is no scratch on thisproduct or surrounding areas, and
that this product is surely installed.
(2)Return the removed parts to the customer.
Thisis the completion of molding replacement.
**************************************************************************************************************
**************************************************************************************************************
SEOCONTENT-END
This product presentation was made with AAWP plugin.