
Accessory Installation Guide
| 2021MY Ascent Wireless Charger | H671SXC200 |
Installation Instructions – French
PART NUMBER: H671SXC200
DESCRIPTION: WIRELESS CHARGER
1 KIT CONTENTS
Wireless Charging Assembly
T- Harness
Tie Wrap (Quantity=6)
Foam Tape (Quantity=2)
Wireless Charging Information Card
2 TOOLS REQUIRED
Philips Screwdriver
Torque Wrench
Panel Removal Tool
10mm socket and ratchet
Nipper
3 VEHICLE PREPARATION
1. Place vehicle in ACC mode, engage Parking brake, turn vehicle OFF.
2. Disconnect the negative battery terminal using a 10mm socket/ratchet. (FIGURE A)
NOTE: If equipped, disconnect eyelet cable only.
NOTE: DO NOT PROCEED TO THE NEXT STEP FOR ONE (1) MINUTE TO ALLOW TIME FOR THE ACCESORY POWER SUPPLY TO DISCHARGE.
3. Use panel removal tool to pry and push down on the shift collar. (FIGURE B)
4. Remove shifter knob retention pin by pushing both sides of the clip forward and then remove the shifter knob and collar. (FIGURE C)
5. Use panel removal tool to remove rubber mat and plastic tray and discard. (FIGURE D)
6. Use panel removal tool to remove console cover. (FIGURE E)
7. Disconnect console power connection. (FIGURE F)
8. Use panel removal tool to remove rear console trim cover. (FIGURE G)
9. Remove 10mm bolt. Repeat on opposite side of console. (FIGURE H)
4 WIRELESS CHARGER INSTALLATION
1. Remove 4 Philips head screws. Save screws for reuse. (FIGURE I)
2. Pull back rear console. (FIGURE K)
3. Unplug connector. Remove rear console. (FIGURE K)
6. Pull back driver side console cover and lay to the side. (FIGURE N)
4. Release center clips. (FIGURE L)
5. Pull passenger side console cover and remove. (FIGURE N)
6. Pull back driver side console cover and lay to the side. (FIGURE N)
7. Pull back button bar to release clips. Leave button bar connected. (FIGURE O)
8. Plug in wireless charger harness and route as shown. Place tie wraps as shown. (FIGURE P)
9. Route harness up through driver side hole containing AVH and Xmode harnesses. Secure to harness. Leave slack for installation. Place tie wrap as shown. (FIGURE Q)
10. Push button panel back into place, ensuring harness is routed through outer edge. Wireless charger connector will be facing driver side.
11. Plug in wireless charger. Clip down. (FIGURE R)
5 VEHICLE PARTS RE-INSTALLATION
1. Reinstall driver side console cover. (FIGURE S)
2. Reinstall passenger side console cover. Make sure center clip is latched. (FIGURE T)
3. Reconnect connector. (FIGURE U)
4. Reinstall rear console by sliding it forward cover. (FIGURE V)
5. Reinstall 4 Philips head screws. (FIGURE T)
6. Reinstall rear console by sliding it forward cover. (FIGURE V)
7. Reinstall 4 Philips head screws. (FIGURE T)
8. Reinstall 10mm bolts on both sides of console. (FIGURE X)
9. Reinstall console trim cover. (FIGURE Y)
10. Reconnect console power connection. (FIGURE Z)
11. Reinstall console cover. (FIGURE AA)
6 POST INSTALLATION CHECKLIST
Place car in ACC or ON mode Ensure wireless charger indicator light illuminates in white.
SEOCONTENT-START
INSTRUCTIONS
D’INSTALLATION
NUMÉRO DE PIÈCE :
H671SXC200
DESCRIPTION :
CHARGEUR SANS FIL
CONTENU DE LA TROUSSE
Ensemble de recharge sans fil Faisceau en T Attache autobloquante (quantité = 6)
Ruban mousse (quantité = 2) Carte d’information sur la recharge sans fil
z
OUTILS REQUIS
Tournevis cruciforme Clé dynamométrique Outil de retrait des panneaux Douille de 10 mm avec clé à cliquet
Pince coupante
NUMÉRO DE PIÈCE
VERSION
DATE
SUBARU OF AMERICA
1 DE 16
H671SXC200
RÉV. 02
5 août 2020
1
2
PRÉPARATION DU VÉHICULE
NUMÉRO DE PIÈCE
VERSION
DATE
SUBARU OF AMERICA
2 DE 16
H671SXC200
RÉV. 02
5 août 2020
3
1. Réglez le siège avant gauche vers l’avant jusqu’au bout pour accéder au boîtier de console arrière.
2. À l’aide d’un outil de garniture en plastique, retirez la garniture de la console arrière. Conservez la garniture pour réutilisation.
3. À l’aide d’une clé à cliquet de 1/4 po avec rallonge de 6 po et douille de 10 mm, déposez le boulon de 10 mm. Conservez le boulon pour réutilisation.
FIGURE A
4. Placez le véhicule en mode ACC, serrez le frein de stationnement, puis arrêtez le véhicule.
5. Débranchez la borne négative de la batterie à l’aide d’une douille de 10 mm et d’une clé à cliquet. (FIGURE A)
REMARQUE : le cas échéant, débranchez uniquement le câble à oeillet.
REMARQUE : ATTENDEZ UNE (1) MINUTE AVANT DE PASSER À LA PROCHAINE ÉTAPE POUR QUE L’ALIMENTATION AIT LE TEMPS DE SE DÉCHARGER.
FIGURE B
FIGURE C
PRÉPARATION DU VÉHICULE (suite)
NUMÉRO DE PIÈCE
VERSION
DATE
SUBARU OF AMERICA
3 DE 16
H671SXC200
RÉV. 02
5 août 2020
6. Appliquez du ruban de protection autour de l’ouverture du porte-gobelet, de la garniture du levier de vitesses et au point d’insertion pour retirer l’insert en caoutchouc.
7. A l’aide d’un outil de garniture en plastique, retirez avec précaution la garniture de la base du levier en la poussant vers le bas.
8. Faites pivoter la garniture de la base pour accéder au ressort de retenue et retirez avec précaution le ressort de retenue avec les doigts.
FIGURE D
FIGURE E
9. Retirez la goupille de retenue du pommeau du levier de vitesses en poussant les deux côtés de l’attache vers l’avant, puis retirez le pommeau et la bague du levier. (FIGURE E)
10. Déposez la garniture de base du levier et mettez-la de côté pour la réinstallation.
FIGURE F
3
PRÉPARATION DU VÉHICULE (suite)
NUMÉRO DE PIÈCE
VERSION
DATE
SUBARU OF AMERICA
4 DE 16
H671SXC200
RÉV. 02
5 août 2020
11. A l’aide d’un outil de garniture en plastique, retirez le tapis en caoutchouc et le plateau en plastique de la pochette centrale et mettez-les au rebut de manière appropriée.
12. A l’aide d’un outil de garniture en plastique, dégagez avec précaution la garniture de la console centrale et soulevez-la.
13. Tout en maintenant la garniture d’une main, débranchez le connecteur du frein de stationnement.
FIGURE G
FIGURE H
FIGURE I
3
PRÉPARATION DU VÉHICULE (suite)
NUMÉRO DE PIÈCE
VERSION
DATE
SUBARU OF AMERICA
5 DE 16
H671SXC200
RÉV. 02
5 août 2020
3
FIGURE J
FIGURE K
FIGURE L
15. Tirez le boîtier de console arrière suffisamment vers l’arrière pour exposer le ou les connecteurs de la console arrière.
16. Débranchez le ou les connecteurs de la console arrière. Retirez le boîtier de la console arrière et mettez-le de côté sur une surface protégée en prévision de la réinstallation.
14. À l’aide d’un tournevis cruciforme, retirez les (4) vis autotaraudeuses qui fixent les panneaux de garniture latéraux et le boîtier de console arrière, de la façon illustrée.
PRÉPARATION DU VÉHICULE (suite)
NUMÉRO DE PIÈCE
VERSION
DATE
SUBARU OF AMERICA
6 DE 16
H671SXC200
RÉV. 02
5 août 2020
3
FIGURE M
FIGURE N
17. Dégagez l’attache centrale qui retient ensemble les deux garnitures latérales.
18. Tirez la garniture latérale droite vers l’arrière pour la dégager des attaches.
19. Débranchez les connecteurs d’éclairage du porte-gobelet et le connecteur d’antenne, le cas échéant, et retirez la garniture latérale droite. Mettez-la de côté sur une surface protégée pour la réinstallation.
FIGURE O
PRÉPARATION DU VÉHICULE (suite)
NUMÉRO DE PIÈCE
VERSION
DATE
SUBARU OF AMERICA
7 DE 16
H671SXC200
RÉV. 02
5 août 2020
3
20. Délogez l’agrafe du faisceau du frein de stationnement assisté.
21. Déposez le panneau de garniture latéral gauche en tirant le panneau vers l’arrière. Mettez-le de côté sur une surface protégée pour la réinstallation.
22. Libérez les attaches de la barre de boutons/USB et positionnez-les vers le levier de vitesses, à environ 2 po. Ne débranchez pas les connecteurs.
FIGURE P
FIGURE Q
FIGURE R
INSTALLATION DU CHARGEUR SANS FIL
NUMÉRO DE PIÈCE
VERSION
DATE
SUBARU OF AMERICA
8 DE 16
H671SXC200
RÉV. 02
5 août 2020
4
1. Branchez le faisceau du chargeur sans fil au connecteur précâblé d’origine et acheminez-le de la façon illustrée.
2. Vérifiez que la connexion est bonne en la tirant-poussant.
3. Acheminez le faisceau vers le haut du côté conducteur en suivant les faisceaux AVH et Xmode.
4. Fixez le faisceau aux emplacements marqués (4) à l’aide d’attaches autobloquantes.
5. Coupez et jetez l’excédent des attaches autobloquantes.
FIGURE S
FIGURE T
6. Vérifiez visuellement que le faisceau du chargeur sans fil est acheminé du côté gauche de l’ouverture du compartiment de rangement entre le panneau du mode X/AVH et la paroi gauche du compartiment de rangement.
7. Réinstallez le panneau du mode X/AVH en vous assurant que toutes les attaches sont bien en place et que le faisceau est correctement acheminé du bord extérieur.
(Remarque : Laissez environ 3 po de jeu pour permettre la connexion au chargeur sans fil.)
Emplacements des attaches autobloquantes
RÉINSTALLATION DES PIÈCES DU VÉHICULE
NUMÉRO DE PIÈCE
VERSION
DATE
SUBARU OF AMERICA
9 DE 16
H671SXC200
RÉV. 02
5 août 2020
FIGURE V
5
1. Réinstallez le panneau latéral de la console gauche.
2. Réinstallez le faisceau du frein de stationnement assisté dans le panneau latéral gauche en logeant en place l’attache du faisceau.
3. Vérifiez que le panneau et le faisceau sont correctement installés.
4. Procurez-vous un panneau latéral de console droit, selon équipement. Rebranchez l’éclairage du porte-gobelet et la connexion de l’antenne.
5. Vérifiez que les connexions sont bonnes en les tirant-poussant.
6. Réinstallez le panneau latéral de console droit.
7. Réinstallez l’attache centrale retenant ensemble les panneaux gauche et droit.
8. Vérifiez que le panneau est correctement logé.
FIGURE U
FIGURE W
RÉINSTALLATION DES PIÈCES DU VÉHICULE (suite)
NUMÉRO DE PIÈCE
VERSION
DATE
SUBARU OF AMERICA
10 DE 16
H671SXC200
RÉV. 02
5 août 2020
5
FIGURE Z
FIGURE Y
FIGURE X
9. Mettez le boîtier de console arrière en position en laissant de l’espace pour brancher le ou les connecteurs. Rebranchez le ou les connecteurs.
10. Vérifiez que les connexions sont bonnes en les tirant-poussant.
11. Remettez le boîtier de console arrière dans sa position d’origine en alignant les trous pour l’installation des vis.
12. Posez les (4) vis autotaraudeuses dans les panneaux de garniture latéraux et la console arrière. Ne serrez pas trop.
RÉINSTALLATION DES PIÈCES DU VÉHICULE (suite)
NUMÉRO DE PIÈCE
VERSION
DATE
SUBARU OF AMERICA
11 DE 16
H671SXC200
RÉV. 02
5 août 2020
5
FIGURE A-1
13. Retirez le ruban adhésif de l’ensemble du levier de vitesses. Procurez-vous le panneau de garniture du levier de vitesses.
14. Tout en maintenant d’une main le panneau de garniture du levier, rebranchez le connecteur du frein de stationnement dans le contacteur correspondant. Vérifiez que la connexion est bonne en tirant-poussant.
15. Mettez délicatement en position la garniture de la console centrale.
16. Posez la garniture de la console centrale en logeant à fond les (9) attaches aux emplacements indiqués.
17. Retirez le ruban adhésif de la garniture du porte-gobelet.
FIGURE B-1
FIGURE C-1
RÉINSTALLATION DES PIÈCES DU VÉHICULE (suite)
NUMÉRO DE PIÈCE
VERSION
DATE
SUBARU OF AMERICA
12 DE 16
H671SXC200
RÉV. 02
5 août 2020
5
18. Procurez-vous le chargeur sans fil et branchez le faisceau. Vérifiez que la connexion est bonne en tirant-poussant.
19. Appliquez un (1) morceau de ruban mousse à l’arrière du chargeur sans fil illustré sur la photo 2.
20. Placez le chargeur dans la pochette centrale en alignant les (3) pattes du chargeur sur les (3) découpes de la pochette centrale.
21. Alignez les (2) attaches avant du chargeur sur le panneau de boutons en vérifiant que le faisceau est correctement acheminé.
22. À l’aide d’un témoin d’inspection, confirmez que le faisceau est correctement acheminé. Assurez-vous que le faisceau n’est pas coincé entre le chargeur et la pochette, ce qui empêcherait le chargeur de se loger correctement en position.
FIGURE D-1
FIGURE E-1
FIGURE F-1
FIGURE G-1
RÉINSTALLATION DES PIÈCES DU VÉHICULE (suite)
NUMÉRO DE PIÈCE
VERSION
DATE
SUBARU OF AMERICA
13 DE 16
H671SXC200
RÉV. 02
5 août 2020
5
23. Réinstallez le soufflet du levier de vitesses.
24. Réinstallez le pommeau du levier de vitesses et l’attache de retenue.
25. Rattachez le soufflet de levier de vitesses au pommeau.
26. Insérez la gaine de caoutchouc dans le logement du chargeur sans fil et fixez-la. (FIGURE W)
27. Insérez la carte d’information à recharge sans fil.
28. Rebranchez la batterie. Couple = 7,4 Nm (66 lb-po).
FIGURE J-1
FIGURE H-1
FIGURE I-1
FIGURE K-1
RÉINSTALLATION DES PIÈCES DU VÉHICULE (suite)
NUMÉRO DE PIÈCE
VERSION
DATE
SUBARU OF AMERICA
14 DE 16
H671SXC200
RÉV. 02
5 août 2020
5
29. Rebranchez le câble négatif en réinstallant sur le goujon l’écrou de 10 mm mis de côté précédemment. A l’aide d’une clé dynamométrique de 1/4 po et d’une douille de 10 mm, serrez l’écrou à 66 lb-po tout en maintenant le capteur pour éviter tout dommage et empêcher l’ensemble de tourner sur la borne de batterie.
Remarque : Réinstallez avec précaution le câble négatif de la batterie sur le goujon de la batterie. Ne laissez pas le câble négatif toucher accidentellement le sol pendant l’installation.
FIGURE L-1
FIGURE M-1
FIGURE N-1
30. Réglez le siège avant gauche à fond vers l’avant pour accéder au boîtier de la console arrière.
31. Ouvrez la porte arrière gauche et mettez un dispositif de protection sur le seuil de porte.
32. Alignez les trous des boulons de la console arrière avec le support et le boulon de 10 mm à démarrage manuel.
33. Serrez le boulon de 10 mm au couple de 58 po-lb.
FIGURE O-1
RÉINSTALLATION DES PIÈCES DU VÉHICULE (suite)
NUMÉRO DE PIÈCE
VERSION
DATE
SUBARU OF AMERICA
15 DE 16
H671SXC200
RÉV. 02
5 août 2020
5
FIGURE P-1
FIGURE Q-1
10. Rebranchez la connexion d’alimentation de la console. (FIGURE Z)
34. Posez la garniture de recouvrement du boulon.
35. Réglez le siège à la position vers l’arrière jusqu’au bout.
36. Répétez la séquence de l’autre côté du boîtier de console.
LISTE DE CONTRÔLE APRÈS INSTALLATION
NUMÉRO DE PIÈCE
VERSION
DATE
SUBARU OF AMERICA
16 DE 16
H671SXC200
RÉV. 02
5 août 2020
6
Placez le véhicule en mode ACC ou ON.
Assurez-vous que le témoin du chargeur sans fil s’allume en blanc.
SEOCONTENT-END
H671SXC200
H671SXC200

- 【15W QI FAST WIRELESS CAR CHARGER】With its efficient charging capabilities, wireless car charger mount enables seamless charging of cell phones without the hassle of cords and cables. It offers 15W Max Charging Speed for LG V50/V40/V30+, 10W Charging Speed for Samsung Galaxy S24 Ultra / S23 / S22+ / S21 / S20 / Note 10+, 7.5W Charging Speed for iPhone 16/15/14/13/12 Pro Max/11 / XS Max/XS, 5W for Other Qi-Enabled devices. QC3.0 car charger adapter(not included) is a must have for fast charging mode
- 【SMART AUTO CLAMPING FEATURE】Just put the phone in it, phone holders for your car will automatically grips the phone and begins charging. Pressing either button on the side opens/closes it and as an added benefit the car phone holder will still open even after turning off the car
- 【TWO ACCESSORIES, VERSATILE FOR USE】 Comes with both suction cup and vent clips, allowing flexibility in how to mount it on the windshield, dashboard, vent or the most flat surfaces
- 【STRONG SUCTION POWER】After several improvements and tests, cell phone car mount firmly grips and stands up to severe shaking from rough, washboard infested dirt roads. Even in the scorching sun, the suction has remained rock-solid, keeping the holder firmly in place. Suction cup can be reused and restored by simply rinsing under warm water and air drying
- 【360°ANGLE ADJUSTABILITY】phone mount for car allows you to easily switch the phone from vertical to horizontal. Whether you're navigating or charging, wireless phone charger for car provides you with optimal viewing and safer driving. The adjustable arm and 360° rotation make it easy to position my phone perfectly for navigation or hands-free use


- 2-in-1 Mounting for 99% Vehicles: This phone holder for car offers both dashboard and vent mounting options, giving first-time wireless car charger buyers more ways to find the right fit for their vehicle. The military-grade 3M dashboard base uses a dual-support structure and is tested through 4 environmental reliability tests from -40°F to 194°F, while the reinforced vent hook is extended by 60% to fit more air vents. Its compact charging head helps reduce windshield obstruction and avoids blocking airflow, making installation easier and lowering the risk of choosing the wrong mount.
- 15W Wireless Charging for Nonstop Driving: This LISEN MagSafe car mount charger combines a magnetic phone holder and 15W wireless car charger in one compact design, helping keep your phone powered throughout the trip. Just place your phone on the mount when you get in, and charging starts automatically; when you arrive, simply lift it off and go. Built for GPS, calls and music on long drives, it is especially useful for Uber, Lyft and delivery drivers who need steady power on the road.
- Strong Magnetic Hold, No Button Blocking: Built with 24 N52 magnets and up to 3800gf magnetic force, this car phone holder is tested to hold the weight of 8 phones at once for a more stable hold on bumpy roads and sharp turns. Its clamp-free magnetic design keeps side buttons accessible, so you can place your phone with one hand and use GPS, calls or music without extra adjustment.
- Ice Blue LED Glow for Interior Style: This magnetic car accessories mount charger features an ice blue LED light ring that adds a modern accent to your car interior at night. The soft glow helps you quickly locate the mount in low-light driving conditions, while the magnetic one-hand snap-on design makes phone placement easier during night drives, parking, commuting and GPS use.
- Wide Compatibility for Shared Family Cars: This MagSafe car mount charger works with iPhone 17/16/15/14/13/12 series, and also supports Samsung Galaxy S26/S25/S24 and Pixel 10/9 series when paired with a MagSafe-compatible case. Its magnetic alignment helps different phone brands stay securely attached and ready for wireless charging, so families who share one car do not need to switch mounts whenever a different person drives.
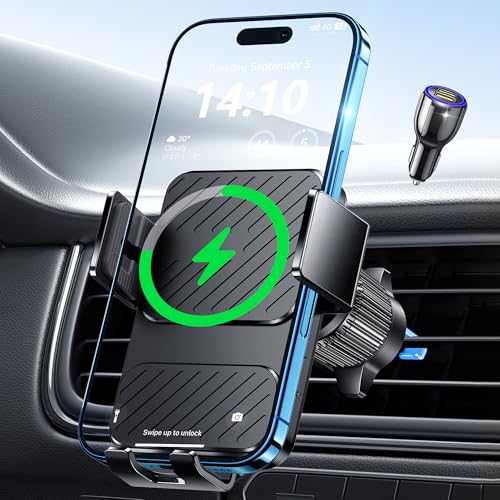
- Advanced Wireless Charger for Car: Equipped with an upgraded chip,wireless car charger mount intelligently identifies and charges devices safely and efficiently. 15W car phone holder charger for iPhone 17, iPhone 17 Air, iPhone 17 Pro, iPhone 17 Pro Max, iPhone 16, iPhone 16 Pro, iPhone 16 Pro Max, iPhone 16 Plus, iPhone 15 Pro max, iPhone 15 Pro, iPhone 15 Plus, iPhone 15, iPhone 14 Pro max, iPhone 14 Pro, iPhone 14 Plus, iPhone 14, iPhone 13 Pro max, iPhone 13 Pro, iPhone 13, iPhone 12 Pro max, iPhone 12 Pro, iPhone 12 for Samsung Galaxy S25 S24 S23 S22 S21 S20 Note 5 6 7 8 9 10 20 All phones that support wireless charging.
- Enhanced Charging Coil: This wireless phone holders for your car is equipped with an enlarged wireless charging coil that covers a wider range of mobile devices, ensuring perfect alignment with smartphones ranging from 5.4 to 6.7 inches. It charges 1.5 times faster than before.
- Auto-Clamping Convenience: The arms and foot of the car phone holder auto-open upon power connection, seamlessly clamping your phone once placed inside.Eliminates the need for manual adjustments, providing a hassle-free experience. If the phone is fully charged, Wireless charger will intelligently identify and automatically power off to last the life of battery of your phone.
- Automatic Precision Alignment: This wireless car charger iphone uses advanced sensors to automatically and accurately align to ensure optimal charging efficiency. Simply place your phone in the cradle after powering on and it will automatically adjust to the optimal charging position.
- 2 In 1 Design: Combines the car wireless charger mount & charging phone mount, Say goodbye to the hassle of dealing with tangled cords or cables in your car, streamlines your in-car charging and phone-holding experience, providing a clutter-free and efficient solution. Focus on the road and stay connected without compromising safety. Great Christmas gift for your family, friends and lover!
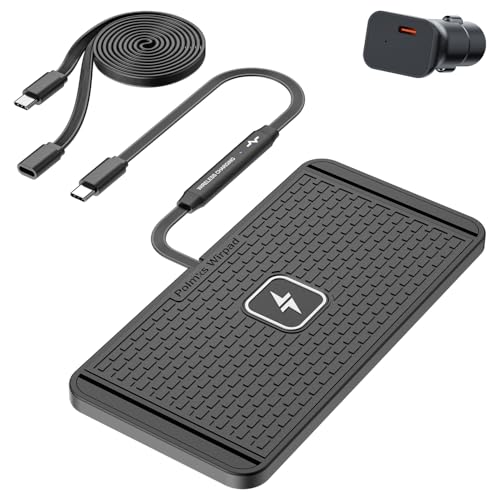
- 【POLMXS’S POLC 25W Wireless Charger】—a powerful, intelligent, and universally compatible wireless charging solution designed for the modern home, office, and car. Whether you need a quick top-up on your morning commute or a safe overnight charge, this wireless charging pad delivers speed, safety, and versatility.
- ⚡【 Wireless Charging Pad With Blazing Fast Charging Speed】 Experience true high-speed wireless charging. Charge an iPhone 17 Pro to 50% in just 30 minutes. It outperforms standard 15W chargers, cutting your charging time significantly:
- 📱 【Universal Compatibility (Case Friendly) Wireless car charger】 Designed to charge through lightweight cases, this charger works with virtu Apple: Compatible with iPhone 8, X, 11, 12, 13, 14, 15, 16, and the latest iPhone 17 series. Samsung: Galaxy S23, S22, S21, and all models with wireless charging. Android: Huawei, Xiaomi, OPPO series and all other smartphones( which support wireless charging ) Earbuds: Fully supports AirPods 2nd Gen, 3rd Gen, AirPods Pro, and Pro 2.
- 🧊 【POLC "Physical Offload Low-heat" Technology – No Fan, No Noise】 Heat is the enemy of battery health. We’ve engineered this wireless charger pad with POLC technology, a novel architecture where heat-generating components are physically decoupled from the charging surface. This results in: Minimized Heat Generation- Keeps your phone cool while charging
- 💡 【New design Wireless charger pad Powered by POLC】 -POLMXS Wirpad P21 wireless car charger Powered by POLC(Physical Offload Low-heat Charging)in which heat-generating components are physically decoupled from the charging surface. POLC is an advanced wireless charging architecture that relocates the entire power management PCB into the cable assembly, enclosed within a shielded metal tube to provide electrical isolation.As the wireless charging coil is inside charging pad and the circuit board is outside the pad, they are far from each other. when you are charging on the pad (over the charging coil), the circuit board will not get heat, so do the whole charger pad and your phone.

- 【Fast Wireless Car Charger】Buit-in upgraded chip, MOKPR wireless car charger mount intelligently identify and charges your device in safe. 15W Wireless Fast Charging for LG V50/V40/V30/G8/G7; 10W for Samsung Galaxy S23 Ultra/S23+/S23/S22 Ultra/S22/S21/S20+/S20/Note 10; 7.5W for iPhone 16 Pro Max Plus 15/14/14 plus/14 pro/14 pro max/13/13 Pro/12 Pro Max/12 Pro/12/11/X/XR/8; Note: 15W/10W/7.5W Fast Charging requires QC 3.0 car charger (Not Included), 5W standard wireless charging requires 5V/2A adapter.
- 【Stable & Flexible Viewing Angle】This carbon fiber car wireless charger with a 360-degree rotating and pivoting ball joint can help you get the most comfortable and safest viewing without neck or eye strain while charging your phone.(Please NOTICE that some Air Vent outlet not compatible)
- 【Arms and Foot Auto Clamping Together】The car phone holder mount wireless charging's arms and foot will auto-opening after connecting to power, and will auto clamping firmly once place your phone inside, don't need to manually adjust the foot to clamp the phone.
- 【Automatic Precise Alignment】This car phone mount is a built-in advanced sensor, just place your phone in after power on, it will intelligent identify and auto-adjusting the phone to the best charging area according to your phone model, no need to manually adjust the foot.
- 【Case Friendly & FOD FUNCTION】This car mount wireless charger supports charging through phone cases up to 4mm thick.FOD foreign body detection prevents abnormal charging of equipment, please remove metal/magnetic objects, credit cards or pop holders before charging.
This product presentation was made with AAWP plugin.