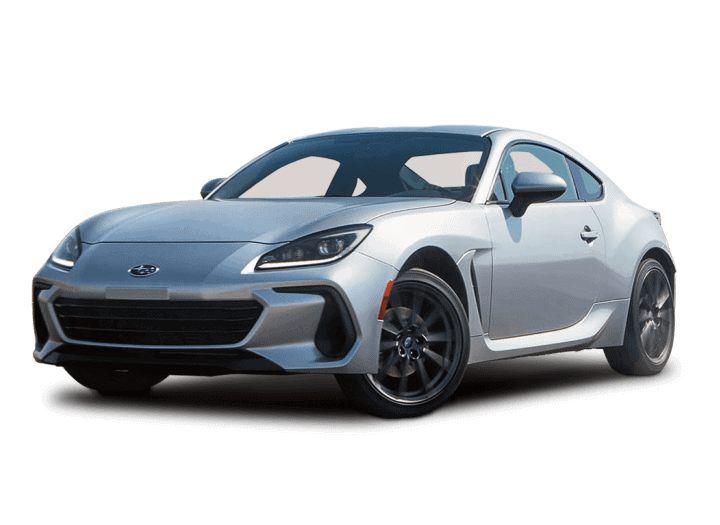
Accessory Installation Guide
| 2022MY BRZ STI Flexible V-Bar | E4010CC100 |
Installation Instructions
E4010CC100
First Edition, April 2021
Installation and Operation Manual for the Flexible V bar
- Thank you for purchasing our product.
- This manual provides instructions for installing and handling the product.
- In order to use the product correctly, make sure you carefully read the “Precautions for Installation Work” section.
- Keep this manual in a safe location such as the glove compartment in order to be able to consult it whenever necessary.
Important instructions are marked with the symbols listed below. Be sure to always follow these instructions.
| WARNING | This symbol marks instructions that must be followed at all times in order to ensure safety. Mishandling the product may result in death or serious injuries. |
| CAUTION | This symbol marks instructions that must be followed at all times in order to ensure safety and maintain the vehicle in good condition. Mishandling the product may result in injuries or accidents. |
| *NOTES | This symbol marks important information and useful tips related to the product. |
| WARNING |
|
| CAUTION |
|
| *NOTES | |
|
Installation Procedure
1. Product Number and Compatible Vehicle Models
| Product number | Part name | Compatible vehicle models |
| E4010CC100 | Flexible V bar | BRZ(ZD) |
2. Components
| Flexible V bar main body | 1 set |
| Flange nuts (6) Flange bolts (2) |
*Upon receiving the product, check the included parts. If any of the parts are missing or if the parts you have received are incorrect, contact the dealer that supplied the product.
3. Precautions for Installation Work
| WARNING |
|
*Precautions for the flexible V bar
| CAUTION |
Subjecting the section to excessive loads may result in damage or other issues. |
| CAUTION |
|
4. Simultaneous Replacement, Non-Reusable Parts, and Other Matters
- When mounting this product, always use new bolts and nuts. Do not reuse any old bolts or nuts.
- Observe the rated torque value. The rated torque for the flange nuts and flange bolts: 16 N·m• Required tools: Ratcheting wrench, torque wrench (12 mm)
5. Work Procedure
(1) Remove the bolt and three nuts, and then remove the stay complete front left.
| WARNING |
| For your safety, be sure to always turn off the engine and ignition before performing any work. |
| *NOTES |
| Before installing the product, make sure there is nobody inside the vehicle and ground the tires.
Failure to do so will affect the performance. |
(2)Next, remove also the stay complete front right.
(3) Use a new flange bolt and a new set of three flange nuts to install the flexible V bar LH.
*Reference value: T=16 N·m (163 kgf·cm)
| CAUTION |
| Each flexible V bar has a pillow ball inside a rubber boot. Be careful not to subject the pillow ball section to excessive loads when the bar is in a fully bent position. Subjecting the section to excessive loads may result in damage or other issues. |
| Before installing a flexible V bar, be sure to check the L/R marks on its mounting surfaces. |
| *NOTES |
| Before installing a flexible V bar, make sure the white marks on the rear surfaces on both ends of the rubber boot are aligned with the white marks on the bar. If they are not, turn the rubber boot to align them. |
| During installation work, be careful not to let oil, chemicals, or any other substances drop onto the surface of the product as that may result in discoloration. |
| When installing the bar, make sure its front and rear ends are in a straight position. |
(4) Follow the same procedure to install the flexible V bar RH.
(5) Flexible V bar after installation (Reference)
E4010CC100

- COMPATIBILITY: The Strut Tower Bar Fit for 2009-2013 for Subaru forester /2015-2019 for Subaru WRX STI
- PRECISE STEERING ACCURACY: The function of the front Strut bar is to enhance the rigidity of the engine compartment, the body roll when cornering is weakened, and the steering accuracy can be more precise than before
- PREVENT BODY DEforMATION: The Strut Brace is used to fix the front shock absorber of the motor vehicle as a whole, enhance the rigidity of the car body, and effectively prevent the car body from deforming
- IMPROVE VEHICLE BALANCE: SCITOO is a specialist in manufacturing aftermarket chassis shock Tower Braces, improving vehicle balance, steering precision, grip levels to enhance overall driving performance
- PACKAGE INCLUDED: 1pc aftermarket shock Tower Braces. Please double-check the parts search above to make sure it fits your vehicle

- Custom-fit for Subaru Forester 2019-2024, enhances chassis rigidity to reduce body deformation during cornering, delivering crisper steering feedback and more stable driving.
- Premium dual-material design: polished silver aluminum middle bar (lightweight yet strong) and detachable red steel side bases (robust load-bearing, sporty look).
- Engineered as a hassle-free direct bolt-on accessory for 2019-2024 Subaru Forester, it aligns perfectly with the vehicle’s original factory mounting positions. There’s no need for drilling, cutting, or any complicated modifications. The detachable side bases further simplify the installation process, allowing most DIY enthusiasts to complete the upgrade quickly and easily on their own.
- Undergoes strict and comprehensive testing, including stress tolerance, vibration endurance, and anti-corrosion trials, to ensure it can stand up to the demands of daily commuting, off-road trips, and long-term use. The polished aluminum bar resists scratches and tarnish, while the steel side bases feature anti-rust treatment, guaranteeing long-lasting reliability even in harsh environmental conditions.
- This strut bar is specially developed for Subaru Forester 2019-2024 models. To guarantee a custom fit, please double-check your vehicle’s exact year and model before purchasing. It’s a premium upgrade part that effectively enhances your Forester’s driving stability and overall performance, perfectly suited for car enthusiasts seeking both functionality and style.

- Strut Bar Type OS
- Easy Install
- Cusco Quality
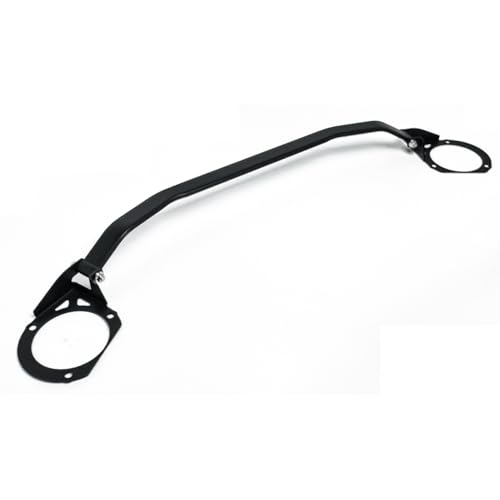
- Enhances Vehicle Stability & Handling – Specifically designed for Subaru Forester 2008-2012 Impreza 2007-2011, this strut tower brace strengthens body rigidity to minimize cornering roll. Engineered to improve driving control, it’s the upgrade for safer, more responsive rides.
- Constructed with Premium Materials for Longevity – Lightweight aluminum rods pair with high-strength steel bases, coated with corrosion-resistant layers to withstand harsh conditions. This durable combo ensures lasting performance without adding unnecessary weight.
- Features Tool-Free, 15-Minute Installation – Detachable rod-and-base design fits perfectly into factory holes, eliminating drilling. Compatible with Forester SH Impreza GE/GH/GR/GV, it’s a plug-and-play solution for DIY enthusiasts.
- Guarantees Perfect Fit for Your Camry Model – Precision-engineered to match Subaru Forester 2008-2012 specifications, this strut tower brace eliminates compatibility worries. Verify your vehicle’s year and trim to ensure a seamless upgrade.
- Tested for Tens of Thousands of Vibrations to Ensure Durability – Rigorously validated through harsh stress tests, this brace resists wear and tear for long-term reliability. Rely on its proven performance to maintain stability through every journey.
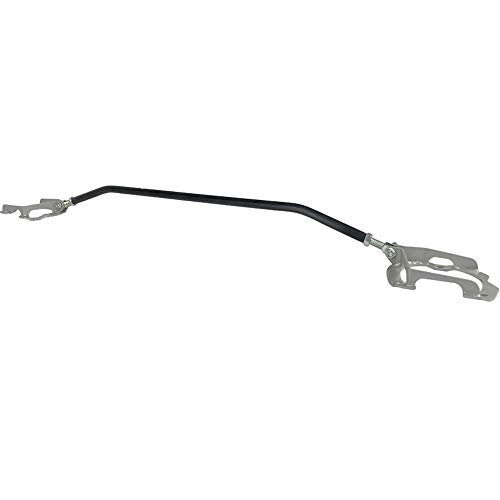
- Bracing maintains alignment angles and spring rates by greatly reducing body or chassis flex. Featuring premium polished alloy materials, Whiteline products not only make your vehicle handle better but they look great too.
SEOCONTENT-START
Installation and Operation Manual for the Flexible V bar E4010CC100 First Edition, April 2021 • Thank you for purchasing our product. • This manual provides instructions for installing and handling the product. • In order to use the product correctly, make sure you carefully read the “Precautions for Installation Work” section. • Keep this manual in a safe location such as the glove compartment in order to be able to consult it whenever necessary. • Do not process or modify this product. Doing so may damage the product and cause a critical failure. • For your safety, be sure to turn off the engine before performing any work. • Make sure all the bolts and nuts are properly fastened. • Once the mounting bolts are installed, inspect them after the first 100 km and in regular intervals afterwards. Tighten the mounting bolts as necessary. • If you notice anything unusual while driving (such as unusual noises, vibrations, etc.), immediately stop the vehicle in a safe location, inspect the mounting bolts and other parts, and tighten them as necessary. If the problem persists, inspect and repair the vehicle as soon as possible. Continuing to operate the vehicle without addressing the issue may damage it or result in an accident. • If the product becomes deteriorated or gets damaged, or if it is subjected to a strong impact in an accident or a similar event, its original performance will be compromised. If that happens, stop using the product immediately. • Be careful not to let any of the parts come into contact with the battery during work. • This product is not designed for drastically improving the vehicle’s performance at the limit. Always drive safely. • Only use this product with compatible vehicle models and within the scope of use it was designed for. Failure to do so may damage the product or lead to an accident. • Furthermore, if the installation process requires any disassembly or maintenance work, make sure the product is installed at a service garage certified by the Ministry of Land, Infrastructure, Transport and Tourism. • When installing this product, be sure to follow the instructions in the service manual issued by SUBARU CORPORATION for the corresponding vehicle model and observe the precautions described in this manual. • If any of the bolts or nuts are not tightened according to the rated torque during the installation of this product, they may get damaged or become loose. Be sure to tighten the bolts and nuts according to the rated torque. • Contact an authorized SUBARU dealer to have the fluid replenished or replaced after installing this product. • SUBARU CORPORATION shall not be held liable for any direct or indirect damage caused by any failures or other malfunctions that occur due to incorrect installation or improper handling of this product. • Please note that SUBARU CORPORATION will not provide warranty coverage for any product or vehicle malfunctions or any similar issues that are directly or indirectly linked to the installation of this product. • Please keep in mind that any vehicle malfunctions or similar issues that can occur due to the installation of this product may not be covered by the vehicle warranty of SUBARU CORPORATION. • When replacing any existing parts with this product, use only genuine SUBARU non-reusable parts, consumables, and lubricants. • The specifications of this product may change without notice. • Installing this product may have a negative impact on the driving experience and can drastically change the driving characteristics of the vehicle. WARNING CAUTION *NOTES Important instructions are marked with the symbols listed below. Be sure to always follow these instructions. This symbol marks instructions that must be followed at all times in order to ensure safety. Mishandling the product may result in death or serious injuries. This symbol marks instructions that must be followed at all times in order to ensure safety and maintain the vehicle in good condition. Mishandling the product may result in injuries or accidents. This symbol marks important information and useful tips related to the product. WARNING CAUTION *NOTES • Each flexible V bar has a pillow ball inside a rubber boot. Be careful not to subject the pillow ball section to excessive loads when the bar is in a fully bent position. Subjecting the section to excessive loads may result in damage or other issues. • This manual was written for car mechanics or users who are familiar with the basics of vehicle repairs. Users without any experience in that area should not perform such work since that may result in injuries, vehicle malfunctions during driving, or other dangerous situations. In order to ensure that the product is properly mounted and functions correctly, we recommend having it installed at a SUBARU-certified service garage. • During work, be sure to follow the instructions in the service manual issued by SUBARU CORPORATION for the corresponding vehicle model and observe the precautions described in this manual. • Be sure to tighten the bolts and nuts according to the rated torque. If any of the bolts or nuts are not tightened according to the rated torque, they may get damaged or become loose. Installation Procedure 1. Product Number and Compatible Vehicle Models Product number E4010CC100 Part name Flexible V bar Compatible vehicle models 2. Components 3. Precautions for Installation Work *Precautions for the flexible V bar BRZ(ZD) *Upon receiving the product, check the included parts. If any of the parts are missing or if the parts you have received are incorrect, contact the dealer that supplied the product. Flexible V bar main body Flange nuts (6) Flange bolts (2) 1 set • For your safety, be sure to always turn off the engine and ignition before performing any work. • Make sure the bolts and nuts are tightened securely. 4. Simultaneous Replacement, Non-Reusable Parts, and Other Matters • When mounting this product, always use new bolts and nuts. Do not reuse any old bolts or nuts. • Observe the rated torque value. The rated torque for the flange nuts and flange bolts: 16 N·m • Required tools: Ratcheting wrench, torque wrench (12 mm) WARNING CAUTION Fully bent position CAUTION Load 5. Work Procedure *Reference value: T=16 N·m (163 kgf·cm) *NOTES Front Rubber boot White mark White mark *NOTES WARNING CAUTION Stay complete front left Flange bolt Flange nuts (1) Remove the bolt and three nuts, and then remove the stay complete front left. (2) Next, remove also the stay complete front right. (3) Use a new flange bolt and a new set of three flange nuts to install the flexible V bar LH. (4) Follow the same procedure to install the flexible V bar RH. For your safety, be sure to always turn off the engine and ignition before performing any work. Before installing the product, make sure there is nobody inside the vehicle and ground the tires. Failure to do so will affect the performance. Each flexible V bar has a pillow ball inside a rubber boot. Be careful not to subject the pillow ball section to excessive loads when the bar is in a fully bent position. Subjecting the section to excessive loads may result in damage or other issues. Before installing a flexible V bar, be sure to check the L/R marks on its mounting surfaces. Before installing a flexible V bar, make sure the white marks on the rear surfaces on both ends of the rubber boot are aligned with the white marks on the bar. If they are not, turn the rubber boot to align them. During installation work, be careful not to let oil, chemicals, or any other substances drop onto the surface of the product as that may result in discoloration. When installing the bar, make sure its front and rear ends are in a straight position. (5) Flexible V bar after installation (Reference)
**************************************************************************************************************
SEOCONTENT-END
This product presentation was made with AAWP plugin.