
Accessory Installation Guide
| 2022MY WRX Rear Under Diffuser | E5610VC110 |
STI REAR UNDER DIFFUSER
INSTALLATION MANUAL
Genuine part number: E5610VC110, E5610VC120
Applicable model: WRX (VB), 2022 MY and later
This manual describes how to install and handle the STI rear under diffuser.
Before installing the part, please be sure to read this manual for proper installation.
Precautions
1. Be sure to observe the content in CAUTION for installation described in the main text during the work. Neglecting it may cause coming-off or peeling-off of the part, and also may prevent the vehicle from functioning.
2. Before the installation, turn the ignition switch to OFF, and apply the parking brake without fail.
3. Do not use thinner or the like, otherwise the surface of the STI rear under diffuser may be corroded. Also, keep the part away from fire, otherwise it may be deformed.
4. When performing an air blow after the installation of the part, keep the nozzle 300 mm or more away from the part. If it is too close, the surface of the part may be peeled off.
Tools to be used
Gloves, Scale, Awl, Torque wrench, Phillips screwdriver, Hole saw (20 mm), Ratchet wrenches (8 mm, 10 mm), Drill bits (3 mm, 6 mm, 9.5 mm), Nippers, File, Fabric adhesive tape, Masking tape, Scissors, Safety goggles, Ratchet wrench extension (50 mm)
WARNING
Before jacking up a vehicle, park the vehicle on a flat and solid ground where a jack will not sink, and use rigid racks or the like to support the vehicle without fail.
Installation procedure
1. Preparation for installation
(1) Cut the template ⑧ to make the center, RH, and LH templates.
(2) On the bottom surface of the vehicle rear bumper, attach the center template ⑧, RH template ⑧, and LH template ⑧, aligning with the radius ends. (Fig. 1) (1 location each at center, RH, and LH, 3 locations in total)
(3) Mark scribe lines with an awl or the like at the center of each hole position on the center template ⑧, RH template ⑧, and LH template ⑧.
(2 locations at center and 1 location each on RH and LH, 4 locations in total)
(4) Remove the center template ⑧, RH template ⑧, and LH template ⑧.
(5) Mark scribe lines with an awl or the like at the marking positions on the rear bumper. (Fig. 2) (2 locations each on RH and LH, 4 locations in total)
(6) Turn the rear fog light socket counterclockwise to remove it, and set aside the harness so that the hole-making work will not be hindered. (Fig. 3)
(7) Drill holes at the positions where the scribe lines are marked in Sections 1. (3) and 1. (5). Referring to the figure on the left, make prepared holes first, and then final holes. (Fig. 4)
(3→6→9.5 mm: 1 location at center)
(3→Hole saw 20 mm: 1 location at center)
(3→6→9.5 mm: 3 locations each on RH and LH, 6 locations in total)
CAUTION
When making holes, wear safety goggles.
CAUTION
Before the work, make a stopper with fabric adhesive tape to a position approximately 5 mm away from the tip of the drill bit to prevent interference with the drill.
CAUTION
When making a hole at the portion A, a harness is present on the back of the rear bumper. Be careful not to damage it.
(8) After making a 20 mm hole in Section 1. (7), cut out the rear bumper with nippers as shown in the enlarged view of the portion B. (Fig. 4)
(9) Remove burrs around the opened holes completely with a file or the like.
(10) Restore the rear fog light socket removed in Section 1. (6).
(11) Insert the well nuts ④ to the holes made on the bottom side of the rear bumper in Section 1. (7). (Fig. 5)
(1 location at center and 3 locations each on RH and LH, 7 locations in total)
(12) Insert the spring nut ⑤ to the panel inside the rear bumper. (Fig. 6)
(1 location each on RH and LH, 2 locations in total)
(13) Peel off the backing paper of the washer A ⑥, and attach the washer to the portion E of the rear under diffuser ①, aligning the holes. (Fig. 7)
(1 location each on RH and LH, 2 locations in total)
2. Installation work of rear under diffuser
(1) Place the rear under diffuser ① on the bottom side of the rear bumper, and temporarily fix them with the bolts A ② in the order of 1, 2, and 3. (Fig. 8)
(1 location each at center, RH, and LH, 3 locations in total)
(2) Align the holes of the rear bumper and the rear under diffuser ①, and temporarily fix them with the bolts A ② in the order of 4, 5, 6, and 7. (Fig. 9)
(2 locations each on RH and LH, 4 locations in total)
(3) After inserting the bolt B ③ to the washer B ⑦, align the holes of the rear bumper and the rear under diffuser ①, and temporarily fix them in the order of 8 and 9. (Fig. 10)
(1 location each on RH and LH, 2 locations in total)
(4) Finally tighten the bolts A ② temporarily tightened in Sections 2. (1) and 2. (2) in the order of 1, 2, 3, 4, 5, 6, and 7. (Fig. 11)
(1 location at center and 3 locations each on RH and LH, 7 locations in total)
(5) Finally tighten the bolts B ③ temporarily tightened in Section 2. (3) in the order of 8 and 9. (Fig. 11)
(1 location each on RH and LH, 2 locations in total)
Tightening torque for reference: 5.0 N•m (0.5 kgf•m)
(6) Finally, check for lifting or tilting of the installation portion and missing and omission of tightening of any bolt.
CAUTION
At the final tightening, use an extension (50 mm) to prevent the torque wrench from contacting the product.
The installation work has been completed.
E5610VC110
2022MY WRX Rear Under Diffuser

- Superior Adaptability: Compatible with 2015-2021 Subaru WRX STI; Compatible with 2015-2021 Subaru WRX. Please check the model and year of your vehicle to buy appropriate products
- Great Construction: Made from premium PE Plastic, our rear diffuser is durable enough to withstand daily wear and tear. Unfinished surfaces allow for do-it-yourself DIY, enabling you to paint or modify them to suit your personal style preferences
- Enhanced Functionality: This diffuser effectively improves airflow management underneath the vehicle. By optimizing airflow, it reduces rear-end turbulence, resulting in improved stability and handling. This subtle but important enhancement can make your driving experience more enjoyable and efficient
- Improved Style: This diffuser increases a sleek black finish to the rear of your vehicle that not only protects it, but also enhances its visual appeal. The modern design complements the lines of your vehicle, giving it an aggressive and sporty look
- Easy Installation: You will receive 2 x Rear Bumper Aprons Spats, 1 x Center Diffuser Fin. Instructions are not included, but there are mounting points on the surface to make your installation process smoother, Drilling is required
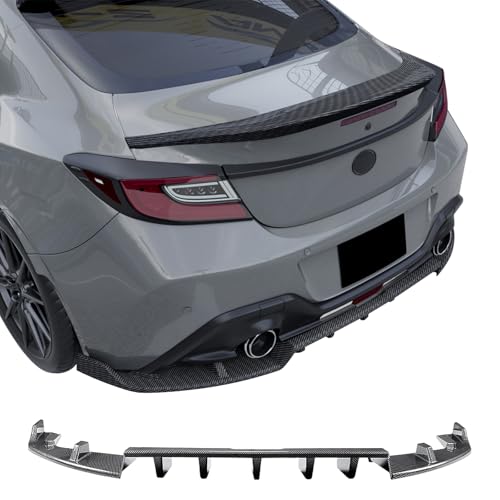
- Custom Fitment: IKON MOTORSPORTS custom fit rear bumper diffuser lip Fits 2022-2026 Subaru BRZ & Toyota GR86, precision injection molded for an perfect fit with no modifications required, which makes it an ideal upgrade for your vehicle.
- Superior Protection: This rear body splitter valance made of high-quality PP Injection, which is known for its light-weight, durable and impact resistance, perfectly protects the original bumper from bumps and scratches on the road.
- Aerodynamic Design: Classic apperance air dam rear under chin spoiler not only makes your car more aggressive, but also have functional advantages. It helps to improve aerodynamic efficiency by directing airflow more effectively, reducing lift and enhancing stability, especially at high speeds. You’ll experience improved handling and maneuverability like never before.
- Ready to Install: Ships in Carbon Fiber Print surface finish rear bumper protector lip/diffuser, ready to install, no need to painting. UV-protected clear coated, resistant to fading for longer life-span.
- Installation: Smooth cutout will not scratch car body, no modification required, installation can be done easily. If you want to install it yourself, you can watch the installation video on Web for some installation tips. Of course, IKON MOTORSPORTS always recommends professional installation. Do not forget to keep your vehicle clean and dry before installation.

- Custom Fitment: IKON MOTORSPORTS custom fit rear bumper diffuser lip Fits 2022-2026 Subaru WRX All Models, precision injection molded for an perfect fit with no modifications required, which makes it an ideal upgrade for your vehicle.
- Superior Protection: This rear body splitter valance made of high-quality ABS Plastic: Acrylonitrile Butadiene Styrene, which is known for its light-weight, durable and impact resistance, perfectly protects the original bumper from bumps and scratches on the road.
- Aerodynamic Design: Classic IKON Style air dam rear under chin spoiler visually enhances the car's performance appearance; it improves aerodynamic efficiency by reducing lift and enhancing stability at high speeds, ensuring driving safety and reducing fuel consumption.
- Ready to Install: Ships in Gloss Black surface finish rear bumper protector lip/diffuser, ready to install, no need to painting. UV-protected clear coated, resistant to fading for longer life-span.
- Easy to Install: Bolt-on Installation, Instructions is not included. IKON MOTORSPORTS always recommends professional installation. Do not forget to keep your vehicle clean and dry before installation.
- FITMENT - The Rear Diffuser is compatible with 2013-2020 Subaru BRZ and replacement for E5610CA000.
- SUPERIOR MATERIAL - Made of high-quality ABS plastic, solid and durable, can accompany you for a long time. Carbon fiber printing gives your vehicle an attractive upgrade of appearance.
- EXCELLENT PERFORMANCE - The rear diffuser increases the downforce of the vehicle, which increases grip and reduces aerodynamic drag, improving performance. The sporty look adds aggressive style to your car, setting it apart from other vehicles on the street.
- PACKAGE INCLUDED - You will receive 1 x Carbon Fiber Color Rear Diffuser as shown. Mounting accessories are included but installation instructions are not included.
- EASY INSTALLATION - Bolt and snap fastening for easy handling. No additional modifications required.
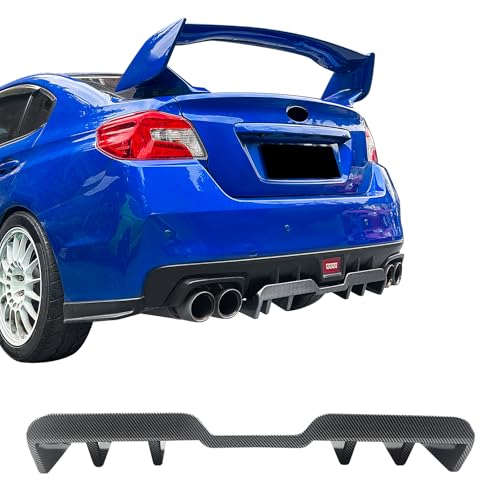
- Custom Fitment: IKON MOTORSPORTS custom fit rear bumper diffuser lip Fits 2015-2021 Subaru WRX & WRX STI, precision injection molded for an perfect fit with no modifications required, which makes it an ideal upgrade for your vehicle.
- Superior Protection: This rear body splitter valance made of high-quality ABS Plastic: Acrylonitrile Butadiene Styrene, which is known for its light-weight, durable and impact resistance, perfectly protects the original bumper from bumps and scratches on the road.
- Aerodynamic Design: Classic HT Style air dam rear under chin spoiler visually enhances the car's performance appearance; it improves aerodynamic efficiency by reducing lift and enhancing stability at high speeds, ensuring driving safety and reducing fuel consumption.
- Ready to Install: Ships in Carbon Fiber Print surface finish rear bumper protector lip/diffuser, ready to install, no need to painting. UV-protected clear coated, resistant to fading for longer life-span.
- Easy to Install: Bolt-on Installation, Instructions is not included. IKON MOTORSPORTS always recommends professional installation. Do not forget to keep your vehicle clean and dry before installation.
SEOCONTENT-START
INSTALLATION MANUAL STI REAR UNDER DIFFUSER Genuine part number: E5610VC110, E5610VC120 Applicable model: WRX (VB), 2022 MY and later Precautions 1. Be sure to observe the content in CAUTION for installation described in the main text during the work. Neglecting it may cause coming-off or peeling-off of the part, and also may prevent the vehicle from functioning. 2. Before the installation, turn the ignition switch to OFF, and apply the parking brake without fail. 3. Do not use thinner or the like, otherwise the surface of the STI rear under diffuser may be corroded. Also, keep the part away from fire, otherwise it may be deformed. 4. When performing an air blow after the installation of the part, keep the nozzle 300 mm or more away from the part. If it is too close, the surface of the part may be peeled off. This manual describes how to install and handle the STI rear under diffuser. Before installing the part, please be sure to read this manual for proper installation. Tools to be used Gloves, Scale, Awl, Torque wrench, Phillips screwdriver, Hole saw (20 mm), Ratchet wrenches (8 mm, 10 mm), Drill bits (3 mm, 6 mm, 9.5 mm), Nippers, File, Fabric adhesive tape, Masking tape, Scissors, Safety goggles, Ratchet wrench extension (50 mm) No. STI rear under diffuser Bolt A Bolt B Well nut Spring nut Washer A Washer B Template Instruction Manual (this document) Components Part name Qty. Available in website * Bottom view of ① * The grid lines seen on the bottom surface of the rear under diffuser are made in the production process and not abnormal. Also, they do not affect driving performance. Small bag WARNING sink, and use rigid racks or the like to support the vehicle without fail. 1 7 2 7 2 2 2 1 1 Rr LH RH UP Rr LH RH UP Completion image 1. Preparation for installation Installation procedure (1) Cut the template ⑧ to make the center, RH, and LH templates. (2) On the bottom surface of the vehicle rear bumper, attach the center template ⑧, RH template ⑧, and LH template ⑧, aligning with the radius ends. (Fig. 1) (1 location each at center, RH, and LH, 3 locations in total) (3) Mark scribe lines with an awl or the like at the center of each hole position on the center template ⑧, RH template ⑧, and LH template ⑧. (2 locations at center and 1 location each on RH and LH, 4 locations in total) (4) Remove the center template ⑧, RH template ⑧, and LH template ⑧. (5) Mark scribe lines with an awl or the like at the marking positions on the rear bumper. (Fig. 2) (2 locations each on RH and LH, 4 locations in total) Fig. 1 Fig. 2 CAUTION Do not mark any scribe line at positions indicated with ◎. (Same for RH) ① Rear under diffuser Rear bumper Rear bumper Rear bumper Rear bumper ⑧ LH template ⑧ LH template ⑧ Center template ⑧ Center template Masking tape Masking tape Masking tape Masking tape Awl Awl Scribe lines Enlarged view of templates ⑧ attachment portions Enlarged view of LH template (same for RH) Align with radius end. Align with radius end. Enlarged view of center template Rr LH RH UP Rr LH RH UP 3mm Rr LH RH UP Fig. 3 Fig. 4 Fig. 5 (6) Turn the rear fog light socket counterclockwise to remove it, and set aside the harness so that the hole-making work will not be hindered. (Fig. 3) (7) Drill holes at the positions where the scribe lines are marked in Sections 1. (3) and 1. (5). Referring to the figure on the left, make prepared holes first, and then final holes. (Fig. 4) (3→6→9.5 mm: 1 location at center) (3→Hole saw 20 mm: 1 location at center) (3→6→9.5 mm: 3 locations each on RH and LH, 6 locations in total) (8) After making a 20 mm hole in Section 1. (7), cut out the rear bumper with nippers as shown in the enlarged view of the portion B. (Fig. 4) (9) Remove burrs around the opened holes completely with a file or the like. (10) Restore the rear fog light socket removed in Section 1. (6). (11) Insert the well nuts ④ to the holes made on the bottom side of the rear bumper in Section 1. (7). (Fig. 5) (1 location at center and 3 locations each on RH and LH, 7 locations in total) CAUTION CAUTION CAUTION CAUTION When making holes, wear safety goggles. Before the work, make a stopper with fabric adhesive tape to a position approximately 5 mm away from the tip of the drill bit to prevent interference with the drill. When making a hole at the portion A, a harness is present on the back of the rear bumper. Be careful not to damage it. Drill bit Fabric adhesive tape Do not make any hole at positions indicated with ◎. (Same for RH) Rear bumper Rear bumper Rear bumper Rear bumper ④ Well nuts Turn counterclockwise to remove. Rear fog light socket Drill Drill Drill Hole saw Enlarged view of portion B 20 mm hole Cutting out rear bumper Rr LH RH DOWN Rr LH RH UP Ft UP Rr LH RH UP Rr LH RH UP Fig. 6 Fig. 7 Fig. 8 Fig. 9 (1) Place the rear under diffuser ① on the bottom side of the rear bumper, and temporarily fix them with the bolts A ② in the order of 1, 2, and 3. (Fig. 8) (1 location each at center, RH, and LH, 3 locations in total) (2) Align the holes of the rear bumper and the rear under diffuser ①, and temporarily fix them with the bolts A ② in the order of 4, 5, 6, and 7. (Fig. 9) (2 locations each on RH and LH, 4 locations in total) (12) Insert the spring nut ⑤ to the panel inside the rear bumper. (Fig. 6) (1 location each on RH and LH, 2 locations in total) (13) Peel off the backing paper of the washer A ⑥, and attach the washer to the portion E of the rear under diffuser ①, aligning the holes. (Fig. 7) (1 location each on RH and LH, 2 locations in total) 2. Installation work of rear under diffuser ① Rear under diffuser ① Rear under diffuser ① Rear under diffuser ① Rear under diffuser Rear bumper Rear bumper Rear bumper Rear bumper Panel Panel ⑤ Spring nut ⑤ Spring nut Insert it so as to contact corner radius. Backing paper ⑥ Washer A ② Bolts A ② Bolts A Sectional view of C-C Insert. Misaligned-Not accepted Enlarged view of portion E ⑥ Washer A Align hole positions. Sectional view of F-F Accepted Rr LH RH UP Ft UP Rr LH RH UP Fig. 11 Fig. 10 (3) After inserting the bolt B ③ to the washer B ⑦, align the holes of the rear bumper and the rear under diffuser ①, and temporarily fix them in the order of 8 and 9. (Fig. 10) (1 location each on RH and LH, 2 locations in total) (4) Finally tighten the bolts A ② temporarily tightened in Sections 2. (1) and 2. (2) in the order of 1, 2, 3, 4, 5, 6, and 7. (Fig. 11) (1 location at center and 3 locations each on RH and LH, 7 locations in total) (5) Finally tighten the bolts B ③ temporarily tightened in Section 2. (3) in the order of 8 and 9. (Fig. 11) (1 location each on RH and LH, 2 locations in total) Tightening torque for reference: 5.0 N•m (0.5 kgf•m) (6) Finally, check for lifting or tilting of the installation portion and missing and omission of tightening of any bolt. The installation work has been completed. Content Date Revision history Newly created July 16, 2021 CAUTION At the final tightening, use an extension (50 mm) to prevent the torque wrench from contacting the product. ① Rear under diffuser ① Rear under diffuser ① Rear under diffuser Rear bumper Rear bumper Rear bumper ⑤ Spring nut ⑥ Washer A ⑦ Washers B ⑦ Washer B ③ Bolts B ③ Bolt B Extension Extension (50 mm) Torque wrench Torque wrench Panel Sectional view of G-G
SEOCONTENT-END
This product presentation was made with AAWP plugin.