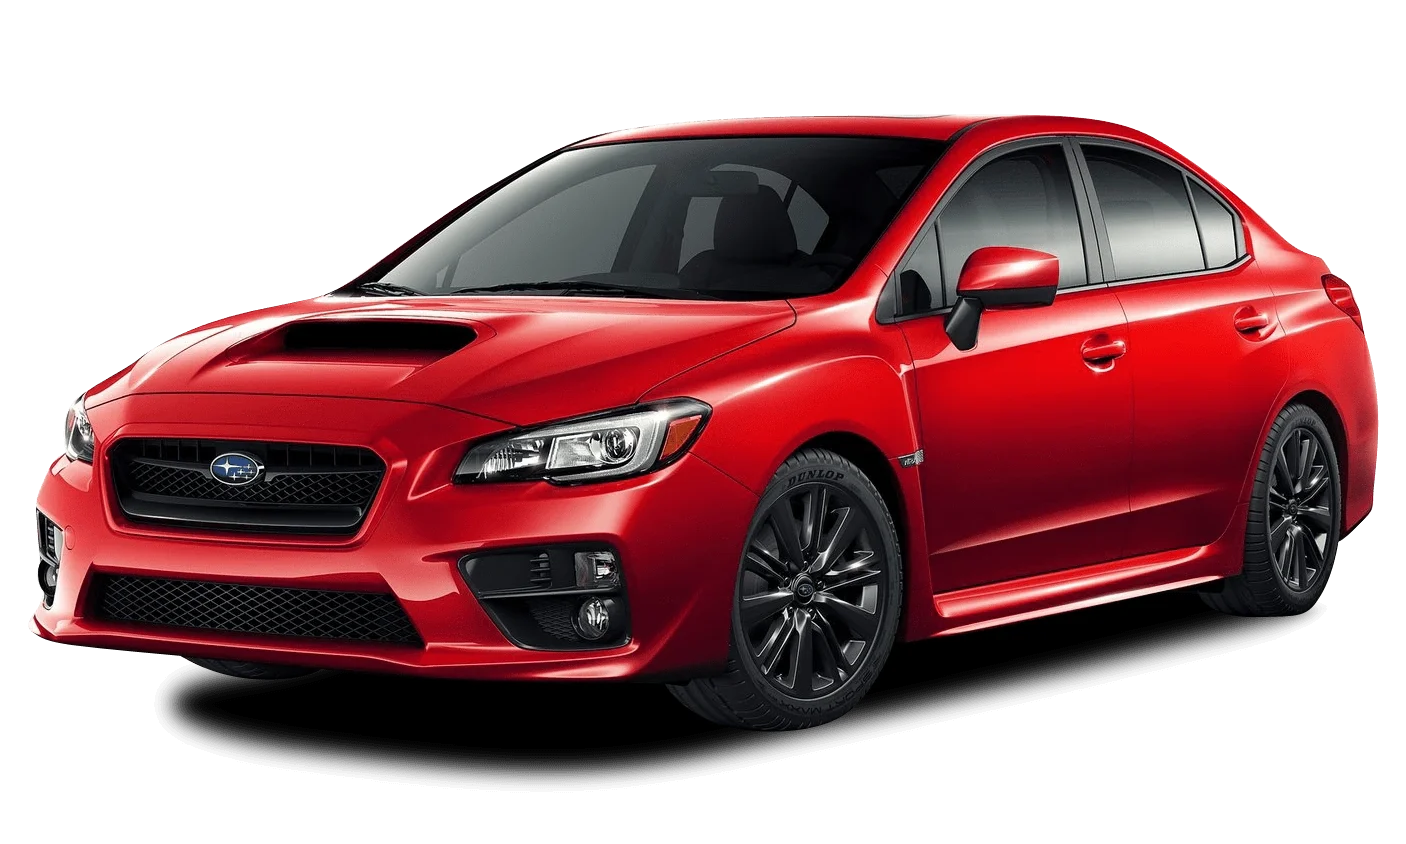
Accessory Installation Guide
Installation Manual
LED Accessory Liner
Genuine Part Number H4510VC200
Applicable Model WRX 2022MY-
Thank you for purchasing the Subaru Genuine LED Accessory Liner.
This manual describes the procedure to install the LED Accessory Liner on the SUBARU WRX. Be sure to read this manual before installing this product and follow the instructions described below.
- Do not modify this product before installing it on the vehicle.
- Note that you may be held responsible for any malfunctions that occur due to not following these precautions.
<Make sure to give the separate instruction manual to the customer. >
CAUTION
Follow the Service Manual for the procedure to disconnect and connect battery terminals and read the precautions when performing the work.
Also perform the reconfiguration work as per the Service Manual after installation.
1. When removing the vehicle parts, be careful not to scratch or damage them.
2. When paying the wiring, be careful not to damage the harnesses on the edge of the vehicle’s body panel.
Installation Overview
- This Installation Manual is for installing the LED Accessory Liner on the SUBARU WRX.
- Perform the installation work with the Front Bumper removed from the vehicle.
Tools Required
H4510VC200

- Superior Visibility in Bad Weather: Equipped with 54 cutting-edge LED chips and enhanced top convex lens, the F1 Series H11 LED Fog Light Bulb provides 360° illumination, projecting 400% upgraded light over greater distances with precision. H11 fog light bulb led focused lights ensures safe and comfortable visibility during driving in rainy and foggy conditions
- Effortless Installation Process: Designed with a near 1:1 compact size ratio, the F1 Series H11 H8 LED bulb closely match the size of original bulbs. This design simplifies the installation process, making it a breeze for Installatin. Compatible with H11/H16/H8/H9 as LED fog lights, LED bulbs, and DRLs
- 30000 Hrs Lifespan: Crafted entirely from 6063 aviation aluminum and featuring an integrated heat sink, H11 H8 H16 LED fog light bulbs offer superior cooling capabilities. This ensures a longer service life of up to 30,000 hours, reducing the need for frequent replacements
- Universal Compatibility: With compatibility for 99% of vehicles, these fog bulbs fit a wide range of H11/H8/H16 applications. They can serve as fog lights or daytime running lights for cars, trucks, and SUVs. For confirmation, refer to your vehicle's manual. Compatible with H11/H16/H8/H9 as LED fog lights, LED bulbs, and DRLs
- IP68 Design for All Conditions: Boasting an IP68 waterproof rating and a high-temperature resistant rubber seal, SEALIGHT H11/H16 LED fog light bulbs are built to perform reliably in various scenarios. They maintain optimal performance in rainy, foggy, or snowy weather, ensuring a superior driving experience even in inclement conditions


- 14,000LM Ultra-Bright: 7X Brighter Than Stock fog lights. Drive safer and see clearer at night with 14,000 lumens of 6500K cool white light. The H8/H11 LED bulb cut through fog, rain, and snow with a perfectly focused beam, improving reaction time and night visibility for safer, stress-free driving, RV Interior Lighting
- Over 70,000 Hours Lifespan: Engineered for Extreme Durability, The H11 LED fog light bulb features aircraft-grade aluminum body, hollow heat sink, and built-in driver for superior cooling. Enjoy years of reliable performance without frequent replacements—saving time
- 3-Min Plug & Play: 99% Vehicle Compatibility 1:1 OEM Size fit makes installation effortless. No polarity issues, no flicker, no error codes. H16 LED fog light bulb are compatible with most H11/H8/H16 sockets for cars, trucks, and SUVs—plug in and light up instantly
- IP68 Waterproof and Dustproof: Built for automotive user, The H16/H8/H11 LED Fog lights features a sealed hollow base design and IP68 waterproof seaing ring, keep out dust and moisture, perfect for harsh weather in places like Florida's humidity, California's dust, or the Pacific Northwest's rain
- Keep Your Lampshade Crystal Clear: The H11 fog lights led have unique UV-absorbing coating blocks 99% of harmful UV rays, protecting your Lampshades from yellowing or fading. Even after 10 years of use, your Lamp covers stay clear and new-looking, ensuring maximum light output and style

- 18000LM Super Bright: SEALIGHT F3S H11/H16/H8 LED fog light bulb deliver up to 18,000 lumens of powerful output, significantly improving your driving visibility. With 24 upgraded LED chips, they are 1000% brighter than stock fog lights, providing a wider and clearer beam for safer driving in fog, rain, snow, and at night.Stay seen and safe on the road with the Tail Light Assemblies
- 80,000 Hours Lifespan with Advanced Cooling System:Built for long-lasting durability, the F3S LED fog lights feature a premium 0.06-inch copper substrate and aviation-grade aluminum housing for superior heat dissipation. The advanced cooling system effectively prevents overheating, ensuring stable brightness and a lifespan of up to 80,000 hours.
- True IP68 Waterproof, Fully Sealed Design:Designed with a one-piece die-cast housing and internal injection sealing technology, these H11 fog light bulb provide true IP68 waterproof protection. They perform reliably in heavy rain, snow, dust, and dense fog, ensuring consistent lighting in all weather conditions
- 1:1 OEM Size, Plug & Play Installation: The H11 LED fog light bulb are designed with a 1:1 OEM size for a perfect fit without any modification. Simply plug and play—no tools or wiring required—and complete installation in minutes, even for first-time users.
- Fits 99% of Vehicles, No Errors or Flickering: Compatible with H11, H8, H16, and H9 sockets, these fog lights LED bulbs fit most vehicles including cars, trucks, SUVs, and off-road models. The built-in driver ensures stable current with no flickering or error warnings, delivering a reliable and worry-free upgrade.For confirmation, refer to your vehicle's manual. Fit for LED fog lights, LED bulbs, Tail Light Assemblies
- 12,000 Lumens Ultra-Bright for All Weather Driving: Cut through dense fog, heavy rain, and snowy roads with 12,000LM of brilliant output—600% brighter than original fog lights. The TF2 Series H11/H16/H8 Yellow fog lights deliver crystal-clear visibility for cars, trucks, and SUVs, keeping you safe in even the toughest driving conditions.
- 1:1 OEM Size, 3-Minute Quick Install: Upgrade your lighting in minutes—no tools, no wiring, no hassle. The compact 1:1 design fits perfectly into your factory housing, ensuring a seamless, secure installation. Say goodbye to bulky bases and hello to the easiest H11 Yellow LED fog light bulb upgrade you’ve ever made.
- 60,000HRS Lifespan: H11/H16/H8 Yellow LED fog lights with aircraft-grade aluminum housing and riveted construction—no loose parts even on bumpy roads, ensuring the H11 Yellow fog lights LED bulb service life over 60,000 hours
- IP68 Waterproof: H8/H16/H11 Yellow fog light bulb feature a fully sealed design with rubber gaskets and tight-fit base, achieving IP68 rating. The H11 Yellow LED bulb can withstand floods, high-pressure washes, and muddy roads—perfect for harsh driving conditions
- 99% Vehicle Compatibility: Our H8/H11/H16 amber fog lights LED are designed for standard vehicles, compatible with H11/H8/H16 sockets and suitable for cars,SUVs,and pickups. Built-in CANbus support helps prevent error codes and flickering,ensuring,stable performance. With the TF2 series H11 LED bulb yellow, you'll enioy reliable lighting and a hassle-free installaion experience.
- Exceptional 600% Brightness: h16 led fog light bulb illuminate the road with 12,000 lumens of bright white light (6500K), providing 600% more brightness than standard bulbs. Ideal for challenging weather conditions like fog, rain, and snow
- Easy Plug & Play 3 Mins Installation: Enjoy a hassle-free installation experience! With our non-polarity design, you can install these H8 H11 LED bulb in just 3 minutes—no external driver or wiring required. CANBus-Ready for error-free performance in H11, H8, H9, and H16 applications.
- Advanced Safety Features: Our 4-Point Safety System includes: Anti-glare technology to minimize glare, IP68 waterproof rating to keep out water and dirt, Shockproof structure for enhanced durability, Overheat protection for added safety
- Long-Lasting Durability: Enjoy over 60,000 hours of reliable performance, thanks to a built-in driver and triple cooling system. The anti-aging rubber seal protects against high temperatures and environmental wear
- OEM-grade Fitment for Great Compatibility: These Newest SEALIGHT H8 LED fog lights fit 99% of vehicles without any radio issues, errors, or flickering. They work with H11/H16/H8 led fog light bulbs, perfect for cars, SUVs, and trucks
SEOCONTENT-START
19878-6048J 1 Thank you for purchasing the Subaru Genuine LED Accessory Liner. This manual describes the procedure to install the LED Accessory Liner on the SUBARU WRX. Be sure to read this manual before installing this product and follow the instructions described below. ・Do not modify this product before installing it on the vehicle. ・Note that you may be held responsible for any malfunctions that occur due to not following these precautions. <Make sure to give the separate instruction manual to the customer. > Installation Manual LED Accessory Liner Genuine Part Number H4510VC200 Applicable Model WRX 2022MY- △ 00 Installation Caution Instructions and Preparation Work Ignore this symbol and making a mistake during installation may cause injury. It indicates content that may lead to physical damage to the product. 1. When removing the vehicle parts, be careful not to scratch or damage them. 2. When paying the wiring, be careful not to damage the harnesses on the edge of the vehicle’s body panel. , take note w to safely and correctly install the parts. For details of removing the parts, see the Service Manual. ● ● You may be held responsible for any faults that occur due to not following the notes in this manual. ● To perform the installation work properly and safely, comply with the following notes. ● Always check the latest Service Manual, and if there are any discrepancies due to revisions, follow the instructions in the Service Manual. ● For vehicles equipped with airbags, do not touch the airbag harness (yellow tape). Take extra care as touching or damaging the harness may cause the airbag to malfunction. CAUTION vehicle functions correctly. Also take a note of the memory of the radio and other electrical equipment. This prevents issues when checking re-installation after the parts have been installed. ● that matches the dimensions and follow the specified torque in the tightening torque instructions. If you do not do so, there is the danger of damaging the nuts and bolts, and them coming off by not securing them properly. ● disconnect the lock while holding the connector and do not pull the lead wires. This will prevent the lead wires from breaking. ● securely. This prevents poor connections. ● clamp to secure the wire harnesses to prevent the wires from being loose. This prevents abnormal noises and the harnesses from ge ng caught. ● or removed finishers, be careful not to pull or get the back of the harness caught. This will prevent the wires from breaking and short-circuits. ● ing nd wire breakage and t the arts function correctly the removed parts. CAUTION Follow the Service Manual for the procedure to disconnect and connect battery terminals and read the precautions when performing the work. Also perform the reconfiguration work as per the Service Manual after installation. ● Make sure the ㊀ terminal on the battery is disconnected while doing the wiring work. Not doing so may cause an electric shock or injury due to an electrical short. Installation Overview ・This Installation Manual is for installing the LED Accessory Liner on the SUBARU WRX. ・Perform the installation work with the Front Bumper removed from the vehicle. Cord ASSY ③ Lamp ASSY LH ② Component Parts (Make sure to check the component parts before starting the work.) ① ② No. ① ② ③ ④ ⑤ Part Name Lamp ASSY RH Lamp ASSY LH Cord ASSY Banding Band Urethane Foam Quantity 1 1 ③ ④ 1 3 2 ⑤ Tools Required ・Socket Wrench (10 mm) ・Clip Remover ・Diagonal Pliers ・Scissors ・Protective Tape Installation Procedure Figure 1 Figure 2 Apply Protective Tape Fog Cover Apply Protective Tape (same on right side) 1.Before beginning the installation work ・ Move the driver’s seat as far back as possible in advance to perform the cabin wiring work. ・ Open the hood and disconnect the minus terminal on the battery. CAUTION When you disconnect the battery terminal, radio channels and other items sa ed in memory will be deleted, so make a note or backup of them before you disconnect the cable. ・ Apply Protective Tape around the Fog Cover. ・ Prepare a storage box to put the parts in so that you do not lose the removed parts. 2.Installing the LED Accessory Liner ・ Although this procedure shows the work for the left side of the vehicle, follow the same procedure for the right side. Removing the Front Bumper 1)Apply Protecti e Tape to the shaded area shown in the figure. Figure 3 Flange Bolts x 6 Clip A x 3 Clip B x 2 2) emo e the lange Bolt and Clip on the co er at the top of the bumper. {Bolt: 6 places; Clip A: 3 places; Clip B: 2 places) Cover on top of bumper Figure 4 3) emo e the Clip at the bottom of the bumper. {Clip A: 8 places) Clip A x 8 Figure 5 Clip B x 2 4) emo e the Clip on the bumper fender. {Clip B: 2 places) Front Bumper Figure 6 Claw x 8 (same on RH side) 5)Disengage the Claws {8 places) on the top of the ront Bumper and then remo e the ront Bumper. 6)Disconnect the connector inside the og Lamp. Figure 7 Front Bumper Fog Lamp Connector Existing Fog Cover Claw x 12 Clip x 2 Removing the Existing Fog Cover ・ Although this procedure shows the work for the left side of the ehicle, follow the same procedure for the right side. 1)Disengage the Clips and Claws on the og Co er, and then remo e the Existing og Co er from the ront Bumper. {Clips: 2 places; Claws: 12 places) CAUTION ・ The remo ed Clips will be reused. Store them in a safe place so that you do not lose them. ・ eturn the og Co er that you remo ed to the customer. Figure 8 Cord Installing the Lamp ASSY ・ Although this procedure shows the work for the left side of the ehicle, follow the same procedure for the right side. 1)Wrap Urethane oam around the Lamp ASSY cord. CAUTION Wrap the Urethane oam {2 pcs) from the base of the lamp cord. Urethane Foam x 2 Lamp ASSY (Back Side) 1st piece 2nd piece Figure 9 Lamp ASSY 3P Connector Clip Fixing Rib Front ❷ Bumper Top View ❸ ❹ ❺ 10 ❻ ❼ ❽ ❾ Lamp ASSY 2)Pass the Lamp ASSY 3P connector through the hole in the ront Bumper and then connect it to the Lamp ASSY. ※ To install the Lamp ASSY, insert the Claws following the steps below parallel to the direction the ehicle tra els. ⒜ )nsert the Clip ixing ib to secure the Clip first and then insert Claw ❼ about 5 mm. CAUTION Do not engage the Claw yet. )f you engage the Claw, you will not be able to cor- rectly install Claws ❶ to ❺ and Claws 10 to Q . ⒝ )nsert the Claws in order of Claw ❶ , Claw ❷ , Claw ❸, Claw Q , Claw 11 , and Claw 10 and engage the inside Claws. ⒞ )nsert the Claws in order of Claw ❹ , Claw ❺ , Claw ❻, Claw ❼ , Claw ❽ , and Claw ❾ , and engage the outside Claws. CAUTION Clip Fixing Rib Back View of Lamp ASSY Lamp ASSY When inserting the Lamp ASSY Claws, assemble them parallel to the direction the ehicle tra els. Figure 10 Lamp ASSY 3)Attach the Clips to the Lamp ASSY. {Clip: 2 places) CAUTION )nsert the Lamp ASSY making sure that the outside of the Lamp ASSY does not ride up onto the guide rib on the ront Bumper and confirm that all 12 Claws are engaged. Front Bumper Figure 11 Windshield Washer Reservoir Clip x 2 Wire Harness Vinyl Tape (Pink) Connecting the Wire Harness: Left Side 1)Peel off the Vinyl Tape {Pink) wrapped around the Wire Harness and pull out the Prewire Harness. 2)Detach the Dummy Connector from the gray 3P con- nector on the Prewire Harness. { eturn the Dummy Connector that you remo ed to the customer.) CAUTION )f you directly pull the Wire Harness without peeling off the Vinyl Tape {Pink), you risk damaging the Wire Har- Figure 12 Banding Band Prewire Harness Gray 3P Connector Release Lever Wrap with Urethane Foam ness. 3)Secure the Prewire Harness to the Wire Harness using a Banding Band. 4)Connect the Lamp ASSY 3P connector to the Gray 3P Connector. CAUTION Wrap Urethane oam around the connector ensuring that you can see the elease Le er. Wire Harness 2nd piece Lamp ASSY 3P Connector Figure 13 Prewire Harness Gray 3P Connector Vinyl Tape (Pink) x 2 Dummy Connector Wire Harness Connecting the Wire Harness: Right Side 1)Peel off the Vinyl Tape {Pink) wrapped around the Wire Harness and pull out the Prewire Harness. 2)Detach the Dummy Connector from the Gray 3P Con- nector on the Prewire Harness. { eturn the Dummy Connector that you remo ed to the customer.) CAUTION )f you directly pull the Wire Harness without peeling off the Vinyl Tape {Pink), you risk damaging the Wire Har- ness. Figure 14 Release Lever Wrap with Urethane Foam Banding Band (make slack, secure) 70 mm 3)Bind some slack of the Prewire Harness and then secure the Prewire Harness to the Wire Harness using a band- ing band. 4)Connect the Lamp ASSY 3P connector to the Gray 3P Connector. CAUTION Wrap Urethane oam around the connector ensuring that you can see the elease Le er. 2nd piece Wire Harness Lamp ASSY 3P Connector Figure 15 Wiring Inside the Cabin 1)Connect the White 4P Connector {female) on the Cord ASSY to the Prewire Harness Connector {white 4P) near the back of the )nterior Panel J/B. Interior Panel J/B Wire Harness Prewire White 4P Connector Opener Cable White 4P Cord ASSY Figure 16 End of Connector Connector Wire Harness 2)Secure the slack of the Cord ASSY to the Wire Harness using a Banding Band. {1 place) CAUTION Secure the center of the fuse with a Banding Band. 70 mm Fuse Cord ASSY Banding Band (Secure center of fuse) 1st piece 2nd piece How to Use the Urethane Foam (150 x 90 mm) 1)Cut the Urethane oam in accordance with the amount to be used. The cut dimensions are shown on the left. Illumination Illumination Illumination Illumination Illumination Illumination Illumination Illumination Cord 3P 3.Installing Removed Parts ⑴ )nstall the parts that you remo ed in the op- posite way to the remo al procedure. 4.Checking Your Work ⑴ Temporarily connect the battery and put the gear selector position into parking. Press the “ENG)NE STA T STOP” button twice without depressing the brake pedal to turn on )G. The LED Accessory Liner turns on and off by operating the switch on the switch ASSY. )f the LED Accessory Liner does not function correctly, see “Troubleshooting” on the next page. ⑵ ully tighten the minus terminal on the bat- tery, and then check that the parts that you remo ed function. Set the audio, clock, and anything else that you made a note of, and then clean the ehicle. The procedure is now completed. Troubleshooting If the LED Accessory Liner does not function correctly One side does not function. Both sides do not function. Is the Accessory Liner switch turned off? NO YES Turn it on. Is the Cord ASSY connected to the vehicle NO connector? Connect it. YES Is the vehicle fuse blown? Not blown Measure the voltage of the Accessory Liner connector. 12 V or higher Blown Less than 12 V Replace it. Replace the Cord ASSY and perform an operation confirmation again. Check the connection of the side that does not turn on. Is the Wire Harness connected to the NO lamp ASSY? Connect it. YES Does it function correctly now? NO Replace the LED lamp and perform an operation confirmation again. 10 11 Circuit Diagram 3 2 1 1 2 3 (Male) (Female) ① ① 1 1 ② ② ①② ③ ③ ④ Lamp ASSY Prewire Harness Cord ASSY Cord ASSY (female) Red: IGN (vehicle) Red: IGN (parts) White Red Black IGN vehicle power 3 3 1 1 3 3 (Male) (Female) 1A 1 2 3 4 1 2 3 4 4 3 2 1 Revision History △ Description Date
**************************************************************************************************************
SEOCONTENT-END
This product presentation was made with AAWP plugin.