
NHTSA ID Number: 10232225
Manufacturer Communication Number: 09-98-22
Summary
This bulletin announces the availability of new reprograming files for the Engine Control Module (ECM).
NUMBER: 09-98-22
DATE: 02/20/23
| APPLICABILITY: | 2019-22MY Ascent |
| SUBJECT: | Camshaft Position Correlation / DTCs: P0016, P0017, P0018, P0019, P0014, P0024, P0128, P2109 |
INTRODUCTION:
This bulletin announces the availability of new reprograming files for the Engine Control Module (ECM) developed to remedy the following DTCs:
- P0016: Crankshaft Position – Camshaft Position Correlation Bank 1 Sensor A
- P0017: Crankshaft Position – Camshaft Position Correlation Bank 1 Sensor B
- P0018: Crankshaft Position – Camshaft Position Correlation Bank 2 Sensor A
- P0019: Crankshaft Position – Camshaft Position Correlation Bank 2 Sensor B
- P0014: “B” Camshaft Position – Timing Over-Advanced Or System Performance Bank 1
- P0024: “B” Camshaft Position – Timing Over-Advanced Or System Performance Bank 2”
- P0128: Coolant Thermostat (Engine Coolant Temperature Below Thermostat Regulating Temperature)
- P2109: Throttle/Pedal Position Sensor “A” Minimum Stop Performance
These files contain enhanced logic for the self-diagnosis program of the ECM. If any of the DTCs listed above are found to be stored in the ECM, follow the procedures outlined below.
PACK FILE APPLICABILITY:
| Model | MY | File Description | Decryption Keyword | New CID # |
| Ascent | 19 | 22765AL738.pak | F55756A0 | LT8DA00A |
| 20 | 22765AN505.pak | A4FE1157 | LT8F500C00G | |
| 21 | 22765AP823.pak | F7FFB51D | LT8H500D00G | |
| 22 | 22765AS002.pak | A7BC72B6 | LT8J400F00G |
These files are included in the November 2022 SSM software update.
SERVICE PROCEDURE / INFORMATION:
(*1) Instructions on how to perform and read the OBD MODE test results. This procedure will be required when performing the diagnostic Steps outlined below.
Read the following data monitor values:
1. MID – $35 TID – $8B
2. MID – $35 TID – $8C
3. MID – $35 TID – $8D
4. MID – $35 TID – $8E
5. MID – $36 TID – $8B
6. MID – $36 TID – $8C
7. MID – $36 TID – $8D
8. MID – $36 TID – $8E
STEP 1: Are DTCs P0016,17,18 or 19 found displayed within the fault memory?
NO – Perform the reprograming procedure outlined in STEP 2 ONLY. The service procedure is finished, no further action is required.
YES – Proceed to STEP: 2 and continue to the proceeding steps.
STEP 2: Reprogram the ECM following the normal FlashWrite procedure.
Subaru of America, Inc. (SOA) highly recommends connecting either the Subaru Midtronics DCA8000 Dynamic Diagnostic Charging System or the Subaru Midtronics GR8-1100 Diagnostic Battery Charger to the vehicle and utilizing the Power Supply Mode feature anytime a vehicle control module is being reprogrammed. Once the Midtronics charger is connected to the vehicle, if the battery is fully charged, it takes less than three (3) minutes to boot-up the charger, select the Power Supply Mode, and have the battery voltage stabilized and ready for reprogramming.
NOTES:
- For instructions on using the Power Supply Mode, reference the applicable User Manual for the Midtronics DCA-8000 Dynamic Diagnostic Charging System and the Midtronics GR81100 Diagnostic Battery Charger on STIS.
- Confirm all electrical loads such as lights, audio, HVAC, seat heaters, and rear defroster are all switched OFF before setting up the charger for Power Supply Mode.
- Select the correct battery type (Enhanced Flooded, Flooded, Gel, AGM or AGM Spiral).
- Input the CCA which matches the vehicle’s battery. NOTE: OE and replacement batteries have different CCA ratings. Always confirm the battery’s CCA rating before proceeding.
- If using a DCA-8000 Dynamic Diagnostic Charging System, set the power supply voltage to 13.5 Volts.
- DO NOT connect the DST-i or DST-010 until the Power Supply mode function has completed its battery test mode and the Charging Voltage has dropped to and shows a steady 13.5 Volts on the display.
- Once Power Supply Mode reaches a steady 13.5 Volts, connect the DST-i or DST-010 to the OBD connector and proceed with initiating the normal FlashWrite reprogramming process.
- Amperage will fluctuate based upon the vehicle’s demand for power. NOTE: If the voltage rises beyond 14 Volts while programming is in process, the procedure will abort. This can indicate a need to test or charge the vehicle battery before any further attempt at programming is made.
- ALWAYS set the power supply voltage to 13.5 Volts when using Power Supply Mode. NEVER turn the ignition switch on when charging at voltages 15 Volts or higher.
REMINDER: If the DCA-8000 or GR8-1100 indicates the vehicle’s battery must be charged, charge the battery fully before proceeding to reprogram the vehicle while using the Power Supply Mode.
NOTE: Control module failures resulting from battery discharge during reprogramming are not a matter for warranty. Should any DTCs reset after the reprogramming update is performed, diagnose per the procedure outlined in the applicable Service Manual.
VERY IMPORTANT:
This information is applicable to the Subaru Midtronics DCA-8000 Dynamic Diagnostic Charging System and the Subaru Midtronics GR8-1100 Diagnostic Battery Charger ONLY. It does not apply to any other brand / type of “generic” battery charger whatsoever. ONLY the DCA-8000 and the GR81100 and their Power Supply Mode feature have been tested and approved by SOA.
End of procedure for vehicles WITHOUT DTCs P0016, P0017, P0018, or P0019 store in the ECM.
STEP 3: Using SSM, read the value the following four data monitor items (ALWAYS Save SSM Data):
1. VVT Initial Position Learning Value #1
2. VVT Initial Position Learning Value #2
3. VVT EX Initial Position Learning Value #1
4. VVT EX Initial Position Learning Value #2
Are all of the data monitor item values within the acceptable range listed in the table above?
YES – proceed to STEP 5.
NO – proceed to STEP 4.
STEP 4: Perform the procedures outlined in “#7 INSPECTION MODE N” and “#12
INSPECTION MODE T”. Then re-check the threshold values in STEP 3 along with the OBD MODE test results (*1)
“#7 INSPECTION MODE N” procedure.
Using the applicable Service Manual, refer to: DIAGNOSTICS > ENGINE> Inspection Mode> #7
DRIVE CYCLE N
A. Confirm the battery voltage is 12 Volts or more and the fuel tank is at least half full.
B. Using SSM, clear the fault memory. Prepare the SSM to be kept in the vehicle during the following road test.
C. With gear selector in the park position (neutral for MT models), idle the engine at approximately 2500 rpm for 40 seconds or more.
D. Move the gear selector into the drive position (appropriate gear range for MT models. Accelerate the vehicle to 31 mph or more.
E. When the vehicle speed is 31 mph or more, release the accelerator pedal and brake pedal (and clutch for MT models) and allow the vehicle to decelerate with any gear shift changes. Maintain the engine speed between 2500 rpm to 1900 rpm for 5 seconds during this deceleration.
NOTE: Depending on road conditions, an appropriate gear might have to be selected to maintain the desired engine speed. The vehicle speed is not important as long as the engine speed is within range during the declaration.
F. In a suitable area, safely bring the vehicle full stop and allow it to idle for 5 minutes.
“#7 INSPECTION MODE N” procedure is complete. Proceed to “#12 INSPECTION MODE T” procedure.
“#12 INSPECTION MODE T” procedure.
Using the applicable Service Manual, refer to: DIAGNOSTICS > ENGINE> Inspection Mode > #12 INSPECTION MODE T
A. Confirm the battery voltage is 12 Volts or more the fuel is at least half full.
B. Start the engine.
C. Allow the engine to idle for at least 3 minutes.
D. Accelerate the vehicle speed to approximately 37 mph.
E. While maintaining approximately 37 mph, cycle the accelerator from a 0% to 20% opening angle. Try to keep these cycles within 5 second intervals. Maintain this driving pattern for 20 minutes or more.
NOTE: It is acceptable to stop the vehicle if needed depending on road/traffic conditions during this driving pattern.
F. Release the accelerator pedal and brake pedal (and clutch for MT models) and allow the vehicle to decelerate with any gear shift changes.
G. In a suitable area, safely bring the vehicle full stop and turn off the engine.
“#12 INSPECTION MODE T” procedure is complete.
Read the threshold values from STEP 3 (pictured below) and the OBD MODE test results (*1) Are all of the data monitor item values within the acceptable range listed in the table below?
Are the threshold values between -1500 to + 1500?
YES – The procedure is FINISHED.
NO – Repeat STEP 4 ONE TIME ONLY and if the result answer is still “NO”, proceed to STEP 6.
STEP 5: Perform the “#7 INSPECTION MODE N” and “#12 INSPECTION MODE T” procedure.
“#7 INSPECTION MODE N” procedure.
Using the applicable Service Manual, refer to: DIAGNOSTICS > ENGINE> Inspection Mode > #7 INSPECTION MODE N
A. Confirm the battery voltage is 12 Volts or more the fuel is at least half full.
B. Using SSM, clear the fault memory. Prepare the SSM to be kept in the vehicle during the following road test.
C. With gear selector in the park position (neutral for MT models), idle the engine at approximately 2500 rpm for 40 seconds or more.
D. Move the gear selector into the drive position (appropriate gear range for MT models. Accelerate the vehicle to 31 mph or more.
E. When the vehicle speed is 31 mph or more, release the accelerator pedal and brake pedal, allow the vehicle to decelerate without any gear shift changes. Maintain the engine speed between 2500 rpm to 1900 rpm for 5 seconds during this deceleration
NOTE: Depending on road conditions, an appropriate gear might have to be selected to maintain the desired engine speed. The vehicle speed does is not important as long as the engine speed is within range during the declaration.
F. In a suitable area, safely bring the vehicle full stop and allow it to idle for 5 minutes.
“#7 INSPECTION MODE N” procedure is complete. Proceed to “#12 INSPECTION MODE T” procedure.
“#12 INSPECTION MODE T” procedure.
Using the applicable Service Manual, refer to: DIAGNOSTICS > ENGINE> Inspection Mode > #12 INSPECTION MODE T
H. Confirm the battery voltage is 12 Volts or more the fuel is at least half full.
I. Start the engine.
J. Allow the engine to idle for at least 3 minutes.
K. Accelerate the vehicle speed to approximately 37 mph.
L. While maintaining approximately 37 mph, cycle the accelerator from a 0% to 20% opening angle. Try to keep these cycles within 5 second intervals. Maintain this driving pattern for 20 minutes or more.
NOTE: It is acceptable to stop the vehicle if needed depending on road/traffic conditions during this driving pattern.
M. Release the accelerator pedal and brake pedal (and clutch for MT models) and allow the vehicle to decelerate with any gear shift changes.
N. In a suitable area, safely bring the vehicle full stop and turn off the engine.
“#12 INSPECTION MODE T” procedure is complete.
O. Using SSM, select Diagnosis > Each System > Engine > DTC > Readiness Code
P. Read the readiness codes for P0016, P0017, P0018, P0019, P000A, P000B, P000C, and P000D. Confirm the self-diagnosis is complete and that the codes are not pending.
Q. Check the DTC and data monitor threshold values. Using SSM, select Diagnosis > Select Vehicle > OBD System – Each System > ECM-EngineControl > OBD MODE test results (*1)
Are there NO DTCs present and the threshold values between -1500 to + 1500?
YES – The procedure is FINISHED.
NO – Proceed to STEP 6
STEP 6: Inspect the engine oil level and condition.
IMPORTANT: If the engine oil and filter were replaced prior to diagnosis, there is no need for inspection. Proceed to STEP: 7.
Is there any abnormal condition or Inappropriate oil level??
YES – Perform the engine oil and filter change. Repeat STEP 4 and STEP 5, then continue diagnosis.
NO – Proceed to STEP 7
STEP 7: Performed the outlined timing chain inspection outlined below:
IMPORTANT: If the timing chain was replaced prior to diagnosis, there is no need to perform the inspection. Proceed to STEP 8.
A. Using SSM, clear the fault memory.
B. Switch the ignition to the “OFF” position.
C. Disconnect the oil control solenoid valve connector on the bank with associated DTC.
D. Switch the ignition switch to the “ON” position.
E. Using SSM and the engine not running, read the “VVT Advance Angle Value” data monitor value.
F. Start the engine and read the “VVT Advance Angle Value” data monitor value for a duration of 10 seconds.
G. Switch the ignition to the “OFF” position.
Is the “VVT Advance Angle Value” data monitor value out of -10 degrees to +10 degrees?
YES – Adjust and / repair the timing chain as needed. Repeat STEP 4 or STEP 5, then continue diagnosis.
NO – Proceed to STEP 8.
STEP 8: Perform a visual inspection of the engine harness and the connectors specified below for any physical damage.
IMPORTANT: If the engine harness was replaced prior to diagnosis, there is no need to perform the inspection. Proceed to STEP 9.
Connectors:
Was there any damage found?
YES – Repair the damaged harness and / or connector. Repeat STEP 4 or STEP 5, then continue diagnosis.
NO – Proceed to STEP 9.
STEP 9: Perform the following Ohm tests:
A. Switch the ignition to the “OFF” position.
B. Disconnect the ECM and the Crank Position Sensor. Disconnect the Oil Control Valve and Cam Position Sensor associated with the DTC.
C. Measure the resistance between the following and record the results:
Connector E158 Pin 99 & Connector E38 Pin 2
Connector E158 Pin 78 & Connector E36 Pin 2
Connector E158 Pin 66 & Connector E10 Pin 1
Are there resistance values 1 Ohm or higher?
YES – Replace the damaged harness. Repeat STEP 4 or STEP 5, then continue diagnosis.
NO – Proceed to STEP 10.
STEP 10: Perform and engine oil pressure test as per the applicable Service Manual: Engine > Mechanical > Engine Oil Pressure > INSPECTION
Was the engine oil pressure found to be within specification?
NO – Inspect the engine oil strainer. Clean or replace any needed parts depending on the inspection results.
YES – Proceed to inspect the items listed below in the following order. Clean or replace the needed parts depending on the inspection results. Repeat STEP 4 and STEP 5, then continue diagnosis.
4 Affected Products
Vehicle
| MAKE | MODEL | YEAR |
| SUBARU | ASCENT | 2019-2022 |
1 Associated Document
Manufacturer Communications
NUMBER: 09-98-22
DATE: 02/20/23
MC-10232225-0001.pdf 1068.189KB

- OE-Level diagnostics on your smart device
- FREE Software updates - No subscriptions, no fees – EVER
- Full bi-directional control, live actuation test
- Supports 23 vehicle reset/relearn functions, including throttle matching, ABS bleeding, TPMS reset, etc.
- Live data mapping and freeze frame capturing


- CEL Doctor: The ANCEL AD310 is one of the best-selling OBD II scanners on the market and is recommended by Scotty Kilmer, a YouTuber and auto mechanic. It can easily determine the cause of the check engine light coming on. After repairing the vehicle's problems, it can quickly read and clear diagnostic trouble codes of emission system, read live data & hard memory data, view freeze frame, I/M monitor readiness and collect vehicle information
- Sturdy and Compact: Equipped with a 2.5 foot cable made of very thick, flexible insulation. It is important to have a sturdy scanner as it can easily fall to the ground when working in a car. The AD310 OBD2 scanner is a well-constructed mechanic tool with a sleek design. It weighs 12 ounces and measures 8.9 x 6.9 x 1.4 inches. Thanks to its compact design and light weight, transporting the device is not a problem. The buttons are clearly labelled and the screen is large and displays results clearly
- Accurate Fast and Easy to Use: The AD310 scanner can help you or your mechanic understand if your car is in good condition, provides exceptionally accurate and fast results, reads and clears engine trouble emission codes in seconds after you fixed the problem. This device will let you know immediately and fix the problem right away without any car knowledge. No need for batteries or a charger, get power directly from the OBDII Data Link Connector in your vehicle
- OBDII Protocols and Car Compatibility: Many cheap scan tools do not really support all OBD2 protocols. AD310 scanner as it can support all OBDII protocols such as KWP2000, J1850 VPW, ISO9141, J1850 PWM and CAN. This device also has extensive vehicle compatibility with 1996 US-based, 2000 EU-based and Asian cars, light trucks, SUVs, as well as newer OBD2 and CAN vehicles both domestic and foreign. Pls confirm with our customer service whether it is compatible with your vehicle before purchasing
- Home Necessity and Worthy to Own: This is an excellent code reader to travel or home with as it weighs less and it is compact in design. You can easily slide it in your backpack as you head to the garage, or put it on the dashboard, this will be a great fit for you. The AD310 is not only portable, but also accurate and fast in performance. Moreover, it covers various car brands and is suitable for people who just need a code reader to check their car

- MAINTAIN PEAK PERFORMANCE AND SAFETY ON THE ROAD - Easily find and fix the problem with your vehicle using the INNOVA 5610 bidirectional scan tool. This OBD2 scanner diagnostic tool provides real-time solutions to troubleshoot issues. Access OBD2 and OEM live data with ease, making it an essential car scanner diagnostic tool. Perfect for those seeking reliable car diagnostic scanner and code readers & scan tools for vehicles.
- PRO-LEVEL FUNCTIONALITIES - Use the INNOVA 5610’s Enhanced Data Stream to view live data for advanced systems like ABS, SRS, transmission, and engine. The Special Reset Function lets you use dealership-level re-learn procedures. This car diagnostic scanner is ideal for those needing a bidirectional scan tool or mechanic tools automotive for professional repairs. Compatible with select vehicle makes and models; not universal.
- COMMAND WITH BIDIRECTIONAL CONTROLS - The INNOVA 5610 bidirectional scan tool sends commands to test functions such as fuel pump on/off or retracting the electronic parking brake. With this car scanner diagnostic for all cars, you can operate like a pro. Ideal for those seeking a car code reader and reset tool or advanced fixd car diagnostic tool capabilities. Compatible with select vehicle makes and models; not universal.
- EASY TO USE - The INNOVA 5610 OBD2 scanner diagnostic tool supports English, Spanish, and French. Easily use this scanner for car on most 1996 - 2023 (2024 coming soon) OBD2 vehicles to verify repairs. Designed for ease of operation, it’s a dependable code reader for cars and trucks and check engine code reader. To confirm vehicle coverage, please utilize Innova's Coverage Checker.
- BUY AND DRIVE WITH CONFIDENCE - Backed by ASE-Certified support, this car scanner pairs with the RepairSolutions2 app, trusted by 4M users, for wireless OBD scanner functionality. With free updates and no subscription fees, this durable car computer diagnostic reader ensures you’re prepared for any repair. A must-have diagnostic scanner for vehicles.

- 2026 Advanced ECU Coding Scan Tool: Maximize the capabilities of your vehicles with the ArtiDiag Pro. This scan tool, seamlessly compatible with renowned models such as VW, A-U-D-I, SKODA, SEAT, BENZ, and more, empowers you to uncover hidden features, deactivate annoying functions, and code retrofitted components for peak performance. Ensure a backup before coding and steer clear of problems on low battery levels.
- Efficient Diagnostics with Bidirectional Control: Say goodbye to uncertainty, streamline diagnostics, and reclaim valuable time with ArtiDiag Pro scan tool. This bidirectional scan tool exceeds expectations, enabling targeted tests on individual actuators to swiftly identify and resolve issues. Covering lights, door locks, fuel and coolant systems, windows, wipers, EVAP, and more in vehicle components.
- 35+ Services Resolve 90% of Repair Challenges: Unleash maximum productivity with the ArtiDiag Pro, a scan tool that tackles 90% of maintenance issues through its 35 special functions. Effortlessly clear oil maintenance indicators with oil reset. Engage the EPB Reset for brake system management and establish precise alignment with the Steering Angle Reset to define the straight-line reference position for your vehicle.
- FCA Autoauth : This diagnostic tool supports Autoauth for FCA SGW/Renault, Chrysler, Jeep, Dodge, Fiat etc. 2017 and later. NOTE: Due to Product Upgrade, there is no Chrysler 12+8 adapter, the BMW-20 Adapter in the package any more. We are sincerely sorry for the inconvenience. NOTE: Please confirm compatibility before purchase.(Topdon Website>Support>Vehicle Coverage)
- Professional Customer Support: At TOPDON, your satisfaction is our unwavering commitment. Experience hassle-free support and a lifetime of expert assistance. Should you encounter any challenges, reach out to us at 833-629-4832. For returns, please damage the packaging to prevent Amazon from reselling it. Please be advised that after two years, a subscription fee of 249 Bucks will apply.
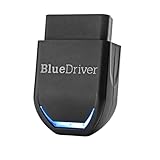
- [Diagnose Like a Pro] BlueDriver Pro Next-Gen is a professional OBD2 scanner and diagnostic tool that helps you scan, understand, and clear vehicle trouble codes with confidence. Turn your phone into a powerful car diagnostic scanner—no guesswork, no unnecessary repairs.
- [Read and Clear More Codes Than Ever] Read and clear more codes than basic car code readers. Access enhanced diagnostics for Check Engine, ABS, SRS, Airbag, TPMS, Transmission, and more on supported vehicles, including expanded coverage on newer model years.
- [Verified Fixes and Real-Time Data] Get unlimited, technician-verified repair reports matched to your VIN, with definitions, causes, and confirmed fixes. Monitor live vehicle data as you drive, view freeze frames, check smog readiness, and analyze Mode 6 test results.
- [Expanded Make & Model Coverage] Optimized for today’s vehicles with strong support for GM, Ford, Stellantis (RAM, Jeep, Chrysler), Toyota, Honda, Nissan, Mazda, Subaru, Hyundai, Mercedes-Benz, BMW, and VW. Enhanced communication on select 2024+ Nissan and Mazda models (see compatibility chart).
- [Gas Vehicles 1996+ & Select Light-Duty Trucks] Works with all gas-powered vehicles made in 1996 or newer, plus select light-duty trucks and diesels, including F-250, RAM 2500, Silverado, and Sierra. Built for daily drivers, family vehicles, and real-world truck use.
SEOCONTENT-START
Bulletin Number: 09-98-22; Date: 02/20/23 Page 1 of 12 SERVICE BULLETIN Continued… CAUTION: VEHICLE SERVICING PERFORMED BY UNTRAINED PERSONS COULD RESULT IN SERIOUS INJURY TO THOSE PERSONS OR TO OTHERS. Subaru Service Bulletins are intended for use by professional technicians ONLY. They are written to inform those technicians of conditions that may occur in some vehicles, or to provide information that could assist in the proper servicing of the vehicle. Properly trained technicians have the equipment, tools, safety instructions, and know-how to do the job correctly and safely. If a condition is described, DO NOT assume that this Service Bulletin applies to your vehicle, or that your vehicle will have that condition. Subaru of America, Inc. is ISO 14001 Compliant ISO 14001 is the international standard for excellence in Environmental Management Systems. Please recycle or dispose of automotive products in a manner that is friendly to our environment and in accordance with all local, state and federal laws and regulations. NUMBER: 09-98-22 DATE: 02/20/23 APPLICABILITY: 2019-22MY Ascent SUBJECT: Camshaft Position Correlation / DTCs: P0016, P0017, P0018, P0019, P0014, P0024, P0128, P2109 INTRODUCTION: This bulletin announces the availability of new reprograming files for the Engine Control Module (ECM) developed to remedy the following DTCs: • P0016: Crankshaft Position – Camshaft Position Correlation Bank 1 Sensor A • P0017: Crankshaft Position – Camshaft Position Correlation Bank 1 Sensor B • P0018: Crankshaft Position – Camshaft Position Correlation Bank 2 Sensor A • P0019: Crankshaft Position – Camshaft Position Correlation Bank 2 Sensor B • P0014: “B” Camshaft Position – Timing Over-Advanced Or System Performance Bank 1 • P0024: “B” Camshaft Position – Timing Over-Advanced Or System Performance Bank 2” • P0128: Coolant Thermostat (Engine Coolant Temperature Below Thermostat Regulating Temperature) • P2109: Throttle/Pedal Position Sensor “A” Minimum Stop Performance These files contain enhanced logic for the self-diagnosis program of the ECM. If any of the DTCs listed above are found to be stored in the ECM, follow the procedures outlined below. PACK FILE APPLICABILITY: Model MY File Description Decryption Keyword New CID # Ascent 19 22765AL738.pak F55756A0 LT8DA00A 20 22765AN505.pak A4FE1157 LT8F500C00G 21 22765AP823.pak F7FFB51D LT8H500D00G 22 22765AS002.pak A7BC72B6 LT8J400F00G These files are included in the November 2022 SSM software update. ATTENTION: GENERAL MANAGER q PARTS MANAGER q CLAIMS PERSONNEL q SERVICE MANAGER q IMPORTANT – All Service Personnel Should Read and Initial in the boxes provided, right. ©2022 Subaru of America, Inc. All rights reserved. Bulletin Number: 09-98-22; Date: 02/20/23 Page 2 of 12 SERVICE PROCEDURE / INFORMATION: Continued… Bulletin Number: 09-98-22; Date: 02/20/23 Page 3 of 12 Continued… (*1) Instructions on how to perform and read the OBD MODE test results. This procedure will be required when performing the diagnostic Steps outlined below. Read the following data monitor values: 1. MID – $35 TID – $8B 2. MID – $35 TID – $8C 3. MID – $35 TID – $8D 4. MID – $35 TID – $8E 5. MID – $36 TID – $8B 6. MID – $36 TID – $8C 7. MID – $36 TID – $8D 8. MID – $36 TID – $8E Bulletin Number: 09-98-22; Date: 02/20/23 Page 4 of 12 Continued… STEP 1: Are DTCs P0016,17,18 or 19 found displayed within the fault memory? NO – Perform the reprograming procedure outlined in STEP 2 ONLY. The service procedure is finished, no further action is required. YES – Proceed to STEP: 2 and continue to the proceeding steps. STEP 2: Reprogram the ECM following the normal FlashWrite procedure. Subaru of America, Inc. (SOA) highly recommends connecting either the Subaru Midtronics DCA8000 Dynamic Diagnostic Charging System or the Subaru Midtronics GR8-1100 Diagnostic Battery Charger to the vehicle and utilizing the Power Supply Mode feature anytime a vehicle control module is being reprogrammed. Once the Midtronics charger is connected to the vehicle, if the battery is fully charged, it takes less than three (3) minutes to boot-up the charger, select the Power Supply Mode, and have the battery voltage stabilized and ready for reprogramming. NOTES: • For instructions on using the Power Supply Mode, reference the applicable User Manual for the Midtronics DCA-8000 Dynamic Diagnostic Charging System and the Midtronics GR8- 1100 Diagnostic Battery Charger on STIS. • Confirm all electrical loads such as lights, audio, HVAC, seat heaters, and rear defroster are all switched OFF before setting up the charger for Power Supply Mode. • Select the correct battery type (Enhanced Flooded, Flooded, Gel, AGM or AGM Spiral). • Input the CCA which matches the vehicle’s battery. NOTE: OE and replacement batteries have different CCA ratings. Always confirm the battery’s CCA rating before proceeding. • If using a DCA-8000 Dynamic Diagnostic Charging System, set the power supply voltage to 13.5 Volts. • DO NOT connect the DST-i or DST-010 until the Power Supply mode function has completed its battery test mode and the Charging Voltage has dropped to and shows a steady 13.5 Volts on the display. • Once Power Supply Mode reaches a steady 13.5 Volts, connect the DST-i or DST-010 to the OBD connector and proceed with initiating the normal FlashWrite reprogramming process. • Amperage will fluctuate based upon the vehicle’s demand for power. NOTE: If the voltage rises beyond 14 Volts while programming is in process, the procedure will abort. This can indicate a need to test or charge the vehicle battery before any further attempt at programming is made. • ALWAYS set the power supply voltage to 13.5 Volts when using Power Supply Mode. NEVER turn the ignition switch on when charging at voltages 15 Volts or higher. REMINDER: If the DCA-8000 or GR8-1100 indicates the vehicle’s battery must be charged, charge the battery fully before proceeding to reprogram the vehicle while using the Power Supply Mode. Bulletin Number: 09-98-22; Date: 02/20/23 Page 5 of 12 Continued… NOTE: Control module failures resulting from battery discharge during reprogramming are not a matter for warranty. Should any DTCs reset after the reprogramming update is performed, diagnose per the procedure outlined in the applicable Service Manual. VERY IMPORTANT: This information is applicable to the Subaru Midtronics DCA-8000 Dynamic Diagnostic Charging System and the Subaru Midtronics GR8-1100 Diagnostic Battery Charger ONLY. It does not apply to any other brand / type of “generic” battery charger whatsoever. ONLY the DCA-8000 and the GR8- 1100 and their Power Supply Mode feature have been tested and approved by SOA. End of procedure for vehicles WITHOUT DTCs P0016, P0017, P0018, or P0019 store in the ECM. STEP 3: Using SSM, read the value the following four data monitor items (ALWAYS Save SSM Data): 1. VVT Initial Position Learning Value #1 2. VVT Initial Position Learning Value #2 3. VVT EX Initial Position Learning Value #1 4. VVT EX Initial Position Learning Value #2 Are all of the data monitor item values within the acceptable range listed in the table above? YES – proceed to STEP 5. NO – proceed to STEP 4. STEP 4: Perform the procedures outlined in “#7 INSPECTION MODE N” and “#12 INSPECTION MODE T”. Then re-check the threshold values in STEP 3 along with the OBD MODE test results (*1) “#7 INSPECTION MODE N” procedure. Using the applicable Service Manual, refer to: DIAGNOSTICS > ENGINE> Inspection Mode> #7 DRIVE CYCLE N A. Confirm the battery voltage is 12 Volts or more and the fuel tank is at least half full. B. Using SSM, clear the fault memory. Prepare the SSM to be kept in the vehicle during the following road test. C. With gear selector in the park position (neutral for MT models), idle the engine at approximately 2500 rpm for 40 seconds or more. Bulletin Number: 09-98-22; Date: 02/20/23 Page 6 of 12 Continued… D. Move the gear selector into the drive position (appropriate gear range for MT models. Accelerate the vehicle to 31 mph or more. E. When the vehicle speed is 31 mph or more, release the accelerator pedal and brake pedal (and clutch for MT models) and allow the vehicle to decelerate with any gear shift changes. Maintain the engine speed between 2500 rpm to 1900 rpm for 5 seconds during this deceleration. NOTE: Depending on road conditions, an appropriate gear might have to be selected to maintain the desired engine speed. The vehicle speed is not important as long as the engine speed is within range during the declaration. F. In a suitable area, safely bring the vehicle full stop and allow it to idle for 5 minutes. “#7 INSPECTION MODE N” procedure is complete. Proceed to “#12 INSPECTION MODE T” procedure. “#12 INSPECTION MODE T” procedure. Using the applicable Service Manual, refer to: DIAGNOSTICS > ENGINE> Inspection Mode > #12 INSPECTION MODE T A. Confirm the battery voltage is 12 Volts or more the fuel is at least half full. B. Start the engine. C. Allow the engine to idle for at least 3 minutes. D. Accelerate the vehicle speed to approximately 37 mph. E. While maintaining approximately 37 mph, cycle the accelerator from a 0% to 20% opening angle. Try to keep these cycles within 5 second intervals. Maintain this driving pattern for 20 minutes or more. NOTE: It is acceptable to stop the vehicle if needed depending on road/traffic conditions during this driving pattern. F. Release the accelerator pedal and brake pedal (and clutch for MT models) and allow the vehicle to decelerate with any gear shift changes. G. In a suitable area, safely bring the vehicle full stop and turn off the engine. “#12 INSPECTION MODE T” procedure is complete. Read the threshold values from STEP 3 (pictured below) and the OBD MODE test results (*1) Bulletin Number: 09-98-22; Date: 02/20/23 Page 7 of 12 Continued… Are all of the data monitor item values within the acceptable range listed in the table below? Are the threshold values between -1500 to + 1500? YES – The procedure is FINISHED. NO – Repeat STEP 4 ONE TIME ONLY and if the result answer is still “NO”, proceed to STEP 6. STEP 5: Perform the “#7 INSPECTION MODE N” and “#12 INSPECTION MODE T” procedure. “#7 INSPECTION MODE N” procedure. Using the applicable Service Manual, refer to: DIAGNOSTICS > ENGINE> Inspection Mode > #7 INSPECTION MODE N A. Confirm the battery voltage is 12 Volts or more the fuel is at least half full. B. Using SSM, clear the fault memory. Prepare the SSM to be kept in the vehicle during the following road test. C. With gear selector in the park position (neutral for MT models), idle the engine at approximately 2500 rpm for 40 seconds or more. D. Move the gear selector into the drive position (appropriate gear range for MT models. Accelerate the vehicle to 31 mph or more. E. When the vehicle speed is 31 mph or more, release the accelerator pedal and brake pedal, allow the vehicle to decelerate without any gear shift changes. Maintain the engine speed between 2500 rpm to 1900 rpm for 5 seconds during this deceleration Bulletin Number: 09-98-22; Date: 02/20/23 Page 8 of 12 Continued… NOTE: Depending on road conditions, an appropriate gear might have to be selected to maintain the desired engine speed. The vehicle speed does is not important as long as the engine speed is within range during the declaration. F. In a suitable area, safely bring the vehicle full stop and allow it to idle for 5 minutes. “#7 INSPECTION MODE N” procedure is complete. Proceed to “#12 INSPECTION MODE T” procedure. “#12 INSPECTION MODE T” procedure. Using the applicable Service Manual, refer to: DIAGNOSTICS > ENGINE> Inspection Mode > #12 INSPECTION MODE T H. Confirm the battery voltage is 12 Volts or more the fuel is at least half full. I. Start the engine. J. Allow the engine to idle for at least 3 minutes. K. Accelerate the vehicle speed to approximately 37 mph. L. While maintaining approximately 37 mph, cycle the accelerator from a 0% to 20% opening angle. Try to keep these cycles within 5 second intervals. Maintain this driving pattern for 20 minutes or more. NOTE: It is acceptable to stop the vehicle if needed depending on road/traffic conditions during this driving pattern. M. Release the accelerator pedal and brake pedal (and clutch for MT models) and allow the vehicle to decelerate with any gear shift changes. N. In a suitable area, safely bring the vehicle full stop and turn off the engine. “#12 INSPECTION MODE T” procedure is complete. O. Using SSM, select Diagnosis > Each System > Engine > DTC > Readiness Code Bulletin Number: 09-98-22; Date: 02/20/23 Page 9 of 12 Continued… P. Read the readiness codes for P0016, P0017, P0018, P0019, P000A, P000B, P000C, and P000D. Confirm the self-diagnosis is complete and that the codes are not pending. Q. Check the DTC and data monitor threshold values. Using SSM, select Diagnosis > Select Vehicle > OBD System – Each System > ECM-EngineControl > OBD MODE test results (*1) Are there NO DTCs present and the threshold values between -1500 to + 1500? YES – The procedure is FINISHED. NO – Proceed to STEP 6 STEP 6: Inspect the engine oil level and condition. IMPORTANT: If the engine oil and filter were replaced prior to diagnosis, there is no need for inspection. Proceed to STEP: 7. Is there any abnormal condition or Inappropriate oil level?? YES – Perform the engine oil and filter change. Repeat STEP 4 and STEP 5, then continue diagnosis. NO – Proceed to STEP 7 STEP 7: Performed the outlined timing chain inspection outlined below: Bulletin Number: 09-98-22; Date: 02/20/23 Page 10 of 12 Continued… IMPORTANT: If the timing chain was replaced prior to diagnosis, there is no need to perform the inspection. Proceed to STEP 8. A. Using SSM, clear the fault memory. B. Switch the ignition to the “OFF” position. C. Disconnect the oil control solenoid valve connector on the bank with associated DTC. D. Switch the ignition switch to the “ON” position. E. Using SSM and the engine not running, read the “VVT Advance Angle Value” data monitor value. F. Start the engine and read the “VVT Advance Angle Value” data monitor value for a duration of 10 seconds. G. Switch the ignition to the “OFF” position. Is the “VVT Advance Angle Value” data monitor value out of -10 degrees to +10 degrees? YES – Adjust and / repair the timing chain as needed. Repeat STEP 4 or STEP 5, then continue diagnosis. NO – Proceed to STEP 8. STEP 8: Perform a visual inspection of the engine harness and the connectors specified below for any physical damage. IMPORTANT: If the engine harness was replaced prior to diagnosis, there is no need to perform the inspection. Proceed to STEP 9. Connectors: • ECM • Oil Control Solenoid • CAM Position Sensor • Crank Position Sensor Was there any damage found? YES – Repair the damaged harness and / or connector. Repeat STEP 4 or STEP 5, then continue diagnosis. NO – Proceed to STEP 9. Bulletin Number: 09-98-22; Date: 02/20/23 Page 11 of 12 Continued… STEP 9: Perform the following Ohm tests: A. Switch the ignition to the “OFF” position. B. Disconnect the ECM and the Crank Position Sensor. Disconnect the Oil Control Valve and Cam Position Sensor associated with the DTC. C. Measure the resistance between the following and record the results: Connector E158 Pin 99 & Connector E38 Pin 2 Connector E158 Pin 78 & Connector E36 Pin 2 Connector E158 Pin 66 & Connector E10 Pin 1 Are there resistance values 1 Ohm or higher? YES – Replace the damaged harness. Repeat STEP 4 or STEP 5, then continue diagnosis. NO – Proceed to STEP 10. STEP 10: Perform and engine oil pressure test as per the applicable Service Manual: Engine > Mechanical > Engine Oil Pressure > INSPECTION Was the engine oil pressure found to be within specification? NO – Inspect the engine oil strainer. Clean or replace any needed parts depending on the inspection results. YES – Proceed to inspect the items listed below in the following order. Clean or replace the needed parts depending on the inspection results. Repeat STEP 4 and STEP 5, then continue diagnosis. • Oil Passages in the Chain Cover • Oil Passages in the Cam Sprocket • Cam Carriers (possible scoring) WARRANTY / CLAIM INFORMATION: For vehicles within the Basic New Car Limited Warranty period, Emissions Defect Warranty or covered by an active Subaru Added Security Classic or Gold plan, this repair may be submitted using the following claim information: For ECM reprograming ONLY Labor Description Labor Operation # Labor Time Fail Code REPROGRAMMING, ENGINE CONTROL MODULE* A455-288 .4 UPG-48 *New/Installed CID number will be required for claim submission Bulletin Number: 09-98-22; Date: 02/20/23 Page 12 of 12 For Situations Continuing after Step 4 or 5 of the Work Procedure. When further Diagnosis and repairs are needed an additional job line / repair claim can be submitted. Please refer to the Subaru Labor Time Guide for warranty time and coverage. Below is a possible EXAMPLE. For vehicles within the Basic New Car Limited Warranty period or covered by an active Subaru Added Security Classic or Gold plan, a repair may be submitted using the following claim information: Labor Description Labor Operation # Labor Time Fail Code OBDII OIL CHANGE TO FIX AVCS OPERATION A455-443 1.0 BAT-42 IMPORTANT REMINDERS: • SOA strongly discourages the printing and/or local storage of service information as previously released information and electronic publications may be updated at any time. • Always check for any open recalls or campaigns anytime a vehicle is in for servicing. • Always refer to STIS for the latest service information before performing any repairs.
SEOCONTENT-END
This product presentation was made with AAWP plugin.