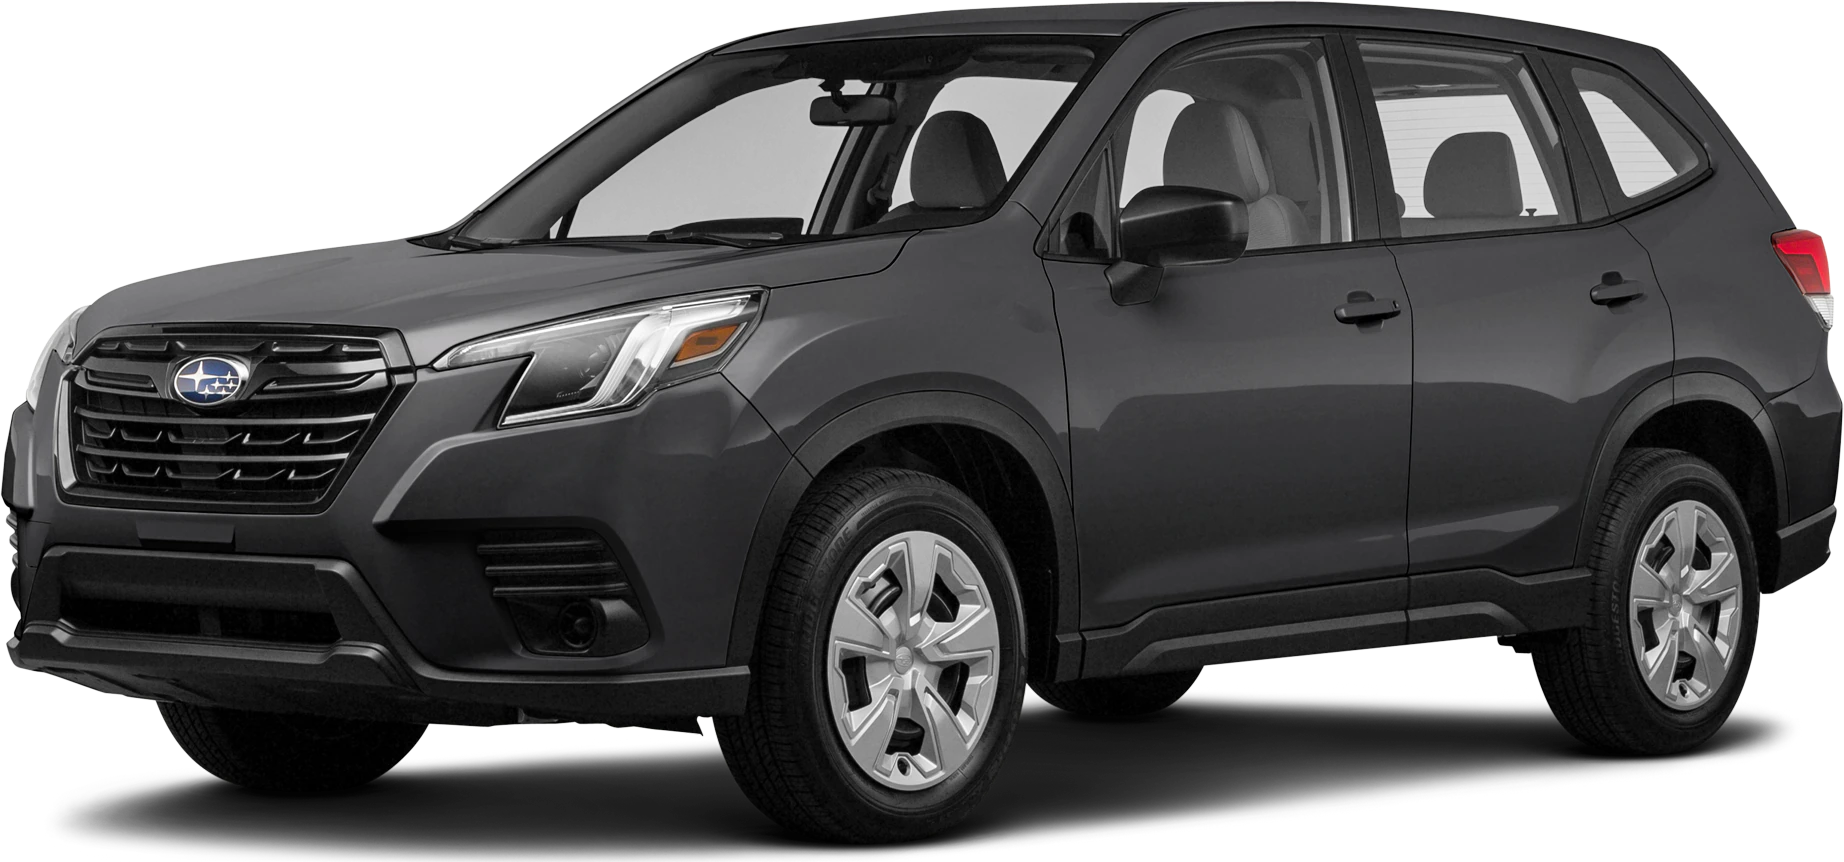
Accessory Installation Guide
| 2022MY Forester Long Range Push Start Remote Engine Start Kit | H101SSJ000 |
INSTALLATION INSTRUCTIONS
PART NUMBER: H101SSJ000
DESCRIPTION: LONG RANGE PUSH START REMOTE ENGINE START SYSTEM FORESTER
VEHICLE PREPARATION
1. Using a 10mm socket/ratchet, disconnect the negative battery cable. (FIGURE A)
NOTE: Do not disconnect the battery terminal from the battery post.
2. Open the glove box and press inward on the sides of the glove box to disengage the retaining tabs from the glove box inner cover. Disconnect the strut to remove the glove box. (FIGURE B)
3. Using a panel removal tool, carefully remove the right side dashboard panel by starting at the bottom access notch and working upward to disengage four (4) pressure clips. (FIGURE C)
4. Using a panel removal tool, carefully lift upward to disengage five (5) pressure clips and then pull rearward to remove the passenger’s side ornament panel. (FIGURE D)
5. Using a panel removal tool, carefully press downward to disengage three (3) pressure clips to remove the passenger’s side under dashboard finisher panel. (FIGURE E)
6. Using a Phillips screwdriver, remove six (6) Phillips screws securing the glove box inner cover. Disengage the six (6) pressure clips and disconnect the glove box lamp connector to remove the glove box inner cover. (FIGURE F)
REMOTE ENGINE START ECU MOUNTING
1. Locate the glove box inner cover and remote engine start ECU. Using alcohol, clean the back side of the glove box inner cover and ECU, as shown. (FIGURE G)
2. Using the supplied double sided tape, remove the two (2) small release liners and attach the tape to the glove box inner cover. Ensure the tape is positioned against the vertical character line and fl at against the multi-level inner cover. Press firmly in place for at least 30 seconds. (FIGURE H)
NOTE: Ensure the double sided tape is positioned away from any obstructions on the glove box inner cover.
3. Remove the one (1) large release liner from the double sided tape and attach the remote engine start ECU. Ensure the corner of the ECU, closest to the small gray connector, is flush with the upper left corner of the tape, as shown. Press firmly in place for at least 30 seconds. (FIGURE I)
NOTE: Ensure the ECU connectors will be facing toward the passenger’s side of the vehicle when the inner cover is replaced.
PRE-ARRANGED JUMPER HARNESS CONNECTIONS
1. Locate and release the vehicle’s 6-pin and 2-pin pre-fit connectors secured to the vehicle’s wire harness with breakaway tape near the upper right, passenger’s side glove box area. (FIGURE J)
2. When the vehicle’s 6-pin and 2-pin pre-fi t connectors are free from the breakaway tape, unplug and discard the 2-pin mating connector/wire jumper. (This is used for the power window interrupt circuit).
3. Plug the remote engine start jumper harness 6-pin and 2-pin connectors into the corresponding pre-fit connectors. (FIGURE K)
4. Using one (1) of the supplied 39cm tie wraps, secure the pre-arranged jumper harness connectors to the vehicle’s wire harness. Using two (2) of the supplied 39cm tie wraps, secure the pre-arranged jumper harness to the vehicle’s wire harness, as shown. Trim off the excess tie wraps. (FIGURE L)
5. Plug the pre-arranged jumper harness 12-pin connector into the 12-pin white port on the remote engine start ECU, previously mounted to the back side of the glove box inner cover (Step 5).
PANEL RE-ASSEMBLY
1. Re-connect the glove box lamp connector to the lamp on the glove box inner cover. Re-install the glove box inner
cover by engaging the six (6) pressure clips and secure with six (6) Phillips screws.
2. Re-install the passenger’s side under dashboard finisher panel by engaging the three (3) pressure clips.
3. Re-install the passenger’s side ornament panel by engaging the five (5) pressure clips.
4. Re-install the right side dashboard panel by engaging the four (4) pressure clips.
5. Re-install the glove box and strut.
6. At the end of the installation, insert the Quick Reference Cards into the Owner’s Information Kit.
UNDER HOOD WARNING LABEL MOUNTING
1. Using alcohol, clean the top of the air intake plenum, near the radiator core support.
NOTE: Ensure the air intake plenum is completely dry.
2. Remove the release liner from the under hood warning label and secure to the top of the air intake plenum, as shown. (FIGURE M)
SYSTEM POWER-UP
1. After all the connections are complete, re-connect the vehicle’s negative battery cable. Using a 10mm socket/torque wrench, tighten the 10mm nut to 7.5 Nm +/- 2 Nm (0.76 Kgf-m +/- 0.2 Kgf-m, 5.5 ft-lbs +/- 1.5 ft-lbs).
2. Start the vehicle at least one (1) time using the Access key prior to activating the remote engine start system. This is required to allow the vehicle’s electronic systems to re-synchronize.
3. With the vehicle running via the Access key, verify that the instrument cluster airbag light turns off . If the airbag light remains on, refer to the vehicle service information for troubleshooting.
4. Refer to the vehicle Owner’s manual for the Power Window Reset Procedure to restore the power window functions.
SYSTEM REGISTRATION
ENSURE THE SOFTWARE VERSION HAS BEEN UPDATED TO THE LATEST REVISION BEFORE ATTEMPTING SYSTEM REGISTRATION.
DST-i SETUP
Plug the DST-i diagnostic plug diagnostic connector into the vehicle’s
⇓
Plug the DST-i USB plug into a laptop Network-Enabled
⇓
Select/Open the SSM4 software on the laptop Network-Enabled
REGISTRATION
1. PRESS IMMOBILIZER ETC. REGISTRATION AND PRESS SELECT
2. PRESS FORESTER AND PRESS SELECT
With an Access key inside the vehicle turn ON the ignition
3. PRESS H TYPE FOR PUSH START MODELS PRESS CONFIRMED AND WAIT FOR LAPTOP TO ESTABLISH CONNECTION
4. PRESS REMOTE ENGINE START CM REGISTRATION AND PRESS CONFIRMED
5. ENTER AUTHENTICATION KEY AND PRESS CONNECTION
6. PRESS YES TO EXECUTE REGISTRATION
7. REGISTRATION SUCCESSFUL, PRESS OK
Registration Complete
POST INSTALLATION CHECKLIST
1. REMOTE ENGINE START- Ensure the Access key is removed from the vehicle, the engine hood, all doors and trunk are closed. Press the START button on the remote start transmitter two (2) times within three (3) seconds. The vehicle’s parking lights should flash and the vehicle’s horn should honk one (1) time and then the vehicle should crank and start. Once started, the transmitter LED will flash two (2) times and the parking lights will turn on and stay on signifying the vehicle is running. The transmitter LED will flash one (1) time every three (3) seconds signifying the vehicle is still running.
NOTE: If the vehicle does NOT respond to the remote start transmitters, proceed to SECTION 12 for the TRANSMITTER PROGRAMMING procedure.
2. CUSTOMER TAKE OVER – While the vehicle is running by the remote engine start, wait at least five (5) seconds and then confirm that all functions (lock, unlock & trunk, but not panic) operate properly on the Access key (FACTORY transmitter). Once the Access key functionality is confirmed, press the UNLOCK button on the Access key, open the driver’s door and enter the vehicle with the Access key. Press and hold the brake pedal, press the ENGINE START/STOP button on the dashboard one (1) time and move the shift position lever from the “P” position to the “D” position and back to the “P” position. The remote engine start should shut down and the transmitter LED should fl ash three (3) times indicating the system has shut down, but the engine should remain running. Press the ENGINE START/STOP button on the dashboard one (1) time to turn off the vehicle.
3. ACTIVATION WITH DOOR UNLOCKED – Ensure the Access key is removed from the vehicle, the engine hood, all doors and trunk are closed and the driver’s door is unlocked. Press the START button on the remote start transmitter two (2) times within three (3) seconds. The vehicle’s parking lights should flash and the vehicle’s horn should honk six (6) times. The vehicle should not start with the driver’s door unlocked.
4. ACTIVATION WITH DOOR OPEN – Ensure the Access key is removed from the vehicle and the engine hood and trunk are closed. Open the driver’s door and press the START button on the remote start transmitter two (2) times within three (3) seconds. The vehicle’s parking lights should flash and the vehicle’s horn should honk six (6) times. The vehicle should not start with any door or trunk opened.
5. HOOD SAFETY SWITCH – Open the engine hood and activate the remote engine start. The vehicle’s parking lights should flash and the vehicle’s horn should honk two (2) times. The vehicle should not start when the hood safety switch is activated.
6. HEATER / AC FUNCTION – With the Access key inside the vehicle, press the ENGINE START/STOP button on the dashboard two (2) times to turn ON the ignition. Preset the vehicle’s heater or air conditioning to the ON position. Press the ENGINE START/STOP button on the dashboard one (1) time to turn OFF the ignition and remove the Access key from the vehicle. Activate the remote engine start and verify that the heater or air conditioning turns on to the preset setting for manual climate controlled vehicles or turns to the “Full Auto” setting for electronic climate control vehicles.
7. 15 MINUTE RUN TIME – Activate the remote engine start and allow the system to run for the 15 minute preset run time.
The remote engine start should shut down after 15 minutes (+/- 10 seconds).
8. TRANSMITTER FUNCTIONALITY VERIFICATION – Activate the remote engine start using both of the supplied single button remote start transmitters.
9. ACCESS KEY (Factory Transmitter) VERIFICATION – Activate the remote engine start using an Access key by pressing the LOCK button two (2) times within two (2) seconds and then pressing and holding the LOCK button for three (3) seconds until the parking lights flash.
FUNCTIONAL TESTING IS NOW COMPLETE.
TRANSMITTER PROGRAMMING
1. Open the driver’s door and enter the vehicle. The driver’s door must remain open throughout the entire programming process. Ensure all other vehicle doors, the engine hood and trunk are closed.
2. Verify that the transmission shifter is in the “park” position.
3. Turn the ignition “ON” then “OFF”, “ON” then “OFF”, “ON” then “OFF”, then back “ON” and leave on throughout the entire programming process. (Turn ON the ignition by pressing the Engine Start/Stop button on the dashboard two (2) times with an Access Key inside the vehicle. Do not press the brake pedal or the engine will start.) (ON/OFF ignition cycles must be completed within twenty (20) seconds.)
4. The system will fl ash the side marker lights, taillights and parking lights and honk the horn three (3) times indicating that the system has entered transmitter learn mode.
5. Press and hold the button on the transmitter to be learned for three (3) seconds until the system flashes the side marker lights, taillights and parking lights and honks the horn one (1) time, indicating that the system has learned the transmitter. Release the button. Upon successful programming, the remote start transmitter may flash/beep one (1) time.
6. Repeat step five (5) for additional transmitters. The system will accept up to eight (8) transmitters.
7. Turn the ignition OFF to exit transmitter learn mode.
8. Return to SECTION 11 to perform the POST INSTALLATION CHECKLIST.
NOTE: The system will exit the transmitter learn mode if the ignition is turned OFF, the driver’s door is closed or thirty (30) seconds of inactivity.
H101SSJ000
2022MY Forester Long Range Push Start Remote Engine Start Kit
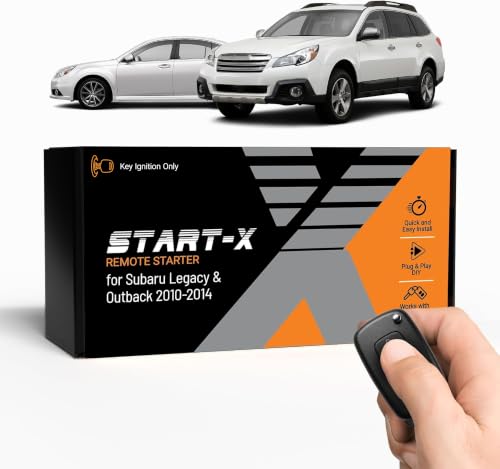
- 𝗩𝗲𝗵𝗶𝗰𝗹𝗲 𝗰𝗼𝗺𝗽𝗮𝘁𝗶𝗯𝗶𝗹𝗶𝘁𝘆: Subaru Legacy and Outback (2010, 2011, 2012, 2013, 2014) models with key ignition.
- 𝗩𝗲𝗵𝗶𝗰𝗹𝗲 𝗿𝗲𝗾𝘂𝗶𝗿𝗲𝗺𝗲𝗻𝘁𝘀: This kit is designed for key blade ignition vehicles only. Not compatible with push-to-start vehicles. Gas and automatic transmission only. Factory remote required. Some vehicle disassembly may be required; see installation guide for details.
- 𝗗𝗜𝗬 𝗿𝗲𝗺𝗼𝘁𝗲 𝘀𝘁𝗮𝗿𝘁 𝗸𝗶𝘁: Add remote start functionality to your vehicle for a fraction of the cost. Enjoy a comfortable driving experience from the start by pre-heating and defrosting your windshield in the winter or cooling down your vehicle before entering in the summer.
- 𝗨𝘀𝗲 𝘆𝗼𝘂𝗿 𝗳𝗮𝗰𝘁𝗼𝗿𝘆 𝗿𝗲𝗺𝗼𝘁𝗲: Start your vehicle by pressing lock 3X on your existing OEM key fob. Press lock 3X again to turn off vehicle. Factory remote required – no remote is included in this kit. The distance you can remote start from is the same distance you can lock/unlock your vehicle. Increase your remote start distance with a Start-X range extender kit (sold separately).
- 𝗢𝗽𝘁𝗶𝗼𝗻𝗮𝗹 𝗿𝗲𝗺𝗼𝘁𝗲 𝗿𝗮𝗻𝗴𝗲 𝗲𝘅𝘁𝗲𝗻𝗱𝗲𝗿 𝗸𝗶𝘁: Increase your remote start distance up to half a mile. Includes two separate remotes used to start your vehicle in place of your OEM key fob. Available in 1-way (up to 2000-feet) and 2-way (up to 3000-feet) systems.
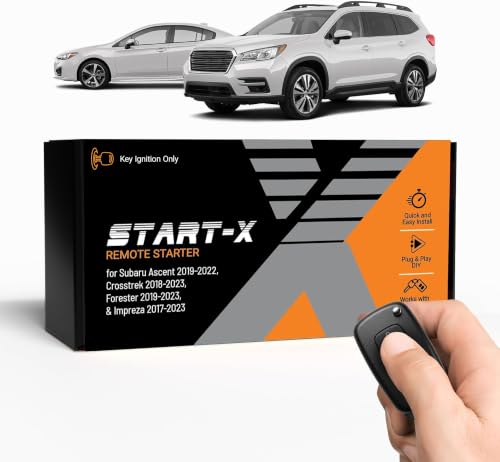
- 𝗩𝗲𝗵𝗶𝗰𝗹𝗲 𝗰𝗼𝗺𝗽𝗮𝘁𝗶𝗯𝗶𝗹𝗶𝘁𝘆: Subaru Ascent (2019, 2020, 2021, 2022), Crosstrek (2018, 2019, 2020, 2021, 2022, 2023), Forester (2019, 2020, 2021, 2022, 2023), and Impreza (2017, 2018,2019, 2020, 2021, 2022, 2023) models with key ignition.
- 𝗩𝗲𝗵𝗶𝗰𝗹𝗲 𝗿𝗲𝗾𝘂𝗶𝗿𝗲𝗺𝗲𝗻𝘁𝘀: This kit is designed for key blade ignition vehicles only. Not compatible with push-to-start vehicles. Gas and automatic transmission only. Factory remote required. Some vehicle disassembly may be required; see installation guide for details. Windows PC is required to complete installation.
- 𝗗𝗜𝗬 𝗿𝗲𝗺𝗼𝘁𝗲 𝘀𝘁𝗮𝗿𝘁 𝗸𝗶𝘁: Add remote start functionality to your vehicle for a fraction of the cost. Enjoy a comfortable driving experience from the start by pre-heating and defrosting your windshield in the winter or cooling down your vehicle before entering in the summer.
- 𝗨𝘀𝗲 𝘆𝗼𝘂𝗿 𝗳𝗮𝗰𝘁𝗼𝗿𝘆 𝗿𝗲𝗺𝗼𝘁𝗲: Start your vehicle by pressing lock 3X on your existing OEM key fob. Press lock 3X again to turn off vehicle. Factory remote required – no remote is included in this kit. The distance you can remote start from is the same distance you can lock/unlock your vehicle. Increase your remote start distance with a Start-X range extender kit (sold separately).
- 𝗢𝗽𝘁𝗶𝗼𝗻𝗮𝗹 𝗿𝗲𝗺𝗼𝘁𝗲 𝗿𝗮𝗻𝗴𝗲 𝗲𝘅𝘁𝗲𝗻𝗱𝗲𝗿 𝗸𝗶𝘁: Increase your remote start distance up to half a mile. Includes two separate remotes used to start your vehicle in place of your OEM key fob. Available in 1-way (up to 2000-feet) and 2-way (up to 3000-feet) systems.

- 𝗩𝗲𝗵𝗶𝗰𝗹𝗲 𝗰𝗼𝗺𝗽𝗮𝘁𝗶𝗯𝗶𝗹𝗶𝘁𝘆: Subaru Forester (2019, 2020, 2021), Legacy (2018, 2019), and Outback (2018, 2019) models with push-to-start ignition. Not compatible with Canadian vehicles.
- 𝗩𝗲𝗵𝗶𝗰𝗹𝗲 𝗿𝗲𝗾𝘂𝗶𝗿𝗲𝗺𝗲𝗻𝘁𝘀: This kit is designed for push-to-start ignition vehicles only. Not compatible if you start the vehicle by turning a key blade. Gas and automatic transmission only. Factory remote required. Some vehicle disassembly may be required; see installation guide for details. Windows PC is required to complete installation.
- 𝗪𝗔𝗥𝗡𝗜𝗡𝗚: 2022-2023 Forester models will lose the ability to unlock vehicle by pressing the unlock button when vehicle is remote started. You will need to physically insert the key to unlock. For all other vehicles, the OEM remote button will work to unlock.
- 𝗗𝗜𝗬 𝗿𝗲𝗺𝗼𝘁𝗲 𝘀𝘁𝗮𝗿𝘁 𝗸𝗶𝘁: Add remote start functionality to your vehicle for a fraction of the cost. Enjoy a comfortable driving experience from the start by pre-heating and defrosting your windshield in the winter or cooling down your vehicle before entering in the summer.
- 𝗨𝘀𝗲 𝘆𝗼𝘂𝗿 𝗳𝗮𝗰𝘁𝗼𝗿𝘆 𝗿𝗲𝗺𝗼𝘁𝗲: Start your vehicle by pressing lock 3X on your existing OEM key fob. Press lock 3X again to turn off vehicle. Factory remote required – no remote is included in this kit. The distance you can remote start from is the same distance you can lock/unlock your vehicle. Increase your remote start distance with a Start-X range extender kit (sold separately).

- Remote Start Kit
- Genuine Subaru Part Number: H001SFL001
- Crosstrek 2018
- Impreza 2017 2018
- For push start cars

- Compatibility : This remote key fits for Subaru Ascent 2019-2024,for Crosstrek 2019-2023,for Forester 2019-2023,for Impreza 2017-2023,for Legacy 2018-2021,for Outback 2018-2023,for BRZ 2022 2023 2024,for WRX STI 2019-2021
- Confirm It Fits for Your Car: Please check the appearance of the key fob(including key buttons and shape); then check if your key has the same part number,Frequency: 433MHz,Chip: 8A,Board ID: 231451-7000,FCC ID: HYQ14AHK,OEM P/N: 88835-FL03A, 88835-FL03B, 88835-FL03C
- How to check part number: Open your original key, then you can see the part information on the key shell or the circuit board, just compare it to my key fob. If you lost your key, you need check with your dealership
- Key Programming and Cutting: You need program and cut the remote fob to your vehicle before it can work on your car by a locksmith or the dealership
- Complete Remote Key Fob: The package includes battery, uncut blade, 8A chip and circuit board, it will function is same as your original one, just ready to program
SEOCONTENT-START
ISSUE 1 OF 10 – DATE 21 Dec 2021 SUBARU OF AMERICA PART NUMBER H101SSJ000 PART NUMBER: H101SSJ000 DESCRIPTION: LONG RANGE PUSH START REMOTE ENGINE START SYSTEM FORESTER INSTALLATION INSTRUCTIONS 1 2 3 KIT CONTENTS TOOLS REQUIRED MEANING OF CHARACTERS CAUTION: DO NOT SECURE ANY REMOTE START HARNESSES TO ANY YELLOW HARNESSES / CONNECTORS (AIRBAG SYSTEM) IN THE VEHICLE. Phillips Screwdriver Short and Standard Panel Removal Tool Wire Cutters Alcohol and Towel : Remove : Tighten Torque : Install : Disconnect : Connect : Location of Clip or Screw : Loosen : Discard : Re-use B A Ratchet, 10mm Socket & Extension Remote Engine Start Control Module (ECU) Quantity=1 Pre-Arranged Jumper Wiring Harness Quantity=1 Remote Engine Start Transmitters w/ Warning Tags Quantity=2 Under Hood Warning Label Quantity=1 Quick Reference Card Quantity=1 English, 1 French Torque Wrench T WARNING: / AVERTISSEMENT This vehicle is equipped with a remote controlled engine starter. To reduce the risk of serious Injury or death, switch engine starter system into service mode and disconnect the vehicle battery before performing any service on the vehicle. Ce véhicule est doté d’un démarreur à distance. Pour réduire les risques de blessures graves ou mortelles, mettre le démarreur à distance en mode service et débrancher la batterie du véhicule avant d’effectuer des travaux d’entretien sur celui-ci. REMOTE START QUICK REFERENCE* Remote Start Activation Press Two (2) Times Within Three (3) Seconds Remote Start Activation Press Two (2) Times Within (2) Seconds, Then Press and Hold For Three (3) Seconds LONG RANGE ACTIVATION – ALL MODELS ALTERNATE ACTIVATION – PUSH BUTTON START MODELS Remote Start Shutdown Press and Hold For Two (2) Seconds Remote Start Shutdown Press and Hold For Three (3) Seconds NOTE: All vehicle doors, hood, trunk or rear gate must be closed prior to activating the remote engine start system. Any open entry point will prevent starting or cause the system to shut down. Upon successful activation, the remote start fob will fl ash and beep one (1) time**, the horn will honk one (1) time and the side marker lights, tail lights and parking lights will fl ash one (1) time. The system will check certain safety preconditions before starting and if all conditions are met, the engine will start within fi ve (5) seconds. After the engine starts, the remote start fob will fl ash and beep two (2) times**, the horn will honk one (1) time and the side marker lights, tail lights and parking lights will fl ash one (1) time. While the engine is running via the remote engine start system, the remote start fob will continue to fl ash one (1) time every three (3) seconds, the side marker lights, tail lights and parking lights will remain illuminated and the power window switches will be disabled. The engine will continue to run for fi fteen (15) minutes unless one of the safety parameters below is triggered. The system also has a timer that will allow the system to operate for a maximum of twenty (20) minutes (under multiple remote start activations). Using the factory ignition key (Turn start models) or Access key (Push button start models) to turn on the ignition resets the twenty (20) minute timer. If the engine turns over but does not start (or starts and stalls) the remote engine start system will power off and then attempt to start the engine three (3) additional times. The system will not attempt to restart the engine if it determines a vehicle malfunction is preventing it from starting. If the engine does not start after the three (3) additional attempts, the remote engine start request will be aborted. Remote Start Safety Parameters For safety and security reasons, the system will fail to start or shut down the engine during remote start operation if any of the following occur: • The remote start system has operated for twenty (20) minutes between ignition “ON” cycles The horn will honk three (3) times and the parking lights will fl ash three (3) times • Any of the vehicle’s doors, trunk or rear gate are open The horn will honk six (6) times and the parking lights will fl ash six (6) times • The vehicle’s hood is open The horn will honk two (2) times and the parking lights will fl ash two (2) times • The ignition key is resting in the ignition cylinder (Turn start models) The horn will honk two (2) times and the parking lights will fl ash two (2) times • The transmission shifter is not in the “park” position The horn will honk two (2) times and the parking lights will fl ash two (2) times • The vehicle’s brake pedal is pressed before the vehicle ignition is turned “ON” The horn will honk two (2) times and the parking lights will flash two (2) times • The vehicle’s engine idle speed has reached a level over 3,500 RPM (this will cause the vehicle to shut down) • The vehicle’s security system is triggered by opening the door, trunk or rear gate (if the security system is armed at the time of remote start activation) In addition to the items above, if the vehicle’s engine management system determines there is a safety risk due to a vehicle related problem, the engine will shut down. WARNING: TO AVOID DANGER OF CARBON MONOXIDE, NEVER REMOTE START A VEHICLE IN A CLOSED SPACE SUCH AS A CLOSED GARAGE. NOTE: Laws in some communities require that the vehicle be within view of anyone using the Remote Engine Start. In some areas, use of the Remote Engine Start may violate state, provincial or local laws. Before using the Remote Engine Start, check your state, provincial and local laws. * See the vehicle owner’s manual for more details. ** Provided that the remote start fob is within the operating range of the system. P/N: 4280648, Rev – SSM IV (DST-i) Diagnostic Interface Tie Wrap 39cm Quantity=4* ECU Foam Tape Quantity=1 * Extra components intentionally placed in kit as spares. Please follow instructions for proper placement of each component. PART NUMBER 2 OF 10 H101SSJ000 ISSUE – DATE 21 Dec 2021 SUBARU OF AMERICA 1. Using a 10mm socket/ratchet, disconnect the negative battery cable. (FIGURE A) NOTE: Do not disconnect the battery terminal from the battery post. 2. Open the glove box and press inward on the sides of the glove box to disengage the retaining tabs from the glove box inner cover. Disconnect the strut to remove the glove box. (FIGURE B) 3. Using a panel removal tool, carefully remove the right side dashboard panel by starting at the bottom access notch and working upward to disengage four (4) pressure clips. (FIGURE C) 4 VEHICLE PREPARATION FIGURE A FIGURE B FIGURE C SOLD BY SUBARU OF AMERICA SUBARU PLAZA P.P. BOX 6000 CHERRY HILL, NJ 08034-6000 DANGER EXPLOSIVE GASES Cigarettes, flames, or sparks could cause battery to explode. Always shield eyes and face from battery. Do not charge or use booster cables or adjust post connections without proper instruction and training. KEEP VENT CAPS TIGHT AND LEVEL POISON CAUSES SEVER BURNS Contains sulfuric acid. Avoid contact with skin, eyes or clothing. In event of accident flush with water or call a physician immediately. KEEP OUT OF REACH OF CHILDREN ISSUE 3 OF 10 – DATE 21 Dec 2021 SUBARU OF AMERICA PART NUMBER H101SSJ000 4. Using a panel removal tool, carefully lift upward to disengage five (5) pressure clips and then pull rearward to remove the passenger’s side ornament panel. (FIGURE D) 5. Using a panel removal tool, carefully press downward to disengage three (3) pressure clips to remove the passenger’s side under dashboard finisher panel. (FIGURE E) 6. Using a Phillips screwdriver, remove six (6) Phillips screws securing the glove box inner cover. Disengage the six (6) pressure clips and disconnect the glove box lamp connector to remove the glove box inner cover. (FIGURE F) 4 VEHICLE PREPARATION, continued FIGURE F FIGURE E FIGURE D PART NUMBER 4 OF 10 H101SSJ000 ISSUE – DATE 21 Dec 2021 SUBARU OF AMERICA 5 REMOTE ENGINE START ECU MOUNTING 1. Locate the glove box inner cover and remote engine start ECU. Using alcohol, clean the back side of the glove box inner cover and ECU, as shown. (FIGURE G) 2. Using the supplied double sided tape, remove the two (2) small release liners and attach the tape to the glove box inner cover. Ensure the tape is positioned against the vertical character line and fl at against the multi-level inner cover. Press firmly in place for at least 30 seconds. (FIGURE H) NOTE: Ensure the double sided tape is positioned away from any obstructions on the glove box inner cover. 3. Remove the one (1) large release liner from the double sided tape and attach the remote engine start ECU. Ensure the corner of the ECU, closest to the small gray connector, is fl ush with the upper left corner of the tape, as shown. Press firmly in place for at least 30 seconds. (FIGURE I) NOTE: Ensure the ECU connectors will be facing toward the passenger’s side of the vehicle when the inner cover is replaced. FIGURE G FIGURE H FIGURE I Vertical Character Line Clean with Alcohol Obstruction Mount Corner of ECU Flush with Corner of Foam Tape Obstruction ISSUE 5 OF 10 – DATE 21 Dec 2021 SUBARU OF AMERICA PART NUMBER H101SSJ000 6 1. Locate and release the vehicle’s 6-pin and 2-pin pre-fi t connectors secured to the vehicle’s wire harness with breakaway tape near the upper right, passenger’s side glove box area. (FIGURE J) 2. When the vehicle’s 6-pin and 2-pin pre-fi t connectors are free from the breakaway tape, unplug and discard the 2-pin mating connector/wire jumper. (This is used for the power window interrupt circuit). 3. Plug the remote engine start jumper harness 6-pin and 2-pin connectors into the corresponding pre-fi t connectors. (FIGURE K) 4. Using one (1) of the supplied 39cm tie wraps, secure the pre-arranged jumper harness connectors to the vehicle’s wire harness. Using two (2) of the supplied 39cm tie wraps, secure the pre-arranged jumper harness to the vehicle’s wire harness, as shown. Trim off the excess tie wraps. (FIGURE L) 5. Plug the pre-arranged jumper harness 12-pin connector into the 12-pin white port on the remote engine start ECU, previously mounted to the back side of the glove box inner cover (Step 5). PRE-ARRANGED JUMPER HARNESS CONNECTIONS FIGURE J FIGURE K FIGURE L PART NUMBER 6 OF 10 H101SSJ000 ISSUE – DATE 21 Dec 2021 SUBARU OF AMERICA 7 PANEL RE-ASSEMBLY 1. Re-connect the glove box lamp connector to the lamp on the glove box inner cover. Re-install the glove box inner cover by engaging the six (6) pressure clips and secure with six (6) Phillips screws. 2. Re-install the passenger’s side under dashboard finisher panel by engaging the three (3) pressure clips. 3. Re-install the passenger’s side ornament panel by engaging the five (5) pressure clips. 4. Re-install the right side dashboard panel by engaging the four (4) pressure clips. 5. Re-install the glove box and strut. 6. At the end of the installation, insert the Quick Reference Cards into the Owner’s Information Kit. 8 UNDER HOOD WARNING LABEL MOUNTING 1. Using alcohol, clean the top of the air intake plenum, near the radiator core support. NOTE: Ensure the air intake plenum is completely dry. 2. Remove the release liner from the under hood warning label and secure to the top of the air intake plenum, as shown. (FIGURE M) FIGURE M WARNING: / ADVERTISSEMENT 9 SYSTEM POWER-UP 1. After all the connections are complete, re-connect the vehicle’s negative battery cable. Using a 10mm socket/ torque wrench, tighten the 10mm nut to 7.5 Nm +/- 2 Nm (0.76 Kgf-m +/- 0.2 Kgf-m, 5.5 ft-lbs +/- 1.5 ft-lbs). 2. Start the vehicle at least one (1) time using the Access key prior to activating the remote engine start system. This is required to allow the vehicle’s electronic systems to re-synchronize. 3. With the vehicle running via the Access key, verify that the instrument cluster airbag light turns off . If the airbag light remains on, refer to the vehicle service information for troubleshooting. 4. Refer to the vehicle Owner’s manual for the Power Window Reset Procedure to restore the power window functions. ISSUE 7 OF 10 – DATE 21 Dec 2021 SUBARU OF AMERICA PART NUMBER H101SSJ000 10 SYSTEM REGISTRATION ENSURE THE SOFTWARE VERSION HAS BEEN UPDATED TO THE LATEST REVISION BEFORE ATTEMPTING SYSTEM REGISTRATION. DST-i SETUP REGISTRATION Plug the DST-i diagnostic plug diagnostic connector into the vehicle’s Plug the DST-i USB plug into a laptop Network-Enabled Select/Open the SSM4 software on the laptop Network-Enabled 1. PRESS IMMOBILIZER ETC. REGISTRATION AND PRESS SELECT PRESS PRESS 2. PRESS FORESTER AND PRESS SELECT PRESS 3. PRESS H TYPE FOR PUSH START MODELS PRESS CONFIRMED AND WAIT FOR LAPTOP TO ESTABLISH CONNECTION PRESS PRESS PRESS PRESS PRESS With an Access key inside the vehicle turn ON the ignition PRESS 4. PRESS REMOTE ENGINE START CM REGISTRATION AND PRESS CONFIRMED PRESS PART NUMBER 8 OF 10 H101SSJ000 ISSUE – DATE 21 Dec 2021 SUBARU OF AMERICA 10 SYSTEM REGISTRATION, continued REGISTRATION, continued 5. ENTER AUTHENTICATION KEY AND PRESS CONNECTION ENTER PRESS 6. PRESS YES TO EXECUTE REGISTRATION 7. REGISTRATION SUCCESSFUL, PRESS OK PRESS PRESS WAIT FOR BIU TO COMMUNICATE WITH RES CONTROL MODULE Registration Complete ISSUE 9 OF 10 – DATE 21 Dec 2021 SUBARU OF AMERICA PART NUMBER H101SSJ000 11 POST INSTALLATION CHECKLIST 1. REMOTE ENGINE START- Ensure the Access key is removed from the vehicle, the engine hood, all doors and trunk are closed. Press the START button on the remote start transmitter two (2) times within three (3) seconds. The vehicle’s parking lights should fl ash and the vehicle’s horn should honk one (1) time and then the vehicle should crank and start. Once started, the transmitter LED will fl ash two (2) times and the parking lights will turn on and stay on signifying the vehicle is running. The transmitter LED will fl ash one (1) time every three (3) seconds signifying the vehicle is still running. NOTE: If the vehicle does NOT respond to the remote start transmitters, proceed to SECTION 12 for the TRANSMITTER PROGRAMMING procedure. 2. CUSTOMER TAKE OVER – While the vehicle is running by the remote engine start, wait at least five (5) seconds and then confirm that all functions (lock, unlock & trunk, but not panic) operate properly on the Access key (FACTORY transmitter). Once the Access key functionality is confirmed, press the UNLOCK button on the Access key, open the driver’s door and enter the vehicle with the Access key. Press and hold the brake pedal, press the ENGINE START/ STOP button on the dashboard one (1) time and move the shift position lever from the “P” position to the “D” position and back to the “P” position. The remote engine start should shut down and the transmitter LED should fl ash three (3) times indicating the system has shut down, but the engine should remain running. Press the ENGINE START/STOP button on the dashboard one (1) time to turn off the vehicle. 3. ACTIVATION WITH DOOR UNLOCKED – Ensure the Access key is removed from the vehicle, the engine hood, all doors and trunk are closed and the driver’s door is unlocked. Press the START button on the remote start transmitter two (2) times within three (3) seconds. The vehicle’s parking lights should fl ash and the vehicle’s horn should honk six (6) times. The vehicle should not start with the driver’s door unlocked. 4. ACTIVATION WITH DOOR OPEN – Ensure the Access key is removed from the vehicle and the engine hood and trunk are closed. Open the driver’s door and press the START button on the remote start transmitter two (2) times within three (3) seconds. The vehicle’s parking lights should fl ash and the vehicle’s horn should honk six (6) times. The vehicle should not start with any door or trunk opened. 5. HOOD SAFETY SWITCH – Open the engine hood and activate the remote engine start. The vehicle’s parking lights should fl ash and the vehicle’s horn should honk two (2) times. The vehicle should not start when the hood safety switch is activated. 6. HEATER / AC FUNCTION – With the Access key inside the vehicle, press the ENGINE START/STOP button on the dashboard two (2) times to turn ON the ignition. Preset the vehicle’s heater or air conditioning to the ON position. Press the ENGINE START/STOP button on the dashboard one (1) time to turn OFF the ignition and remove the Access key from the vehicle. Activate the remote engine start and verify that the heater or air conditioning turns on to the preset setting for manual climate controlled vehicles or turns to the “Full Auto” setting for electronic climate control vehicles. 7. 15 MINUTE RUN TIME – Activate the remote engine start and allow the system to run for the 15 minute preset run time. The remote engine start should shut down after 15 minutes (+/- 10 seconds). 8. TRANSMITTER FUNCTIONALITY VERIFICATION – Activate the remote engine start using both of the supplied single button remote start transmitters. 9. ACCESS KEY (Factory Transmitter) VERIFICATION – Activate the remote engine start using an Access key by pressing the LOCK button two (2) times within two (2) seconds and then pressing and holding the LOCK button for three (3) seconds until the parking lights fl ash. FUNCTIONAL TESTING IS NOW COMPLETE. PART NUMBER 10 OF 10 H101SSJ000 ISSUE – DATE 21 Dec 2021 SUBARU OF AMERICA 12 TRANSMITTER PROGRAMMING 1. Open the driver’s door and enter the vehicle. The driver’s door must remain open throughout the entire programming process. Ensure all other vehicle doors, the engine hood and trunk are closed. 2. Verify that the transmission shifter is in the “park” position. 3. Turn the ignition “ON” then “OFF”, “ON” then “OFF”, “ON” then “OFF”, then back “ON” and leave on throughout the entire programming process. (Turn ON the ignition by pressing the Engine Start/Stop button on the dashboard two (2) times with an Access Key inside the vehicle. Do not press the brake pedal or the engine will start.) (ON/OFF ignition cycles must be completed within twenty (20) seconds.) 4. The system will fl ash the side marker lights, taillights and parking lights and honk the horn three (3) times indicating that the system has entered transmitter learn mode. 5. Press and hold the button on the transmitter to be learned for three (3) seconds until the system fl ashes the side marker lights, taillights and parking lights and honks the horn one (1) time, indicating that the system has learned the transmitter. Release the button. Upon successful programming, the remote start transmitter may fl ash/beep one (1) time. 6. Repeat step fi ve (5) for additional transmitters. The system will accept up to eight (8) transmitters. 7. Turn the ignition OFF to exit transmitter learn mode. 8. Return to SECTION 11 to perform the POST INSTALLATION CHECKLIST. NOTE: The system will exit the transmitter learn mode if the ignition is turned OFF, the driver’s door is closed or thirty (30) seconds of inactivity. 4281057 Rev – 12/21/21 VERSION 1 DE 10 – DATE 21 déc 2021 SUBARU OF AMERICA NUMÉRO DE PIÈCE H101SSJ000 NUMÉRO DE PIÈCE : H101SSJ000 DESCRIPTION : SYSTÈME DE DÉMARRAGE À DISTANCE LONGUE PORTÉE – À BOUTON-POUSSOIR FORESTER INSTRUCTIONS D’INSTALLATION 1 2 3 CONTENU DE LA TROUSSE OUTILS REQUIS SIGNIFICATION DES SYMBOLES MISE EN GARDE : N’ATTACHEZ JAMAIS LE FAISCEAU DU DÉMARREUR À DISTANCE À DES FAISCEAUX OU CONNECTEURS JAUNES (SYSTÈME DE COUSSINS GONFLABLES) DANS LE VÉHICULE. Tournevis cruciforme, court et standard Outil de dépose de panneau Coupe-fi ls Alcool et chiffon : Retirer : Installer : Déconnecter : Connecter : Emplacement de l’attache ou de la vis : Desserrer : Jeter : Réutiliser B A Clé à rochet, douille de 10 mm et rallonge Module de commande (ECU) du démarreur à distance Quantité = 1 Faisceau cavalier prémonté Quantité = 1 Télécommandes de démarrage à distance avec étiquettes de mise en garde Quantité = 2 Étiquette de mise en garde du compartiment moteur Quantité = 1 Carte de référence rapide Quantité = 1 en anglais 1 en français Clé dynamométrique T WARNING: / AVERTISSEMENT This vehicle is equipped with a remote controlled engine starter. To reduce the risk of serious Injury or death, switch engine starter system into service mode and disconnect the vehicle battery before performing any service on the vehicle. Ce véhicule est doté d’un démarreur à distance. Pour réduire les risques de blessures graves ou mortelles, mettre le démarreur à distance en mode service et débrancher la batterie du véhicule avant d’effectuer des travaux d’entretien sur celui-ci. REMOTE START QUICK REFERENCE* Remote Start Activation Press Two (2) Times Within Three (3) Seconds Remote Start Activation Press Two (2) Times Within (2) Seconds, Then Press and Hold For Three (3) Seconds LONG RANGE ACTIVATION – ALL MODELS ALTERNATE ACTIVATION – PUSH BUTTON START MODELS Remote Start Shutdown Press and Hold For Two (2) Seconds Remote Start Shutdown Press and Hold For Three (3) Seconds NOTE: All vehicle doors, hood, trunk or rear gate must be closed prior to activating the remote engine start system. Any open entry point will prevent starting or cause the system to shut down. Upon successful activation, the remote start fob will fl ash and beep one (1) time**, the horn will honk one (1) time and the side marker lights, tail lights and parking lights will fl ash one (1) time. The system will check certain safety preconditions before starting and if all conditions are met, the engine will start within fi ve (5) seconds. After the engine starts, the remote start fob will fl ash and beep two (2) times**, the horn will honk one (1) time and the side marker lights, tail lights and parking lights will fl ash one (1) time. While the engine is running via the remote engine start system, the remote start fob will continue to fl ash one (1) time every three (3) seconds, the side marker lights, tail lights and parking lights will remain illuminated and the power window switches will be disabled. The engine will continue to run for fifteen (15) minutes unless one of the safety parameters below is triggered. The system also has a timer that will allow the system to operate for a maximum of twenty (20) minutes (under multiple remote start activations). Using the factory ignition key (Turn start models) or Access key (Push button start models) to turn on the ignition resets the twenty (20) minute timer. If the engine turns over but does not start (or starts and stalls) the remote engine start system will power off and then attempt to start the engine three (3) additional times. The system will not attempt to restart the engine if it determines a vehicle malfunction is preventing it from starting. If the engine does not start after the three (3) additional attempts, the remote engine start request will be aborted. Remote Start Safety Parameters For safety and security reasons, the system will fail to start or shut down the engine during remote start operation if any of the following occur: • The remote start system has operated for twenty (20) minutes between ignition “ON” cycles The horn will honk three (3) times and the parking lights will fl ash three (3) times • Any of the vehicle’s doors, trunk or rear gate are open The horn will honk six (6) times and the parking lights will fl ash six (6) times • The vehicle’s hood is open The horn will honk two (2) times and the parking lights will fl ash two (2) times • The ignition key is resting in the ignition cylinder (Turn start models) The horn will honk two (2) times and the parking lights will fl ash two (2) times • The transmission shifter is not in the “park” position The horn will honk two (2) times and the parking lights will fl ash two (2) times • The vehicle’s brake pedal is pressed before the vehicle ignition is turned “ON” The horn will honk two (2) times and the parking lights will fl ash two (2) times • The vehicle’s engine idle speed has reached a level over 3,500 RPM (this will cause the vehicle to shut down) • The vehicle’s security system is triggered by opening the door, trunk or rear gate (if the security system is armed at the time of remote start activation) In addition to the items above, if the vehicle’s engine management system determines there is a safety risk due to a vehicle related problem, the engine will shut down. WARNING: TO AVOID DANGER OF CARBON MONOXIDE, NEVER REMOTE START A VEHICLE IN A CLOSED SPACE SUCH AS A CLOSED GARAGE. NOTE: Laws in some communities require that the vehicle be within view of anyone using the Remote Engine Start. In some areas, use of the Remote Engine Start may violate state, provincial or local laws. Before using the Remote Engine Start, check your state, provincial and local laws. * See the vehicle owner’s manual for more details. ** Provided that the remote start fob is within the operating range of the system. P/N: 4280648, Rev – Interface diagnostic SSM IV (DST-i) Attache autobloquante 39 cm, quantité = 4 Ruban mousse de l’UCE Quantité = 1 : Couple de serrage NUMÉRO DE PIÈCE 2 DE 10 H101SSJ000 VERSION – DATE 21 déc 2021 SUBARU OF AMERICA 1. À l’aide d’une clé à rochet/douille de 10 mm, déconnectez le câble négatif de la batterie. (FIGURE A) REMARQUE : Ne débranchez pas la cosse de batterie de la borne de la batterie. 2. Ouvrez la boîte à gants et appuyez sur les côtés de la boîte pour libérer les languettes de retenue du couvercle intérieur. Dégagez le support pour retirer la boîte à gants. (FIGURE B) 3. À l’aide de l’outil de dépose de panneau, enlevez délicatement le côté droit du tableau de bord en partant de l’encoche d’accès du bas vers le haut pour libérer les quatre (4) attaches. (FIGURE C) 4 PRÉPARATION DU VÉHICULE FIGURE A FIGURE B FIGURE C SOLD BY SUBARU OF AMERICA SUBARU PLAZA P.P. BOX 6000 CHERRY HILL, NJ 08034-6000 DANGER EXPLOSIVE GASES Cigarettes, flames, or sparks could cause battery to explode. Always shield eyes and face from battery. Do not charge or use booster cables or adjust post connections without proper instruction and training. KEEP VENT CAPS TIGHT AND LEVEL POISON CAUSES SEVER BURNS Contains sulfuric acid. Avoid contact with skin, eyes or clothing. Inevent of accident flush with water or call a physician immediately. KEEP OUT OF REACH OF CHILDREN VERSION 3 DE 10 – DATE 21 déc 2021 SUBARU OF AMERICA NUMÉRO DE PIÈCE H101SSJ000 4. À l’aide de l’outil de dépose de panneau, soulevez délicatement pour libérer cinq (5) attaches à pression, puis tirez vers l’arrière pour retirer le panneau de garniture côté passager. (FIGURE D) 5. À l’aide d’un outil de dépose de panneau, appuyez délicatement sur le bas pour dégager trois (3) attaches à pression pour retirer le panneau de fi nition sous le tableau de bord du côté passager. (FIGURE E) 6. À l’aide du tournevis Phillips, retirez les six (6) vis Phillips qui maintiennent le couvercle intérieur de la boîte à gants. Libérez les six (6) attaches à pression et débranchez le connecteur de la lampe de la boîte à gants pour retirer le couvercle intérieur. (FIGURE F) 4 PRÉPARATION DU VÉHICULE (suite) FIGURE F FIGURE E FIGURE D NUMÉRO DE PIÈCE 4 DE 10 H101SSJ000 VERSION – DATE 21 déc 2021 SUBARU OF AMERICA 5 INSTALLATION DE L’UCE DU DÉMARREUR À DISTANCE 1. Repérez le couvercle intérieur de la boîte à gants et retirez l’UCE du démarreur à distance. Avec de l’alcool, nettoyez l’arrière du couvercle de la boîte à gants et l’UCE, comme illustré. (FIGURE G) 2. Prenez le ruban adhésif double-face fourni, retirez les deux (2) petites pellicules de protection et fi xez le ruban au couvercle de la boîte à gants. Assurez-vous de bien placer le ruban contre la ligne de relief verticale et à plat contre le couvercle intérieur multi-niveaux. Appuyez fermement pendant au moins 30 secondes. (FIGURE H) REMARQUE : Assurez-vous de ne pas placer le ruban adhésif double-face sur les obstacles du couvercle de la boîte à gants. 3. Retirez la grande bande de protection du ruban adhésif double-face et fi xez l’UCE du démarreur à distance. Assurez-vous que le coin de l’UCE le plus près du petit connecteur gris est bien de niveau avec le coin supérieur gauche du ruban, comme illustré. Appuyez fermement pendant au moins 30 secondes. (FIGURE I) REMARQUE : Assurez-vous que les connecteurs de l’UCE seront orientés vers le côté passager du véhicule lorsque le couvercle intérieur sera replacé. FIGURE G FIGURE H FIGURE I Ligne en relief verticale Nettoyer à l’alcool Obstacle Coin de montage de l’UCE de niveau avec le coin du ruban mousse Obstacle VERSION 5 DE 10 – DATE 21 déc 2021 SUBARU OF AMERICA NUMÉRO DE PIÈCE H101SSJ000 6 1. Repérez et dégagez les connecteurs prémontés à 6 broches et à 2 broches fi xés au faisceau de câblage du véhicule par du ruban détachable, près du côté droit supérieur de la boîte à gants côté passager. (FIGURE J) 2. Lorsque les connecteurs prémontés à 6 broches et à 2 broches sont dégagés du ruban détachable, débranchez le cavalier/connecteur homologue à 2 broches et mettez-le au rebut. (Il est destiné au circuit de coupure du lève-glace électrique.) 3. Branchez les connecteurs à 6 broches et à 2 broches du faisceau cavalier du démarreur à distance dans les connecteurs prémontés correspondants. (FIGURE K) 4. À l’aide de l’une (1) des attaches autobloquantes de 39 cm fournies, fi xez les connecteurs du faisceau cavalier prémonté au faisceau de câblage du véhicule. À l’aide de deux (2) des attaches autobloquantes de 39 cm fournies, fi xez le faisceau cavalier prémonté au faisceau de câblage du véhicule, comme sur l’illustration. Coupez l’excédent des attaches autobloquantes. (FIGURE L) 5. Branchez le connecteur à 12 broches du faisceau cavalier prémonté dans la prise blanche à 12 broches de l’UCE du démarreur à distance, précédemment monté sur l’envers du couvercle intérieur de la boîte à gants (étape 5). CONNEXIONS DU FAISCEAU CAVALIER PRÉMONTÉ FIGURE J FIGURE K FIGURE L NUMÉRO DE PIÈCE 6 DE 10 H101SSJ000 VERSION – DATE 21 déc 2021 SUBARU OF AMERICA 7 REMONTAGE DU PANNEAU 1. Rebranchez le connecteur de la lampe sur le couvercle intérieur de la boîte à gants. Installez le couvercle intérieur de la boîte à gants au moyen des six (6) attaches à pression et fi xez-le avec six (6) vis Phillips. 2. Réinstallez le panneau de fi nition sous le tableau de bord du côté passager en engageant les trois (3) attaches à pression. 3. Installez le panneau de garniture côté passager au moyen des cinq (5) attaches à pression. 4. Installez le panneau du côté droit du tableau de bord à l’aide des quatre (4) attaches à pression. 5. Installez la boîte à gants et le support. 6. À la fi n de l’installation, glissez les Cartes de référence rapide dans le dossier du propriétaire. 8 ÉTIQUETTE DE MISE EN GARDE DU COMPARTIMENT MOTEUR 1. En utilisant de l’alcool, nettoyez la partie supérieure de la chambre d’admission d’air à proximité du support de faisceau de radiateur. REMARQUE : S’assurer que la chambre d’admission d’air est complètement sèche. 2. Retirez l’endos adhésif de l’étiquette de mise en garde du compartiment moteur et collez-la sur le haut de la chambre d’admission d’air, comme illustré. (FIGURE M) FIGURE M WARNING: / ADVERTISSEMENT 9 DÉMARRAGE DU SYSTÈME 1. Une fois toutes les connexions terminées, rebranchez le câble négatif de la batterie du véhicule. À l’aide de la clé à rochet/douille/rallonge de 10 mm, serrez l’écrou de 10 mm à 7,5 +/- 2 Nm (0,76 +/- 0,2 kgfm ou 5,5 +/- 1,5 lb-pi). 2. Faites démarrer le véhicule au moins une (1) fois avec la clé d’accès avant d’essayer le système de démarrage à distance. Cette précaution est nécessaire pour permettre aux systèmes électroniques du véhicule de se resynchroniser. 3. Pendant que le moteur est en marche avec la clé d’accès, vérifi ez si le témoin de coussin gonfl able du tableau de bord s’éteint. Si le témoin de coussin gonfl able reste allumé, reportez-vous à l’information de service après-vente du véhicule pour avoir des précisions sur le dépannage. 4. Pour restaurer les fonctions des glaces électriques, consultez la procédure de réinitialisation des glaces à commande électrique dans le manuel du propriétaire du véhicule. VERSION 7 DE 10 – DATE 21 déc 2021 SUBARU OF AMERICA NUMÉRO DE PIÈCE H101SSJ000 10 CONFIGURATION DU DST-i ENREGISTREMENT Branchez la prise de diagnostic du DST-i dans le connecteur de diagnostic du véhicule. Branchez le connecteur USB du DST-i dans un ordinateur portable sur réseau Sélectionnez ou ouvrez le logiciel SSM4 sur l’ordinateur portable sur réseau 1. APPUYEZ SUR IMMOBILIZER ETC. REGISTRATION, PUIS APPUYEZ SUR SELECT APPUYEZ SUR 2. APPUYEZ SUR FORESTER, PUIS APPUYEZ SUR SELECT 3. APPUYEZ SUR TYPE H POUR LES MODÈLES À DÉMARRAGE À BOUTON-POUSSOIR, APPUYEZ SUR CONFIRMED ET ATTENDEZ QUE L’ORDINATEUR PORTABLE ÉTABLISSE LA CONNEXION PRESS PRESS Mettez le contact avec la clé d’accès à l’intérieur du véhicule. 4. APPUYEZ SUR REMOTE ENGINE START CM REGISTRATION, PUIS APPUYEZ SUR CONFIRMED APPUYEZ SUR APPUYEZ SUR APPUYEZ SUR APPUYEZ SUR APPUYEZ SUR APPUYEZ SUR APPUYEZ SUR ENREGISTREMENT DU SYSTÈME ASSUREZ-VOUS QUE LE LOGICIEL A ÉTÉ MIS À JOUR À LA DERNIÈRE VERSION AVANT DE TENTER D’ENREGISTRER LE SYSTÈME. NUMÉRO DE PIÈCE 8 DE 10 H101SSJ000 VERSION – DATE 21 déc 2021 SUBARU OF AMERICA 10 ENREGISTREMENT, suite 5. ENTREZ LA CLÉ D’AUTHENTIFICATION, PUIS APPUYEZ SUR CONNECTION ENTER 6. APPUYEZ SUR YES POUR EXÉCUTER L’ENREGISTREMENT 7. ENREGISTREMENT RÉUSSI, APPUYEZ SUR OK APPUYEZ SUR ATTENDEZ QUE LE BIU COMMUNIQUE AVEC LE MODULE DE COMMANDE RES L’enregistrement est terminé APPUYEZ SUR APPUYEZ SUR ENREGISTREMENT DU SYSTÈME, suite VERSION 9 DE 10 – DATE 21 déc 2021 SUBARU OF AMERICA NUMÉRO DE PIÈCE H101SSJ000 11 LISTE DE CONTRÔLE APRÈS INSTALLATION 1. DÉMARRAGE À DISTANCE – Assurez-vous que la clé d’accès est retirée du véhicule et que le capot ainsi que toutes les portes sont fermés, y compris le coffre. Appuyez sur le bouton START (démarrage) de la télécommande de démarrage à distance deux (2) fois en trois (3) secondes. Les feux de stationnement du véhicule doivent clignoter et l’avertisseur sonore doit retentir une (1) fois, puis le véhicule doit démarrer. Une fois que le véhicule a démarré, le témoin à DEL de la télécommande clignote deux (2) fois et les feux de stationnement s’allument, ce qui indique que le moteur tourne. Le témoin à DEL de la télécommande clignote une (1) fois toutes les trois (3) secondes, ce qui indique que le moteur tourne toujours. REMARQUE : Si le véhicule ne répond PAS aux télécommandes de démarrage à distance, passez à la SECTION 12 pour connaître la procédure de PROGRAMMATION DE LA TÉLÉCOMMANDE. 2. PRISE DE COMMANDE PAR LE CONDUCTEUR – Pendant que le moteur est en marche après un démarrage à distance, attendez au moins cinq (5) secondes, puis vérifi ez la bonne marche de toutes les fonctions (verrouillage, déverrouillage, coffre, sauf le bouton d’alarme) sur la clé d’accès (télécommande D’ORIGINE). Après avoir vérifi é le bon fonctionnement de la clé d’accès, appuyez sur le bouton de DÉVERROUILLAGE de la clé d’accès, ouvrez la porte du conducteur et entrez dans le véhicule avec la clé d’accès. Appuyez sur la pédale de frein et maintenez-la enfoncée, appuyez une (1) fois sur le bouton de MARCHE/ARRÊT DU MOTEUR sur le tableau de bord, puis déplacez le levier de vitesse de la position « P » (stationnement) à la position « D » (marche avant) et de nouveau à la position « P ». Le démarreur à distance doit s’arrêter et le témoin à DEL de la télécommande doit clignoter trois (3) fois pour indiquer l’arrêt du système, mais le moteur doit continuer de tourner. Appuyez une (1) fois sur le bouton de démarrage et d’arrêt du moteur sur le tableau de bord pour arrêter le véhicule. 3. ACTIVATION AVEC PORTE DÉVERROUILLÉE – Assurez-vous que la clé d’accès est retirée du véhicule, puis que le capot, toutes les portes et le coffre sont fermés et que la porte du conducteur est déverrouillée. Appuyez sur le bouton START (démarrage) de la télécommande de démarrage à distance deux (2) fois en trois (3) secondes. Les feux de stationnement du véhicule doivent clignoter et l’avertisseur sonore doit retentir six (6) fois. Le véhicule ne doit pas démarrer si la porte du conducteur est déverrouillée. 4. ACTIVATION AVEC PORTE OUVERTE – Assurez-vous que la clé d’accès est retirée du véhicule et que le capot et le couvercle du coffre sont fermés. Ouvrez la porte du conducteur et appuyez sur le bouton START (démarrage) de la télécommande de démarrage à distance deux (2) fois en trois (3) secondes. Les feux de stationnement du véhicule doivent clignoter et l’avertisseur sonore doit retentir six (6) fois. Le moteur ne doit pas démarrer si l’une des portes ou le coffre est ouvert. 5. CONTACTEUR DE SÉCURITÉ DU CAPOT – Ouvrez le capot et activez le démarrage à distance. Les feux de stationnement du véhicule doivent clignoter et l’avertisseur doit retentir deux (2) fois. Le véhicule ne doit pas démarrer quand le contacteur de sécurité du capot est activé. 6. FONCTIONNEMENT DU SYSTÈME DE CHAUFFAGE/CLIMATISATION – Avec la clé d’accès à l’intérieur du véhicule, appuyez deux (2) fois sur le bouton de démarrage et d’arrêt du moteur sur le tableau de bord pour mettre le contact. Mettez en marche le chauffage ou la climatisation. Appuyez une (1) fois sur le bouton de démarrage et d’arrêt du moteur sur le tableau de bord pour couper le contact, puis retirez la clé d’accès du véhicule. Activez le démarreur à distance et vérifi ez si le chauffage ou la climatisation se met en marche au réglage choisi avant la coupure du contact, s’il s’agit d’un système CVC manuel, ou au réglage maximum automatique, s’il s’agit d’un système CVC électronique. 7. DURÉE MAXIMALE DE FONCTIONNEMENT DE 15 MINUTES – Activez le démarrage à distance et laissez le moteur tourner pendant 15 minutes. Le démarreur à distance devrait arrêter le moteur après 15 minutes (+/- 10 secondes). 8. VÉRIFICATION DU FONCTIONNEMENT DE LA TÉLÉCOMMANDE – Activez le démarreur à distance tour à tour avec les deux télécommandes à un bouton fournies. 9. VÉRIFICATION DE LA CLÉ D’ACCÈS (émetteur d’usine) – Activez le démarrage à distance du moteur à l’aide d’une clé d’accès en appuyant deux (2) fois sur le bouton VERROUILLAGE en deux (2) secondes, puis en appuyant sur le bouton VERROUILLAGE et en le maintenant enfoncé pendant trois (3) secondes jusqu’à ce que le stationnement les lumières clignotent. L’ESSAI DE FONCTIONNEMENT EST MAINTENANT TERMINÉ. NUMÉRO DE PIÈCE 10 DE 10 H101SSJ000 VERSION – DATE 21 déc 2021 SUBARU OF AMERICA 4281057 Rév. 21-12-2021 12 PROGRAMMATION DE LA TÉLÉCOMMANDE 1. Ouvrez la porte du conducteur et entrez dans le véhicule. La porte du conducteur doit demeurer ouverte tout au long du processus de programmation. Assurez-vous que toutes les autres portes du véhicule, le capot et le coffre sont fermés. 2. Assurez-vous que le levier de vitesses est à la position « P » (stationnement). 3. Mettez le contact et coupez le moteur, remettez le contact et coupez le moteur, remettez le contact et coupez le moteur, puis remettez le contact et laissez le processus de programmation se dérouler. (Mettez le contact en appuyant deux (2) fois sur le bouton de démarrage/arrêt du moteur du tableau de bord, avec une clé d’accès à l’intérieur du véhicule. N’appuyez pas sur la pédale de frein, pour éviter que le moteur démarre.) (Les cycles d’allumage MARCHE/ARRÊT doivent être effectués en moins de vingt (20) secondes. 4. Le système fait clignoter les feux de position, les feux arrière et les feux de stationnement et fait retentir l’avertisseur sonore trois (3) fois pour indiquer que le système a entré le mode d’apprentissage de télécommande. 5. Maintenez enfoncé le bouton de la télécommande à programmer pendant trois (3) secondes jusqu’à ce que le système fasse clignoter les feux de position, les feux arrière et les feux de stationnement, puis fasse retentir l’avertisseur sonore une (1) fois, ce qui indique que le système a accepté la télécommande. Relâchez le bouton . Une fois la programmation réussie, la télécommande de démarrage à distance peut clignoter ou émettre un signal sonore une (1) fois. 6. Répétez l’étape cinq (5) pour les autres télécommandes. Le système accepte jusqu’à huit (8) télécommandes. 7. Coupez le contact pour quitter le mode d’apprentissage de télécommande. 8. Retournez à la SECTION 11 pour effectuer la LISTE DE VÉRIFICATION APRÈS L’INSTALLATION. REMARQUE : Le système quitte le mode d’apprentissage de télécommande dans les conditions suivantes : contact coupé, porte du conducteur fermée ou trente (30) secondes d’inactivité.
**************************************************************************************************************
SEOCONTENT-END
This product presentation was made with AAWP plugin.