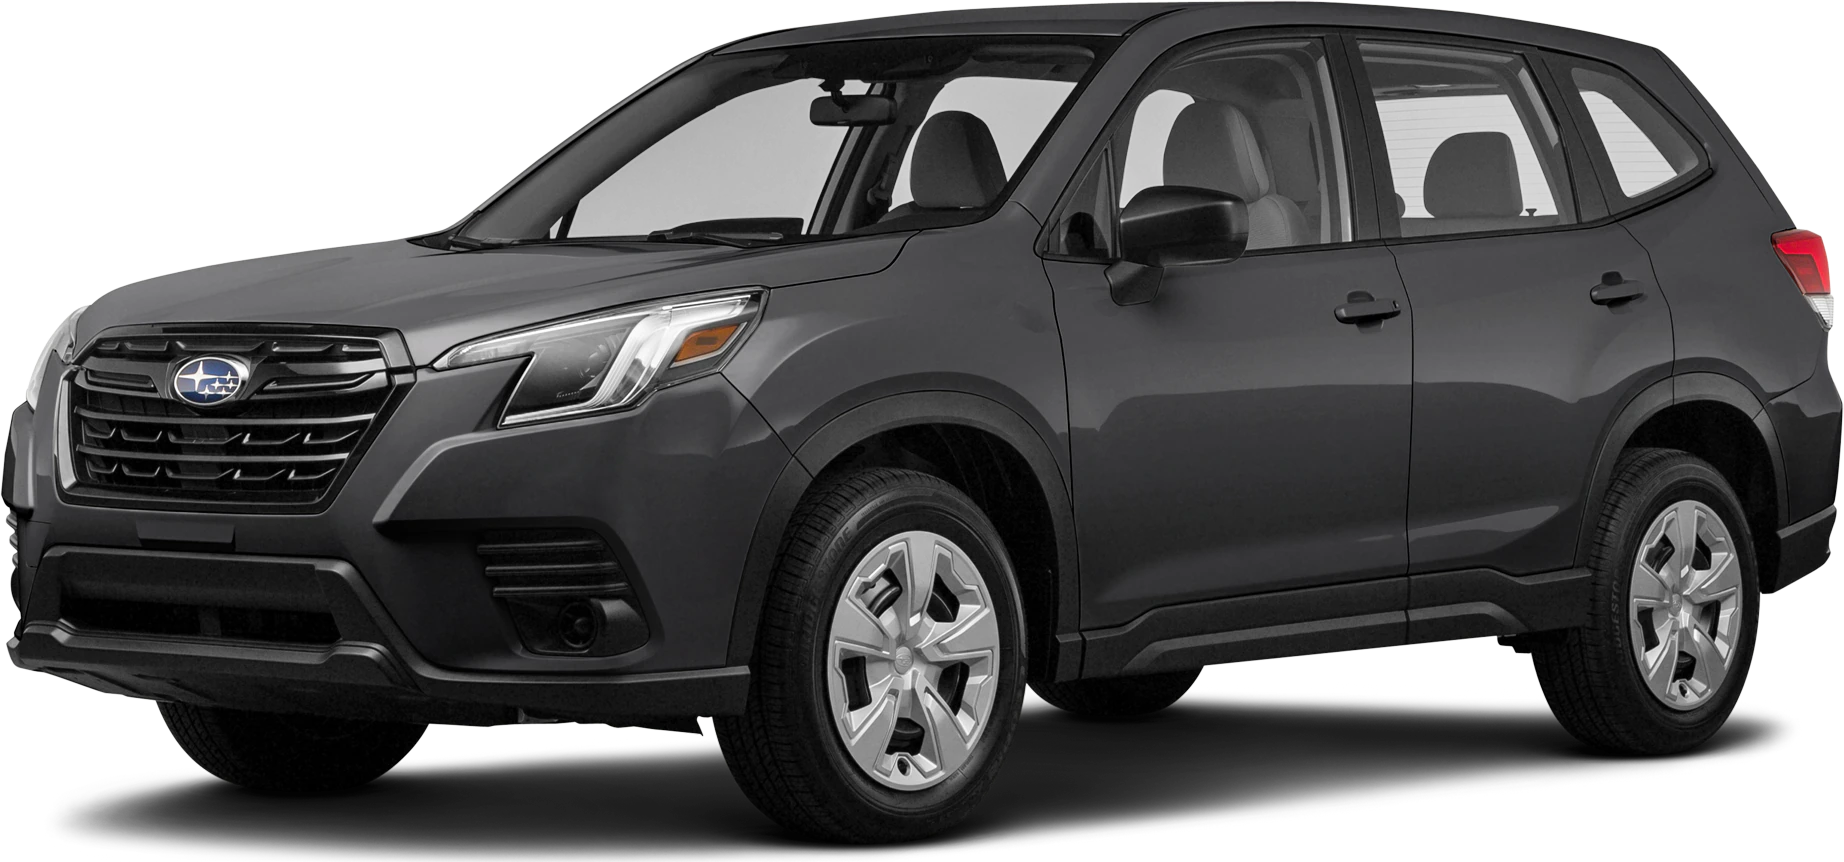
Accessory Installation Guide
| 2022MY Forester Trailer Hitch | L101SSJ005 |
INSTALLATION INSTRUCTIONS
PART NUMBER: L101SSJ005
DESCRIPTION: FORESTER TRAILER HITCH
PLEASE READ THESE INSTRUCTIONS CAREFULLY, BEFORE YOU START INSTALLATION
SAFETY PRECAUTION: When installing Trailer Hitch, the use of safety glasses is recommended.
WARNING:
1. Always install the accessory following the instructions. Failure to do so may cause damage to the vehicle or the accessory.
2. Please also refer to SUBARU SERVICE MANUAL upon removing and re-assembling vehicle components.
3. Do not drill, cut, weld or otherwise modify the Trailer Hitch.
4. Do not lubricate the bolts and nuts with oil or grease.
5. If Trailer Hitch is removed, a bumper beam MUST be reinstalled. Failure to reinstall a bumper beam after removal of the trailer hitch will negatively affect vehicle rear crash performance. Please contact your SUBARU dealer.
6. When a Trailer Hitch is installed, it is not possible to install the rear towing hook.
7. Never exceed the maximum towing capacity and maximum tongue load. It could cause personal injury and/or vehicle damage.
8. When towing, total vehicle weight must not exceed the Gross Vehicle Weight Rating (GVWR). Also the load distribution on each axle must not exceed the Gross Axle Weight Rating (GAWR). The GVWR and GAWR for your vehicle can be found on the “Certification label” which is located on the left side center pillar of the vehicle.
9. For models equipped with RAB, refer to the part which indicated [RAB].
10. Ensure all recyclable discarded vehicle accessory components and packaging are recycled following local recycling regulations.
11. It is always recommended that this accessory is fitted by a qualified SUBARU technician.
12. In the engine bay, disconnect the negative battery terminal.
13. Safely store and protect any removed vehicle components.
14. Ensure all bare metal surfaces are protected using Automotive Bare Metal Primer and touch-up paint.
15. Remove all metal swarf and dust from all vehicle surfaces if surface is used for accessory installation.
16. Tow hitch to be used with Subaru ball mount L101SSJ205 & L101SSJ207. Ball mount is sold separately.
Warranty is granted only when installation is done correctly by your SUBARU dealer.
SUBARU reserves the right to change the design of accessories and/or construction, illustration, and text of this manual at anytime without prior notice.
Please put installation instruction in glove box once installation is complete.
ACCESS TRUNK WELL AND REMOVE SPARE TIRE
Raise and remove the carpeted spare tire compartment cover.
Remove tool tray
Unscrew and remove tire thumbscrew.
Remove spare tire.
Remove (4) push pin fasteners from side foam trays.
Remove (2) push pin fasteners to remove the rear inside trunk panel.
Remove rear tailgate trim.
REMOVE REAR TAIL LIGHT COVERS
Using a small Phillips head screwdriver, remove (2) screws from the rear tail light cover assembly on each side
Using a rachet with 10mm socket, remove the LH and RH tail light housing by removing 2 bolts on each side. Disconnect the connector when removing the housing.
REMOVE REAR BUMPER FASCIA
With a screwdriver, release (1) small push pin fastener per side on the LH/RH fascia wheel well. Use the tip of the screwdriver to push the center of the pin.
With a small flat head screwdriver, remove (8) large push pin fasteners across the length of the bumper. Save push pins for later use.
Starting at the LH side wheel well, using both hands, pull one side of the fascia out from the vehicle.
Continue around the rear LH side. At the rear corner, begin to pull rearward and work across the vehicle from left to right to remove the entire bumper.
Disconnect the RAB sensor harness.
Fully release the bumper from the vehicle body.
Lay fascia aside where it will not be damaged during hitch installation.
REMOVE REAR BUMPER BEAM
Using 14 mm deep socket, remove (2) bolts and (1) nut from each side of the bumper beam
Discard (2) nuts and (4) bolts.
Remove the bumper beam and apply touch-up paint in the areas shown.
REMOVE MUFFLER AND HEAT SHIELD AND PREPARE FRAME
Unbolt the muffler from the exhaust pipe by disconnecting 2 bolts at the flange.
Discard the exhaust gasket and (2) lock nuts
Remove the muffler by first disengaging the rearmost exhaust hanger, then disengaging the forwardmost exhaust hanger.
Put the muffler aside for later reinstallation.
Remove (4) heat shield bolts and then remove the heat shield. Retain bolts and heat shield for reinstallation.
Remove (2) rubber grommets per side from the bottom of the side frame.
Remove (2) rubber grommet per side from the inside of the frame rail.
INSTALL LH / RH FRAME BRACKET ASSEMBLIES – PART “B”
Place LH and RH welded bracket subassembly “B” into side frame hole opening.
Align the bracket holes with the holes in the frame rail.
Loosely install and hand tighten (2) M12 bolt “C” and washer “D” through the bottom of the frame into the (2) frame holes and (2) into the side frame hole. Repeat on the other side of the vehicle.
INSTALL MAIN HITCH MEMBER – PART “A”
Install the main hitch “A” between the LH and RH frame bracket subassemblies.
Loosely install (3) M12 bolt “C” on each side of the hitch tube into the bracket weld nuts
TORQUE FASTENERS
Torque all fasteners in the order and to the torque values as shown in the table
MODIFYING REAR BUMPER FASCIA
Move the fascia to a flat area in order to cut the “U” shape for the trailer hitch.
Choose the correct paper termplate from the following pages for vehicle trim and prepare as shown on that page.
Align the edges in the template to the features on the inside of the bumper fascia.
With the template in place, mark the opening shape.
Move the fascia to a flat area in order to cut the opening shape for the trailer hitch.
Remove all burrs and rough edges after the cut is made.
INSTALLING RUBBER BUMPER TRIM GASKET “M”
Make sure the starting end of the gasket has a 90° square cut end.
Starting at one end of the bumper opening, carefully slide the gasket “L” along the edge.
Continue to wrap around the opening, being sure to create a smooth joint as you go.
Once the gasket is in place, trim the excess length so that it is even with the edge.
WIRING HARNESS INSTALLATION
Locate vehicle side connector and remove/cut tape to uncoil
Mate trailer harness connector “H” to vehicle connector and wrap in foam tape “K”.
Remove plug from trunk floor panel as shown.
Route the 4-pin connector end of the trailer harness from the inside of the trunk, through the hole to the underside of the vehicle
Fully seat the rubber grommet into the hole.
Remove the adhesive line from the fuse and controller module (ECU) and secure to trunk well in locations shown in picture. (Be sure to thoroughly clean the surface before applying tape)
Route the tube as shown below and then apply adhesive cable tie mounts “J” in the locations shown. (Be sure to thoroughly clean the surface before applying mounts) Use a cable tie “I” to secure the wiring harness to the mounts using the white tape marks on the harness tube as a guide.
USE THESE DIMENSIONS TO REFERENCE MOUNTING LOCATIONS FOR STEPS 6 & 7
(A) cable tie mount to tape mark ~ 2 1/8″ (~55mm)
(B) rear truck panel to cable tie mount ~3 3/8″ (~85mm)
(C) rear truck panel to middle of ECU ~2 3/8″ (~60mm)
(D) distance between ECU and fuse holder ~1 1/2″ (~40mm)
(E) edge of grommet to cable tie mount ~5 1/2″ 2″(~140mm)
(F) rear trunk panel to cable tie mount ~3 1/2″ (~90mm)
Install the 4-pin flat connector into the clam shell mounting connector.
Using hardware provided, install to trailer hitch wiring mounting bracket.
Install (1) adhesive back cable tie mounts “J” in the locations shown. (Be sure to thoroughly clean the surface before applying cable tie mount). Use a cable tie “I” to secure the wiring harness to the mounts using the white tape marks on the harness tube as a guide.
REINSTALLATION OF COMPONENTS
Reinstall heat shield. Torque to 10 Nm (90 in-lb)
Reinstall the muffler using self locking nut “N” and exhaust gasket “O” supplied in kit. Torque the exhaust nuts to 45±5 Nm (35•±4 ft-lb)
Reconnect RAB harness
Reinstall rear bumper fascia.
Reinstall rear tail lights and covers.
Reinstall spare tire and related components.
Replace rear compartment cover.
Place receiver plug “M” into tow hitch receiver neck.
WIRING HARNESS FUNCTION CHECK
With the ignition on but without starting the engine, perform the following checks sequentially on both the vehicle and trailer lights.
(Turn signals will not work without ignition on the ON position)
Turn on headlamps → Tail lights and marker lights are lit
Turn on Left Turn signal → Left turn signal is flashing.
Turn on Right Turn Signal → Right turn signal is flashing.
Apply foot brake → Stop lights are lit.
With the ignition in the “ON” position (not “START”, the engine would not be running) AND the parking brake applied, perform the following checks on both the vehicle and trailer lights.
Push “START”
Press the push-button ignition twice without depressing the brake pedal
Perform the following at the same time.
Apply foot brake → Stop lights are lit.
Turn on headlamps → Tail lights and marker lights are lit
Shift into reverse → Backup lights are lit.
Turn on Hazards → Left and right turn signals are flashing.
INSTALLATION INSTRUCTIONS
These instructions are an official document and an integral part of the trailer hitch. It should be stored in a glove box all the time and handed over with the vehicle if sold.
SAFETY CHAIN HOOK
Always use safety chains when towing.
CAUTION
For further information, read vehicle’s owners manual or consult your dealer or dealer’s service department.
SUBARU accepts no liability for product defects caused by the vehicle owner or other persons and/or incorrect use.
After the first 600 miles (966 km), please consult with SUBARU dealer to re-check the tightness of Trailer Hitch bolts and/or nuts.
For models equipped with BSD (Blind Spot Detection) and RCTA (Rear Cross Traffic Alert) driving support systems, when towing a trailer, press BSD/RCTA OFF switch to deactivate the systems. The system may not operate properly due to the blocked radar waves. For details about BSD/RCTA OFF switch, refer to the owners manual “BSD/RCTA OFF switch”.
For models equipped with RAB (Reverse Automatic Braking) system, please consult with SUBARU dealer when towing a trailer.
2022MY Forester Trailer Hitch
2022MY Forester Trailer Hitch – (French)

- Dependable Strength: Stringently tested to SAE J684 standards, the hitch has a weight capacity of 3,500 pounds gross trailer weight and 350 pounds tongue weight
- Corrosion Resistant: Finished with CURT's unique co-curing process; Each hitch is dipped in a liquid A-coat for rust prevention, inside and out, and then co-cured in a durable black powder coat finish for maximum rust, chip and UV resistance
- Vehicle Compatibility: Each CURT class 3 hitch is engineered to fit on a specific vehicle; This provides the best possible fit and easiest installation; Fits 2020-2025 Legacy & Outback
- Warranty: Covered by CURT's limited lifetime warranty to give you confidence in each adventure, season after season
- Made in USA: CURT custom-fit receiver hitches are made in the USA to ensure quality from design to finish (may include imported hardware)


- Rated to 3,500 lbs. gross trailer weight and 525 lbs. tongue weight
- Engineered with a vehicle-specific design for a custom fit
- Tested for safety in accordance with SAE J684
- Precisely welded for superior strength and fit
- Protected by a durable high-gloss black powder coat finish

- VEHICLE FITMENT — (NOTE:Vehicle Frame hole enlarge is required). Compatible with Subaru Crosstrek 2018-2023. Please check vehicle compatibility before purchase.
- VERSATILE DESIGN — This class 3 hitch equips your vehicle with a standard 2-inch x 2-inch hitch receiver.(not compatible with vertical hanging bikes / bike racks that require the bikes to be hung / mounted vertically). Includes a hitch cover to block dirt, moisture, and debris from the receiver tube, preventing rust and corrosion.
- HEAVY DUTY TOWING CAPACITY — Gross Trailer Weight (GTW): 3,500 lbs. Tongue Weight (TW): 525 lbs. (limited to lowest-rated towing component).
- SECURE TOWING PERFORMANCE — Tested for towing safety, delivering a solid and stable connection that helps reduce movement for a safer and smoother towing experience.
- RUST, CHIP, UV-RESISTANT — This tow hitch is protected with a unique dual-coat finish of rust-resistant liquid A-coat and highly durable black powder coat. The two finishes are co-cured together for exceptional resistance to rust, chipping and UV rays.

- Fitment: This Class 3 Trailer Hitch Compatible with 2010-2019 Subaru Outback
- Feature: This heavy-duty steel trailer hitch features a durable black powder-coated finish, rated for a maximum gross trailer weight of 4000 lbs (4000 lbs with weight distribution) and a maximum tongue weight of 600 lbs (600 lbs with weight distribution)
- Function:This heavy-duty trailer hitch provides a standard 2-inch square receiver, offering versatile mounting for cargo racks, bike racks, tow hooks, and various other accessories. Constructed from robust steel and finished with a durable black powder coat, it delivers superior protection and exceptional resistance to rust, ensuring reliable performance and longevity even under demanding outdoor conditions and rigorous work environments
- Installation: Installation is straightforward using the included hardware; however, it is essential to thoroughly review the provided installation instructions before beginning, as they contain critical information and specific guidance. For optimal performance, professional installation is highly recommended
- Package: 1 x Trailer Hitch including instruction manual and mounting hardware

- Rated to 3,500 lbs. gross trailer weight and 525 lbs. tongue weight
- Engineered with a vehicle-specific design for a custom fit
- Concealed main body for OE look and seamless integration with the vehicle
- Tested for safety in accordance with SAE J684
- Precisely welded for superior strength and fit
SEOCONTENT-START
OF PART NUMBER: L101SSJ005 DESCRIPTION: FORESTER TRAILER HITCH SUBARU OF AMERICA PAGE PLEASE READ THESE INSTRUCTIONS CAREFULLY, BEFORE YOU START INSTALLATIONSAFETY PRECAUTION: When installing Trailer Hitch, the use of safety glasses is recommended.WARNING:1. Always install the accessory following the instructions. Failure to do so may cause damage to the vehicle or the accessory.2. Please also refer to SUBARU SERVICE MANUAL upon removing and re-assembling vehicle components.3. Do not drill, cut, weld or otherwise modify the Trailer Hitch.4. Do not lubricate the bolts and nuts with oil or grease.5. If Trailer Hitch is removed, a bumper beam MUST be reinstalled. Failure to reinstall a bumper beam after removal of the trailer hitch will negatively affect vehicle rear crash performance. Please contact your SUBARU dealer. 6. When a Trailer Hitch is installed, it is not possible to install the rear towing hook.7. Never exceed the maximum towing capacity and maximum tongue load. It could cause personal injury and/or vehicle damage. 8. When towing, total vehicle weight must not exceed the Gross Vehicle Weight Rating (GVWR). Also the load distribution on each axle must not exceed the Gross Axle Weight Rating (GAWR). The GVWR and GAWR for your vehicle can be found on the “Certification label” which is located on the left side center pillar of the vehicle.9. For models equipped with RAB, refer to the part which indicated [RAB].10. Ensure all recyclable discarded vehicle accessory components and packaging are recycled following local recycling regulations.11. It is always recommended that this accessory is fitted by a qualified SUBARU technician.12. In the engine bay, disconnect the negative battery terminal.13. Safely store and protect any removed vehicle components.14. Ensure all bare metal surfaces are protected using Automotive Bare Metal Primer and touch-up paint.15. Remove all metal swarf and dust from all vehicle surfaces if surface is used for accessory installation.16. Tow hitch to be used with Subaru ball mount L101SSJ205 & L101SSJ207. Ball mount is sold separately. Warranty is granted only when installation is done correctly by your SUBARU dealer.SUBARU reserves the right to change the design of accessories and/or construction, illustration, and text of this manual at anytime without prior notice.Please put installation instruction in glove box once installation is complete. ISSUE 03 DATE 4/18/2022 INSTALLATION INSTRUCTIONS 1 21 L101SSJ005 PART NUMBER RH LH wiring harness cable tie cable tie mount foam tape rubber trim exhaust nut exhaust gasket OF B KIT CONTENTS: x2 H I J D A C x1 set M12 hex flange bolt x8 L101SSJ005 03 x2 x1 21 SUBARU OF AMERICA PAGE 4/18/2022 2 x1 PART NUMBER ISSUE DATE O M12 flat washer x3 K L M N x1 x3 x14 x1 G E F x1 Items E, F, G are Items E, F, G are not included with hitch kit.not included with hitch kit. Ball mount kit is sold separately as #L101SSJ205 & L101SSJ207 Ball mount kit is sold separately as #L101SSJ205 & L101SSJ207 OF PAGE 21 03 4/18/2022 3 TOOLS REQUIRED: 1/2″ drive torque wrench 1/2″ drive racket Flat head screwdriver Phillips head screwdriver 10 mm socket 7mm socket 6″ socket extension touch up paint file side cutter PART NUMBER 18mm open end wrench ISSUE DATE SUBARU OF AMERICA 14mm open end wrench 17mm deep well socket 14mm deep well socket reamer cutting tool clip remover 7mm open end wrench L101SSJ005 1 Raise and remove the carpeted spare tire compartment cover. 2 Remove tool tray 3 Unscrew and remove tire thumbscrew. 4 Remove spare tire. 5 Remove (4) push pin fasteners from side foam trays. 6 Remove rear tailgate trim. (2) push pin fasteners to remove the rear inside trunk panel. 7 Remove rear tailgate trim. 0 OF SUBARU OF AMERICA PAGE 1 ACCESS TRUNK WELL AND REMOVE SPARE TIRE L101SSJ005 03 4/18/2022 4 21 PART NUMBER ISSUE DATE 1 1 2 2 3 3 4 4 5 5 5 5 6 6 6 6 clip remover clip remover 7 7 1 2 OF DATE 4/18/2022 5 2 REMOVE REAR TAIL LIGHT COVERS Using a small Phillips head screwdriver, remove (2) screws from the rear tail light cover assembly on each side PAGE 03 SUBARU OF AMERICA 21 L101SSJ005 PART NUMBER ISSUE Using a rachet with 10mm socket, remove the LH and RH tail light housing by removing 2 bolts on each side. Disconnect the connector when removing the housing. LH tail LH tail light light covercover 1 1 1 1 ratchet ratchet 10mm socket 10mm socket 2 2 Phillips head screwdriver Phillips head screwdriver 2 2 1 2 3 4 (TOP OF VEHICLE) (TOP OF VEHICLE) OF 21 SUBARU OF AMERICA PAGE 5 67 Disconnect the RAB sensor harness.Fully release the bumper from the vehicle body.Lay fascia aside where it will not be damaged during hitch installation. L101SSJ005 03 4/18/2022 6 Starting at the LH side wheel well, using both hands, pull one side of the fascia out from the vehicle. With a screwdriver, release (1) small push pin fastener per side on the LH/RH fascia wheel well. Use the tip of the screwdriver to push the center of the pin. With a small flat head screwdriver, remove (8) large push pin fasteners across the length of the bumper. Save push pins for later use. 3 REMOVE REAR BUMPER FASCIA PART NUMBER ISSUE DATE Continue around the rear LH side. At the rear corner, begin to pull rearward and work across the vehicle from left to right to remove the entire bumper. 2 2 (x8) (x8) 1 1 3 3 4 4 4 4 clip remover clip remover flat flathead screwdriverhead screwdriver 1 2 3 LH SIDE RH SIDE OF 4 REMOVE REAR BUMPER BEAM Remove the bumper beam and apply touch-up paint in the areas shown. Discard (2) nuts and (4) bolts. Using 14 mm deep socket, remove (2) bolts and (1) nut from each side of the bumper beam L101SSJ005 03 PAGE 7 21 PART NUMBER ISSUE DATE SUBARU OF AMERICA 4/18/2022 If Trailer Hitch is removed, If Trailer Hitch is removed,a bumper beam MUST be reinstalled. Failure to a bumper beam MUST be reinstalled. Failure to reinstall a bumper beam after removal of the trailer hitch will negatively affect reinstall a bumper beam after removal of the trailer hitch will negatively affect vehicle rear crash performance. Please contact your SUBARU dealervehicle rear crash performance. Please contact your SUBARU dealer. . ! ! 1 1 14mm deep socket 14mm deep socket ratchet ratchet extension extension 1 1 1 1 1 1 1 1 1 1 apply touch up paint in apply touch up paint in these areasthese areas touch up paint pen touch up paint pen 1 2 3 4 5 6 7 Remove (2) rubber grommet per side from the inside of the frame rail. OF PART NUMBER ISSUE DATE SUBARU OF AMERICA PAGE L101SSJ005 03 4/18/2022 8 21 Remove the muffler by first disengaging the rearmost exhaust hanger, then disengaging the forwardmost exhaust hanger. Put the muffler aside for later reinstallation. Remove (4) heat shield bolts and then remove the heat shield. Retain bolts and heat shield for reinstallation. Remove (2) rubber grommets per side from the bottom of the side frame. 5 REMOVE MUFFLER AND HEAT SHIELD AND PREPARE FRAME Unbolt the muffler from the exhaust pipe by disconnecting 2 bolts at the flange. Discard the exhaust gasket and (2) lock nuts 1 1 2 2 2 2 RH RH REAR REAR 6 6 6 6 7 7 7 7 2 3 4 OF 6 INSTALL LH / RH FRAME BRACKET ASSEMBLIES – PART “B” L101SSJ005 03 4/18/2022 9 21 DATE SUBARU OF AMERICA PAGE PART NUMBER ISSUE Place LH and RH welded bracket subassembly “B” into side frame hole opening. Loosely install and hand tighten (2) M12 bolt “C” and washer “D” through the bottom of the frame into the (2) frame holes and (2) into the side frame hole. Repeat on the other side of the vehicle. Align the bracket holes with the holes in the frame rail. B B 2 2 (LH side) (LH side) (LH side) (LH side) D D C C D D C C 1 2 OF 21 PART NUMBER ISSUE Loosely install (3) M12 bolt “C” on each side of the hitch tube into the bracket weld nuts Install the main hitch “A” between the LH and RH frame bracket subassemblies. 03 DATE 4/18/2022 L101SSJ005 SUBARU OF AMERICA PAGE 10 7 INSTALL MAIN HITCH MEMBER – PART “A” C C C C C C 1 OF ORDER TORQUE (Nm) TORQUE (ft-lb) socket size (mm) 14 105 78 17 12 105 78 17 13 105 78 17 10 105 78 17 11 105 78 17 8 105 78 17 9 105 78 17 6 105 78 17 7 105 78 17 4 105 78 17 5 105 78 17 2 105 78 17 3 105 78 17 8 TORQUE FASTENERS Torque all fasteners in the order and to the torque values as shown in the table SUBARU OF AMERICA 4/18/2022 L101SSJ005 03 PAGE 11 21 PART NUMBER 1 105 78 17 ISSUE DATE ! ! 17mm deep well socket 17mm deep well socket torque wrench torque wrench extension extension 1 2 3 4 5 6 1 2 3 4 OF 12 21 PAGE L101SSJ005 PART NUMBER ISSUE DATE SUBARU OF AMERICA 03 4/18/2022 9 MODIFYING REAR BUMPER FASCIA Move the fascia to a flat area in order to cut the “U” shape for the trailer hitch. Once the gasket is in place, trim the excess length so that it is even with the edge. Make sure the starting end of the gasket has a 90° square cut end. Starting at one end of the bumper opening, carefully slide the gasket “L” along the edge. Remove all burrs and rough edges after the cut is made. Continue to wrap around the opening, being sure to create a smooth joint as you go. With the template in place, mark the opening shape. Align the edges in the template to the features on the inside of the bumper fascia. Choose the correct paper termplate from the following pages for vehicle trim and prepare as shown on that page. Move the fascia to a flat area in order to cut the opening shape for the trailer hitch. 10 INSTALLING RUBBER BUMPER TRIM GASKET “M” 3 3 AFTER CUT AFTER CUT side cutter side cutter file file cutting tool cutting tool reamer reamer 3 3 4 4 4 4 4 4 5 5 6 6 4 4 1 1 2 2 L L 3 3 DRIVER’S DRIVER’S SIDESIDE OF 21 PART NUMBER ISSUE DATE SUBARU OF AMERICA PAGE L101SSJ005 03 4/18/2022 13 INSTALL ON INSIDE INSTALL ON INSIDEFACE OF FACE OF BUMPER FASCIABUMPER FASCIA ALIGN ALIGNTO TO REAR REAR BUMPERBUMPEREDGEEDGE Paper Size: Letter Paper Size: Letter Scale: Scale:1:11:1 Select Select”Actual Size” in printer options”Actual Size” in printer options WILDERNESS WILDERNESS BUMPERBUMPER ALIGN ALIGNEDGE TO EDGE TO BUMPER STYLING BUMPER STYLING BUMPBUMP–OUT FEATUREOUT FEATURE BUMPER BUMPERCUT LINECUT LINE installed in installed in bumperbumper 4″ REF TO CHECK 4″ REF TO CHECK SCALESCALE 8″ REF TO CHECK 8″ REF TO CHECK SCALESCALE when whencomplete, template complete, template should look like this: should look like this: OF 21 PART NUMBER ISSUE DATE SUBARU OF AMERICA PAGE L101SSJ005 03 4/18/2022 14 INSTALL ON INSIDE INSTALL ON INSIDEFACE OF BUMPER FACE OF BUMPER FASCIAFASCIA Paper Size: Letter Scale: Scale:1:11:1 Select Select”Actual Size” in printer options”Actual Size” in printer options STANDARD STANDARD BUMPERBUMPER ALIGN ALIGNTO REAR TO REAR BUMPERBUMPEREDGEEDGE ALIGN ALIGNTO TO CENTERLINE CENTERLINE OF BUMPEROF BUMPER BUMPER BUMPERCUT LINECUT LINE 4″ REF TO CHECK 4″ REF TO CHECK SCALESCALE 8″ REF TO CHECK 8″ REF TO CHECK SCALESCALE when whencomplete, template should complete, template should look like this: look like this: template templateinstalled installed in bumperin bumper OF 21 PART NUMBER ISSUE DATE SUBARU OF AMERICA PAGE L101SSJ005 03 4/18/2022 15 INSTALL ON INSIDE INSTALL ON INSIDEFACE OF BUMPER FACE OF BUMPER FASCIAFASCIA Paper Size: Letter Paper Size: Letter Scale: Scale:1:11:1 Select Select”Actual Size” in printer options”Actual Size” in printer options TOURING BUMPER TOURING BUMPER ALIGN ALIGNTO REAR TO REAR BUMPERBUMPEREDGEEDGE BUMPER BUMPERCUT LINECUT LINE ALIGN EDGE ALIGN EDGE TO CREASE IN TO CREASE IN THE BUMPERTHE BUMPERFASCIA FASCIA installed in installed in bumperbumper 4″ REF TO CHECK 4″ REF TO CHECK SCALESCALE 8″ REF TO CHECK 8″ REF TO CHECK SCALESCALE when whencomplete, template complete, template should look like this: should look like this: ALIGN TEMPLATE ALIGN TEMPLATE CENTERLINE TO CENTERLINE TO CENTER FASCIA CENTER FASCIA CLIP CLIP TEMPLATE CENTERLINE TEMPLATE CENTERLINE 1 2 OF PART NUMBER ISSUE DATE SUBARU OF AMERICA PAGE L101SSJ005 03 4/18/2022 16 21 Mate trailer harness connector “H” to vehicle connector and wrap in foam tape “K”. 11 WIRING HARNESS INSTALLATION Locate vehicle side connector and remove/cut tape to uncoil 1 1 2 2 3 4 5 6 7 OF PART NUMBER SUBARU OF AMERICA L101SSJ005 03 4/18/2022 ISSUE DATE PAGE 17 21 11 WIRING HARNESS INSTALLATION (CONT’D) Remove plug from trunk floor panel as shown. Route the 4-pin connector end of the trailer harness from the inside of the trunk, through the hole to the underside of the vehicle Fully seat the rubber grommet into the hole. Remove the adhesive line from the fuse and controller module (ECU) and secure to trunk well in locations shown in picture. (Be sure to thoroughly clean the surface before applying tape) Route the tube as shown below and then apply adhesive cable tie mounts “J” in the locations shown. (Be sure to thoroughly clean the surface before applying mounts) Use a cable tie “I” to secure the wiring harness to the mounts using the white tape marks on the harness tube as a guide. 3 3 4 4 (inside) (inside) (outside) (outside) 5 5 5 5 6 6 6 6 7 7 7 7 USE THESE DIMENSIONS TO REFERENCE MOUNTING LOCATIONS USE THESE DIMENSIONS TO REFERENCE MOUNTING LOCATIONS FOR STEPS 6 & 7FOR STEPS 6 & 7 (A) cable (A) cabletie mount to tape mark ~tie mount to tape mark ~22–1/8″ (~55mm)1/8″ (~55mm) (B) rear truck panel to cable tie mount ~3 (B) rear truck panel to cable tie mount ~3–3/8″ (~85mm)3/8″ (~85mm) (C) rear truck panel to middle of ECU ~2 (C) rear truck panel to middle of ECU ~2–3/8″ (~60mm)3/8″ (~60mm) (D) distance between ECU and fuse holder ~1 (D) distance between ECU and fuse holder ~1–1/2″ (~40mm)1/2″ (~40mm) (E) edge of grommet to cable tie mount ~5 (E) edge of grommet to cable tie mount ~5–1/2″1/2″(~140mm)(~140mm) (F) rear trunk panel to cable tie mount ~3 (F) rear trunk panel to cable tie mount ~3–1/2″ (~90mm)1/2″ (~90mm) (A) (A) (B) (B) (C) (C) (D) (D) (E) (E) (F) (F) 8 9 OF 10 11 WIRING HARNESS INSTALLATION (CONT’D) Install the 4-pin flat connector into the clam shell mounting connector. Using hardware provided, install to trailer hitch wiring mounting bracket. PART NUMBER ISSUE DATE SUBARU OF AMERICA PAGE L101SSJ005 03 4/18/2022 18 21 Install (1) adhesive back cable tie mounts “J” in the locations shown. (Be sure to thoroughly clean the surface before applying cable tie mount). Use a cable tie “I” to secure the wiring harness to the mounts using the white tape marks on the harness tube as a guide. 8 8 9 9 10 10 9 9 110mm 110mm(~4(~4–1/4″)1/4″) 1 2 3 4 5 6 7 8 1 2 3 4 OF With the ignition on but without starting the engine, perform the following checks sequentially on both the vehicle and trailer lights. Turn on headlamps Turn on Left Turn signal Turn on Right Turn Signal Apply foot brake → → → → 4/18/2022 19 21 Place receiver plug “M” into tow hitch receiver neck. Left turn signal is flashing. Right turn signal is flashing. Stop lights are lit. Tail lights and marker lights are lit (Turn signals will not work without ignition on the ON position) 12 REINSTALLATION OF COMPONENTS Reinstall heat shield. Torque to 10 Nm (90 in-lb) PART NUMBER ISSUE DATE SUBARU OF AMERICA PAGE L101SSJ005 03 Reconnect RAB harness Reinstall rear bumper fascia. Reinstall the muffler using self locking nut “N” and exhaust gasket “O” supplied in kit. Torque the exhaust nuts to 45±5 Nm (35•±4 ft-lb) Reinstall rear tail lights and covers. 13 WIRING HARNESS FUNCTION CHECK Reinstall spare tire and related components. Replace rear compartment cover. 1 OF Backup lights are lit. Perform the following at the same time. Apply foot brake Stop lights are lit. Turn on headlamps Tail lights and marker lights are lit → Turn on Hazards Left and right turn signals are flashing. 13 WIRING HARNESS FUNCTION CHECK (CONT’D) With the ignition in the “ON” position (not “START”, the engine would not be running) AND the parking brake applied, perform the following checks on both the vehicle and trailer lights. Push “START” Press the push-button ignition twice without depressing the brake pedal L101SSJ005 03 PART NUMBER 4/18/2022 20 PAGE 21 ISSUE DATE SUBARU OF AMERICA Shift into reverse 1 1 1 2 3 4 5 OF 14 INSTALLATION INSTRUCTIONS These instructions are an official document and an integral part of the trailer hitch. It should be stored in a glove box all the time and handed over with the vehicle if sold. 15 SAFETY CHAIN HOOK Always use safety chains when towing. PART NUMBER 16 CAUTION For models equipped with BSD (Blind Spot Detection) and RCTA (Rear Cross Traffic Alert) driving support systems, when towing a trailer, press BSD/RCTA OFF switch to deactivate the systems. The system may not operate properly due to the blocked radar waves. For details about BSD/RCTA OFF switch, refer to the owners manual “BSD/RCTA OFF switch”. ISSUE DATE SUBARU OF AMERICA PAGE For models equipped with RAB (Reverse Automatic Braking) system, please consult with SUBARU dealer when towing a trailer. L101SSJ005 03 4/18/2022 21 21 For further information, read vehicle’s owners manual or consult your dealer or dealer’s service department. SUBARU accepts no liability for product defects caused by the vehicle owner or other persons and/or incorrect use. After the first 600 miles (966 km), please consult with SUBARU dealer to re-check the tightness of Trailer Hitch bolts and/or nuts. ! ! ! !
**************************************************************************************************************
DE NUMÉRO DE PIÈCE : L101SSJ005 DESCRIPTION : ATTELAGE DE REMORQUE DE FORESTER SUBARU OF AMERICA PAGE VEUILLEZ LIRE ATTENTIVEMENT CES INSTRUCTIONS AVANT D’ENTREPRENDRE L’INSTALLATION.MESURE DE SÉCURITÉ : Le port de lunette de sécurité est recommandé lors de l’installation d’un attelage de remorque.AVERTISSEMENT :1. Posez toujours l’accessoire conformément aux instructions d’installation. Faute de quoi, des dommages pourraient survenir au véhicule ou à l’accessoire.2. Veuillez aussi consulter le MANUEL D’ENTRETIEN DE SUBARU pour la dépose et le remontage des composants du véhicule.3. Évitez de percer, de couper, de souder ou de modifier de quelconque façon l’attelage de remorque.4. Évitez de lubrifier les boulons et les écrous avec de l’huile ou de la graisse.5. Si l’attelage de remorque est retiré, une poutre de pare-chocs DOIT être réinstallée, sinon cela pourrait avoir une incidence négative sur la résistance aux collisions arrière du véhicule. Veuillez communiquer avec votre concessionnaire SUBARU. 6. Il n’est pas possible d’installer un crochet de remorquage arrière si un attelage de remorque est installé.7. Vous ne devez jamais dépasser la capacité de remorquage et la charge au timon maximales, sinon cela pourrait causer des blessures et/ou endommager le véhicule. 8. Lors de remorquage, le poids total du véhicule ne doit pas dépasser le poids nominal brut du véhicule (PNBV). Aussi, la distribution de la charge sur chaque essieu ne doit pas dépasser le poids nominal brut sur l’essieu (PNBE). Le PNBV et le PNBE de votre véhicule sont indiqués sur le « sceau d’attestation » situé sur le côté gauche du montant central du véhicule.9. Pour les modèles équipés du freinage automatique en marche arrière, reportez-vous à la pièce indiquant [RAB].10. Assurez-vous que les composants recyclables et l’emballage de l’accessoire sont recyclés conformément aux règles en vigueur.11. Il est fortement recommandé de confier l’installation de l’accessoire à un technicien SUBARU qualifié.12. Dans le compartiment moteur, débranchez le câble négatif de la batterie.13. Les composants déposés doivent être entreposés de façon sécuritaire.14. Les surfaces métalliques nues doivent être protégées en appliquant un apprêt automobile pour métal nu et de la peinture de retouche.15. Enlevez les éclats métalliques et la saleté qui pourraient couvrir la surface de pose.16. Crochet de remorquage à utiliser avec la boule de fixation Subaru L101SSJ205 & L101SSJ207. (vendu séparément)La garantie sera valide uniquement si l’installation est effectuée correctement par votre concessionnaire SUBARU.SUBARU se réserve le droit de modifier la conception des accessoires ou leur construction, les illustrations et le texte du présent manuel en tout temps et sans préavis.Veuillez ranger les instructions d’installation dans la boîte à gants, une fois l’installation terminée. VERSION 01 DATE 4/26/2022 INSTRUCTIONS D’INSTALLATION 1 21 L101SSJ005 NUMÉRO DE PIÈCE DROIT GAUCHE faisceau de fils attache-câble fixation d’attache-câble ruban mousse joint d’échappement DE CONTENU : x2 H I J D A B C x1 x1 jeu x6 x3 rondelle plate M12 L101SSJ005 01 x2 x1 21 SUBARU OF AMERICA PAGE 4/26/2022 2 x1 NUMÉRO DE PIÈCE VERSION DATE O K L M N x1 x3 Boulon à tête hexagonale à embase M12 joint de garniture en caoutchouc écrou d’échappement x12 x1 G E F E, F, G vendu séparément E, F, G vendu séparément.. (# L101SSJ205 & L101SSJ207) (# L101SSJ205 & L101SSJ207) DE PAGE 21 01 4/26/2022 3 OUTILS REQUIS : clé dynamométrique à prise de 1/2 po clé à cliquet à prise de 1/2 po tournevis à tête plate tournevis Phillips douille de 10 mm douille de 7mm rallonge de douille de 6 po peinture de retouche lime pince à tranchant latéral NUMÉRO DE PIÈCE clé à fourche de 18mm VERSION DATE SUBARU OF AMERICA clé à fourche de 14mm douille longue de 17mm douille longue de 14mm alésoir outil de coupe dégrafeuse clé à fourche de 7mm L101SSJ005 1 Soulever et déposer le couvercle moquetté du compartiment du pneu de secours. 2 Déposer le plateau à outils. 3 Dévisser et retirer la vis à oreilles du pneu. 4 Retirer le pneu de secours. 5 Retirer (4) goupilles-poussoirs des panneaux en mousse latéraux. 6 Remove rear tailgate trim. Retirer (2) goupilles-poussoirs. 7 Retirer la garniture du hayon. 0 DE SUBARU OF AMERICA PAGE 1 RETIRER LE PNEU DE SECOURS L101SSJ005 01 4/26/2022 4 21 NUMÉRO DE PIÈCE VERSION DATE 1 1 2 2 3 3 4 4 5 5 5 5 6 6 6 6 dégrafeuse dégrafeuse 8 8 7 7 1 2 DE DATE 4/26/2022 5 2 RETIRER LES COUVERCLES DE FEUX ARRIÈRE. Au moyen d’un petit tournevis Phillips, retirer les (2) vis des boîtiers de feux arrière de chaque côté PAGE 01 SUBARU OF AMERICA 21 L101SSJ005 NUMÉRO DE PIÈCE VERSION À l’aide d’un cliquet avec une douille de 10 mm, retirer les boîtiers des feux arrière gauche et droit en retirant les deux boulons de chaque côté des boîtiers. Débrancher le connecteur lorsque le boîtier est retiré. Feu arrière Feu arrière gauchegauche 1 1 1 1 clé à cliquet clé à cliquet douille de 30mm douille de 30mm 1 1 tournevis Phillips tournevis Phillips 1 2 3 4 5 6 7 DE 21 SUBARU OF AMERICA PAGE L101SSJ005 01 4/26/2022 6 Depuis le passage de roue arrière gauche, utiliser les deux mains pour retirer un côté du carénage du véhicule. Au moyen d’un tournevis, dégager (1) petite goupille-poussoir de chaque côté des passages de roues gauche et droite du carénage. Utiliser la pointe du tournevis pour enfoncer le centre de la goupille. À l’aide d’un petit tournevis à pointe plate, retirer les (8) grosses goupilles-poussoirs sur toute la longueur du pare-chocs. Conserver les goupilles-poussoirs pour un usage ultérieur. 3 RETRAIT DU CARÉNAGE DU PARE-CHOCS ARRIÈRE NUMÉRO DE PIÈCE VERSION DATE Poursuivre jusqu’au gauche arrière. Depuis le coin arrière gauche, tirer le pare-chocs pour le dégager, et effectuer la même opération sur toute la longueur du pare-chocs jusqu’au côté droit. (DESSUS DU VÉHICULE) (DESSUS DU VÉHICULE) Débrancher le faisceau des capteurs du système de freinage automatique en marche arrière. Dégager entièrement le pare-chocs du véhicule. Déposer le carénage à un endroit sécuritaire pendant l’installation de l’attelage de remorque. 2 2 (x8) (x8) 1 1 3 3 4 4 4 4 dégrafeuse dégrafeuse 1 2 3 CÔTÉ GAUCHE CÔTÉ DROIT DE 4 DÉPOSE DE LA POUTRE DU PARE-CHOCS ARRIÈRE Mettre au rebut les (2) écrous et (4) boulons. Au moyen d’une douille longue de 14 mm, retirer (2) boulons et (1) écrou de chaque côté de la poutre du pare-chocs. Retirer la poutre du pare-chocs et appliquer de la peinture de retouche aux endroits indiqués. L101SSJ005 01 PAGE 7 21 NUMÉRO DE PIÈCE VERSION DATE SUBARU OF AMERICA 4/26/2022 Si l’attelage de remorque est retiré, une poutre de pare Si l’attelage de remorque est retiré, une poutre de pare–chocs DOIT être réinstallée, sinon cela chocs DOIT être réinstallée, sinon cela pourrait avoir une incidence négative sur la résistance aux collisions arrière du véhicule. Veuillez pourrait avoir une incidence négative sur la résistance aux collisions arrière du véhicule. Veuillez communiquer avec votre concessionnaire SUBARU. communiquer avec votre concessionnaire SUBARU. ! ! 1 1 douille longue de 14 douille longue de 14mmmm clé à cliquet clé à cliquet rallonge rallonge 1 1 1 1 1 1 1 1 1 1 peinture de retouche peinture de retouche 1 2 3 4 5 6 7 DE NUMÉRO DE PIÈCE VERSION DATE SUBARU OF AMERICA PAGE L101SSJ005 01 4/26/2022 8 21 Retirer (1) passe-fils en caoutchouc par côté de la partie intérieure du longeron du cadre. 5 RETIRER LE SILENCIEUX ET LE BOUCLIER THERMIQUE ET PRÉPARER LE CHÂSSIS Mettre le silencieux de côté pour le réinstaller ultérieurement. Pour retirer le silencieux, désengager d’abord le tout dernier support d’échappement, avant de désengager celui le plus à l’avant. Mettre au rebut le joint d’échappement et les (2) écrous de blocage. Retirer les deux boulons de la collerette afin de séparer le silencieux du tuyau d’échappement. Retirer les (4) boulons du bouclier thermique, puis enlever ce dernier. Conserver ces écrous et le bouclier thermique pour les réinstaller ultérieurement. Retirer (2) passe-fils en caoutchouc par côté de la partie inférieure du cadre latéral. 1 1 2 2 2 2 DROIT DROIT 6 6 6 6 7 7 AVANT DU VÉHICULE AVANT DU VÉHICULE 2 3 4 DE 6 POSE DES SUPPORTS GAUCHE ET DROIT DU CADRE – PIÈCE « B » L101SSJ005 01 4/26/2022 9 21 DATE SUBARU OF AMERICA PAGE NUMÉRO DE PIÈCE VERSION Poser sans serrer (2) boulons M12 « C » et une rondelle « D » dans les (2) trous de la partie inférieure du cadre et dans les (2) trous inférieurs du cadre latéral. Reprendre les mêmes étapes de l’autre côté du véhicule. Aligner les trous des supports avec les trous dans le longeron du cadre. Insérer le sous-ensemble « B » des supports soudés gauche et droit dans l’ouverture du cadre latéral. D D C C D D C C B B 2 2 (Côté gauche) (Côté gauche) (Côté gauche) (Côté gauche) 1 2 DE 10 21 NUMÉRO DE PIÈCE VERSION Installer l’attelage principal « A » entre les sous-ensembles de support de cadre gauche et droit. Poser sans serrer (3) boulons M12 « C » de chaque côté dans les écrous soudés du support. 01 DATE 4/26/2022 L101SSJ005 SUBARU OF AMERICA PAGE 7 POSE DE L’ÉLÉMENT PRINCIPAL DE L’ATTELAGE – PIÈCE « A » C C C C C C 1 DE 8 SERRAGE DES FIXATIONS Serrer toutes les fixations dans l’ordre indiqué et au couple prescrit, comme l’indique le tableau. L101SSJ005 01 PAGE 11 21 NUMÉRO DE PIÈCE VERSION DATE SUBARU OF AMERICA 4/26/2022 ORDRE COUPLE(Nm) COUPLE (ft-lb) grosseur de douille (mm) 1 105 78 17 4 105 78 17 5 105 78 17 2 105 78 17 3 105 78 17 8 105 78 17 9 105 78 17 6 105 78 17 7 105 78 17 12 105 78 17 10 105 78 17 11 105 78 17 ! ! douille longue douille longue dede17mm17mm clé dynamométrique clé dynamométrique rallonge rallonge 1 2 3 4 5 6 1 2 3 4 DE 9 MODIFICATION DU CARÉNAGE DU PARE-CHOCS ARRIÈRE Une fois le joint en place, enlever tout excédent afin qu’il soit affleurant au bord. S’assurer que l’extrémité de départ du joint est coupée à 90°. En commençant à une extrémité de l’ouverture du pare-chocs, insérer soigneusement le joint « M » le long du bord. Poursuivre en recouvrant toute l’ouverture en s’assurant de créer un joint lisse. Choisir le gabarit en papier approprié dans les pages suivantes selon la garniture du véhicule et le préparer comme indiqué sur la page en question. Placer le carénage sur une surface plate afin de couper la section en « U » nécessaire au passage de l’attelage de remorque. 01 4/26/2022 Placer le carénage sur une surface plate afin de couper la section en « U » nécessaire au passage de l’attelage de remorque. Placer le carénage sur une surface plate afin de couper la forme d’ouverture nécessaire pour le passage de l’attelage de remorque. Avec le gabarit en place, tracer la forme d’ouverture. Aligner les bords du gabarit avec les indications à l’intérieur du carénage du pare-chocs. 10 POSE DU JOINT DE GARNITURE EN CAOUTCHOUC DU PARE-CHOCS « M » 12 21 PAGE L101SSJ005 NUMÉRO DE PIÈCE VERSION DATE SUBARU OF AMERICA 3 3 APRÈS LA COUPE APRÈS LA COUPE pince à tranchant latéral pince à tranchant latéral lime lime outil de coupe outil de coupe alésoir alésoir 3 3 4 4 4 4 4 4 5 5 6 6 4 4 1 1 2 2 L L 3 3 CÔTÉ CÔTÉ CONDUCTEURCONDUCTEUR DE 21 PART NUMBER ISSUE DATE SUBARU OF AMERICA PAGE L101SSJ005 03 4/18/2022 13 Appliquer sur la surface Appliquer sur la surface intérieure du carénage. intérieure du carénage. ALIGNER AVEC LE ALIGNER AVEC LE BORD DU PAREBORD DU PARE–CHOCS ARRIÈRECHOCS ARRIÈRE Format du papier Format du papier: Lettre: Lettre Échelle Échelle: 1:1: 1:1 Sélectionner « Sélectionner «Taille réelleTaille réelle» dans les » dans les options de l’imprimanteoptions de l’imprimante WILDERNESS WILDERNESS ALIGNER LE BORD AVEC ALIGNER LE BORD AVEC LA GARNITURE DE LA LA GARNITURE DE LA BORDURE DE PAREBORDURE DE PARE–CHOCSCHOCS DÉMARCATION DÉMARCATION DU PAREDU PARE–CHOCSCHOCS installé à l’intérieur du installé à l’intérieur du parepare–chocschocs RÉF. DE 4 RÉF. DE 4PO POUR PO POUR VÉRIFIER L’ÉCHELLEVÉRIFIER L’ÉCHELLE RÉF. DE 8 RÉF. DE 8PO POUR PO POUR VÉRIFIER VÉRIFIER L’ÉCHELLEL’ÉCHELLE une fois terminé le gabarit une fois terminé le gabarit devrait ressembler à cecidevrait ressembler à ceci: : OF 21 PART NUMBER ISSUE DATE SUBARU OF AMERICA PAGE L101SSJ005 03 4/18/2022 14 Appliquer sur la surface Appliquer sur la surface intérieure du carénage. intérieure du carénage. ALIGNER AVEC LE BORD DU ALIGNER AVEC LE BORD DU PAREPARE–CHOCS ARRIÈRECHOCS ARRIÈRE ALIGNEZ ALIGNEZ–LE LE AVEC L’AXE AVEC L’AXE CENTRAL DU CENTRAL DU PAREPARE–CHOCSCHOCS DÉMARCATION DU DÉMARCATION DU PAREPARE–CHOCSCHOCS RÉF. DE 4 RÉF. DE 4PO POUR PO POUR VÉRIFIER L’ÉCHELLEVÉRIFIER L’ÉCHELLE RÉF. DE 8 RÉF. DE 8PO POUR PO POUR VÉRIFIER L’ÉCHELLEVÉRIFIER L’ÉCHELLE une fois terminé le gabarit une fois terminé le gabarit devrait ressembler à cecidevrait ressembler à ceci:: installé à l’intérieur installé à l’intérieur du paredu pare–chocschocs Format du papier Format du papier: Lettre: Lettre Échelle Échelle: 1:1: 1:1 Sélectionner « Sélectionner «Taille réelleTaille réelle» dans les » dans les options de l’imprimanteoptions de l’imprimante STANDARD STANDARD OF PART NUMBER ISSUE DATE SUBARU OF AMERICA PAGE L101SSJ005 03 4/18/2022 15 21 Appliquer sur la surface Appliquer sur la surface intérieure du carénageintérieure du carénage TOURISME TOURISME ALIGNER AVEC LE ALIGNER AVEC LE BORD DU PAREBORD DU PARE–CHOCS ARRIÈRECHOCS ARRIÈRE DÉMARCATION DU DÉMARCATION DU PAREPARE–CHOCSCHOCS installé à l’intérieur du installé à l’intérieur du parepare–chocschocs une fois terminé le gabarit une fois terminé le gabarit devrait ressembler à cecidevrait ressembler à ceci:: RÉF. DE 4 RÉF. DE 4PO POUR PO POUR VÉRIFIER L’ÉCHELLEVÉRIFIER L’ÉCHELLE RÉF. DE 8 RÉF. DE 8PO POUR PO POUR VÉRIFIER L’ÉCHELLEVÉRIFIER L’ÉCHELLE Format du papier: Lettre: Lettre Échelle Échelle: 1:1: 1:1 Sélectionner « Sélectionner «Taille réelleTaille réelle» dans les » dans les options de l’imprimanteoptions de l’imprimante ALIGNEZ ALIGNEZ–LE LE AVEC L’AXE AVEC L’AXE CENTRAL DU CENTRAL DU PAREPARE–CHOCSCHOCS 1 2 DE NUMÉRO DE PIÈCE VERSION DATE SUBARU OF AMERICA PAGE L101SSJ005 01 4/26/2022 16 21 11 INSTALLATION DU FAISCEAU DE CÂBLAGE Repérer le connecteur latéral du véhicule et retirer/couper le ruban pour le dérouler. Brancher le connecteur d’attelage de remorque « H » au connecteur du véhicule et enroulez-les de ruban mousse « K ». 1 1 2 2 3 4 5 6 7 DE NUMÉRO DE PIÈCE SUBARU OF AMERICA L101SSJ005 01 4/26/2022 VERSION DATE PAGE 17 21 11 INSTALLATION DU FAISCEAU DE CÂBLAGE (SUITE) Retirer le bouchon du panneau de coffre sous le plancher comme illustré. Par l’intérieur du coffre, acheminer le connecteur à quatre broches de l’extrémité d’attelage de remorque à travers le trou percé sous le véhicule. Enfoncer le passe-fil en caoutchouc dans le trou. Retirer la pellicule adhésive du fusible ainsi que de l’UCE et vérifier l’installation du coffre aux emplacements illustrés. (S’assurer d’appliquer le ruban sur une surface propre.) Acheminer le tube comme illustré ci-dessous, puis appliquer les fixations d’attache-câble « J » aux emplacements illustrés. (Nettoyer attentivement la surface avant d’appliquer les fixations) Au moyen d’un attache-câble « I », fixer le faisceau de fils aux fixations à l’aide des repères du ruban de couleur blanche sur le tube de faisceau. 3 3 4 4 (intérieur) (intérieur) (extérieur) (extérieur) 5 5 5 5 6 6 6 6 7 7 7 7 (A) (A) (B) (B) (C) (C) (D) (D) (E) (E) (F) (F) (A) (A)fixation d’attachefixation d’attache–câble au repère du ruban de couleur câble au repère du ruban de couleur blancheblanche~2~21/81/8po (~55po (~55mm)mm) (B) (B)panneau arrière du camion à la fixation d’attachepanneau arrière du camion à la fixation d’attache–câblecâble~3~33/83/8po (~85po (~85mm)mm) (C) (C)panneau arrière du camion au centre de panneau arrière du camion au centre de l’UCEl’UCE~2~23/83/8po (~60po (~60mm)mm) (D) (D)distance entre l’UCE et le portedistance entre l’UCE et le porte–fusiblefusible~1~11/21/2po po (~40(~40mm)mm) (E) (E)bord du passebord du passe–fil à la fixation d’attachefil à la fixation d’attache–câblecâble~5~51/21/2po po (~140(~140mm)mm) (F) (F)panneau arrière du camion à la fixation d’attachepanneau arrière du camion à la fixation d’attache– 8 9 DE 10 11 INSTALLATION DU FAISCEAU DE CÂBLAGE (SUITE) À l’aide du matériel fourni, installer le support de montage du faisceau de l’attelage de la remorque. Insérer le connecteur plat à quatre broches dans le connecteur présentant un logement à clapet. NUMÉRO DE PIÈCE VERSION DATE SUBARU OF AMERICA PAGE L101SSJ005 01 4/26/2022 18 21 Appliquer (1) fixation d’attache-câble arrière « J » aux emplacements illustrés. (Nettoyer attentivement la surface avant d’appliquer les fixations d’attache-câble). Au moyen d’un attache-câble « I », fixer le faisceau de fils aux fixations à l’aide des repères du ruban de couleur blanche sur le tube de faisceau. 8 8 9 9 10 10 9 9 110 110mm (environ 4mm (environ 41/41/4po)po) 1 2 3 4 5 6 7 8 1 2 3 4 OF 12 RÉINSTALLATION DES COMPOSANTS Réinstaller le bouclier thermique. Serrer à 10 Nm (90 po-lb). Rebrancher le faisceau du système de freinage automatique en marche arrière. Réinstaller le carénage du pare-chocs arrière. Réinstaller les feux arrière et leurs boîtiers. Remettre en place le pneu de secours et tous les composants connexes. Remettre le couvercle de l’espace utilitaire en place. Insérer le cache-attelage « M » dans l’attelage de remorque. 13 VÉRIFICATION DU FONCTIONNEMENT DU FAISCEAU DE CÂBLAGE Mettre le contact sans démarrer le moteur et faire les vérifications suivantes de manière séquentielle sur les feux du véhicule et de la remorque. Appuyer sur la pédale de frein (Les clignotants ne fonctionneront pas sans mettre le contact) Allumer les feux Activer le clignotant gauche → Les feux arrière et les feux de position sont allumés Le clignotant de gauche clignote. Le clignotant de droite clignote. Les feux d’arrêt sont allumés. PART NUMBER ISSUE DATE SUBARU OF AMERICA PAGE L101SSJ005 03 Réinstaller le silencieux avec les écrous autobloquants « N » et le joint d’échappement « O » fourni. Serrer les écrous d’échappement à 45 ± 5 Nm (35 •± 4 lb-pi). 4/18/2022 19 21 Activer le clignotant droit 1 OF Appuyer sur la pédale de frein Allumer les feux → Les feux d’arrêt sont allumés. Les feux arrière et les feux de position sont allumés Les feux arrièrer sont allumés. Les clignotants de gauche et de droite clignotent 13 VÉRIFICATION DU FONCTIONNEMENT DU FAISCEAU DE CÂBLAGE (SUITE) Mettre le contact (sans démarrer le moteur, le moteur ne devrait pas tourner) ET enclencher le frein de stationnement, puis faire les vérifications suivantes sur les feux du véhicule et de la remorque. Appuyer sur « START » Appuyer deux fois sur le bouton d’allumage sans relâcher la pédale de frein Faire les opérations suivantes en même temps. PART NUMBER ISSUE DATE SUBARU OF AMERICA PAGE Passer en marche arrière Activer les feux de détresse L101SSJ005 03 4/18/2022 20 21 Mettre le contact Mettre le contact NE PAS DÉMARRER NE PAS DÉMARRER LE MOTEURLE MOTEUR 1 1 1 2 3 4 5 OF 14 INSTRUCTIONS D’INSTALLATION 15 CROCHET DE CHAÎNES DE SÉCURITÉ Toujours utiliser des chaînes de sécurité lors du remorquage d’une charge. Sur les véhicules équipés du système de détection des angles morts (BSD) et de l’avertissement de circulation transversale arrière (RCTA), ces systèmes d’aide à la conduite doivent être désactivés lors du tractage d’une remorque. Le système peut ne pas fonctionner correctement en raison du blocage des ondes radar. Pour obtenir plus de détails sur la désactivation de ces systèmes, consulter le manuel du propriétaire sous « Interrupteur de désactivation de système BSD/RCTA ». Les propriétaires de modèles équipés du système de freinage automatique en marche arrière doivent consulter un concessionnaire SUBARU avant de tracter une remorque. 21 21 Ces instructions constituent un document officiel faisant partie intégrante de l’attelage de remorque. Elles doivent être conservées dans la boîte à gant en tout temps et doivent être remises au nouveau propriétaire si le véhicule est vendu. 16 MISE EN GARDE Pour obtenir plus de renseignements, consulter le manuel du propriétaire, le concessionnaire ou le service après-vente du concessionnaire. SUBARU ne peut être tenue responsable des défectuosités causées par le propriétaire du véhicule ou par toute autre personne et/ou par une mauvaise utilisation du produit. PART NUMBER ISSUE DATE SUBARU OF AMERICA PAGE L101SSJ005 03 4/18/2022 Après les 1 000 premiers kilomètres (600 milles), consulter le concessionnaire SUBARU pour vérifier le serrage des boulons ou écrous de l’attelage de remorque. ! ! ! !
SEOCONTENT-END
This product presentation was made with AAWP plugin.