
NHTSA ID Number: 10225750
Manufacturer Communication Number: 12-241-22
Summary
This Bulletin announces installation tips for installing the trunk lid weather strip.
NUMBER: 12-241-22
DATE: 10/07/22
| APPLICABILITY: | All Models |
| SUBJECT: | Trunk Weather Strip Installation |
INTRODUCTION:
This Service Information Bulletin announces installation tips for installing the trunk lid weather strip. This information will help ensure proper installation and prevent any unwanted water intrusion. The following tips are to be used in conjunction with the information supplied in the applicable Service Manual. The information outlined below is broken down by body style.
SERVICE PROCEDURE / INFORMATION:
REMINDER: Customer satisfaction and retention starts with performing quality repairs.
The service procedures for trunk lid weather strip replacement remain unchanged. Always refer to the applicable Service Manual and review the full requirements of the repair being performed. The Service Manual procedures contain information critical to performing an effective repair the first time, every time. This includes but is not limited to important SAFETY precautions, proper inspection criteria, necessary special tools, required processes and related one-time-use parts needed for a complete and lasting repair.
Refer to STIS: EXTERIOR BODY PANELS > Weather Strip
Installation Tips for Sedan Models (WRX is Shown):
Locate the trunk lid center hole, the weather strip center mark, and the center welding line located on the weather strip.
When installing the new seal, confirm the trunk lid center hole, the weather strip center mark and the welding line are all aligned with one another as shown below.
Confirm the entire weather strip is fully seated onto the body flange in all areas.
CAUTION: Any improper fitment can cause unwanted water intrusion.
installation closely when completed to confirm proper fitment and alignment.
Installation Tips for Coupe Models (BRZ is Shown):
Locate the trunk lid center hole, the weather strip center mark, the center welding line located on the weather strip.
When installing the new seal, confirm the trunk lid center hole, weather strip center mark, and the welding line are all aligned with one another as shown below.
Confirm the entire weather strip is fully seated onto the body flange in all areas.
CAUTION: Any improper fitment can cause unwanted water intrusion.
installation closely when completed to confirm proper fitment and alignment.
Installation Tips for Wagon Models (Outback Wilderness is Shown):
Locate the the welding line on the weather strip. Locate the center of the rear gate between the innerportion of the left and right gate hinge.
When installing the new seal, confirm the center of the gate lid and the welding line are aligned with one another as shown below.
Confirm the entire weather strip is fully seated onto the body flange in all areas.
CAUTION: Any improper fitment can cause unwanted water intrusion. installation to confirm proper fitment and alignment.
1 Affected Product
Vehicle
1 Associated Document
Manufacturer Communications
NUMBER: 12-241-22
DATE: 10/07/22
MC-10225750-0001.pdf 4192.294KB

- 【Perfect Fit】: The rubber weatherstrip is fit for Toyota Corolla 2009 2010 2011 2012 2013
- 【Replace Part Number】: Replace 64461-02120 6446102120 64461-02130 6446102130 64461-12570 6446112570
- 【High Quality】:The seal strip is made of high-quality rubber material, which is aging resistant, has excellent elasticity, strong deformation resistance, can quickly rebound, has a long service life, safe and reliable in quality
- 【Easy Installation】: Easy to install, No drilling or cutting required. The Sealing Strip may bend during transportation and packaging, it is recommended to flat the product 1-2 days before use.
- 【One-year Warranty】:If you get any problems with our Rear Trunk Lid Weatherstrip, please contact us in the first time, If the product has quality problems,we can provide free replacement or refund.

- Fitment1: Trunk Weatherstrip Seal Fit for Buick Apollo 1973-1974, Fit for Buick Gran Sport 1964-1967, Fit for Buick GS/GS 455 1970-1972, Fit for Buick GS 400 1968-1969, Fit for Buick Skylark 1964-1972, Fit for Buick Special 1964-1969, Fit for Chevy Camaro 1967-1969, Fit for Chevy Malibu Chevelle 1964-1972, Fit for Chevy Chevy II/Nova 1962-1974, Fit for Chevy Monte Carlo 1970-1972
- Fitment2: Fit for Olds F85 442 1964-1972, Fit for Olds Cutlass/Cutlass Supreme 1964-1972, Fit for Pontiac Firebird 1967-1969, Fit for Pontiac Grand Prix 1969-1972, Fit for Pontiac GTO LeMans Tempest 1964-1972, Fit for Pontiac Ventura 1973-1974
- MATERIAL: Trunk weatherstrip seal is made of durble EPDM rubber, the sealing strip has excellent durability and wear resistance, can provide excellent protection against heat, corrosion and extreme weather damage. High temperature and cold resistance, protection against ultraviolet light and can be used for a long time
- Waterproof & Dustproof Seal: This trunk seal weatherstrip has good elasticity and resistance to compression deformationcan, effectively prevent rainwater and wind from entering the car to keep the interior of the car dry and quiet,provide a comfortable driving environment
- Easy Installation: As a replacement trunk lid seal, the sealing strip is designed to be used as a direct replacement for the old seal, making the installation process quick and easy
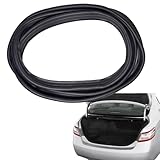
- 【Perfect Fit】: The rubber weatherstrip is fit for Toyota Camry 2007 2008 2009 2010 2011 2012 2013 2014 2015 2016; Fit for Toyota RAV4 2009 2010 2011 2012 2013 2014
- 【Replace Part Number】: Replace 64461-06060 6446106060 64461-33070 6446133070
- 【High Quality】:The seal strip is made of high-quality rubber material, which is aging resistant, has excellent elasticity, strong deformation resistance, can quickly rebound, has a long service life, safe and reliable in quality
- 【Easy Installation】: Easy to install, No drilling or cutting required. The Sealing Strip may bend during transportation and packaging, it is recommended to flat the product 1-2 days before use.
- 【One-year Warranty】:If you get any problems with our Rear Trunk Lid Weatherstrip, please contact us in the first time, If the product has quality problems,we can provide free replacement or refund.

- 【Product Structure and Size】This car door rubber seal strip is 20ft. U Shape PVC Trim adopts the high-quality internal metal clips structure provides excellent grip retention to promise a stable and strong grip, and the EPDM rubber top bulb provides a secure seal for a variety of applications. The trim bulb seal fits 1/16"-2/25" edge, bulb diameter is 0.55"
- 【Weather Resistance】The rubber bulb seal can provide excellent protection against heat, corrosion and extreme weather damage. High temperature and cold resistance, protection against ultraviolet light
- 【Safe And Durable】This car door rubber seal adopts excellent EPDM rubber and PVC plastic to protect your vehicle, and effectively play a role in noise reduction, eliminate vibration, waterproof, dustproof , soundproof and windproof
- 【Installation】Durable EPDM foam rubber contains internal metal clips to grip permanent around the install place and excellent grip retention. It easy to install, not need to adhesive, just push-on trim seal allows for a fast installation
- 【Wide Range of Application】The car door seal strip suitable for all kinds of vehicles, trucks, trailers, trains,ships, aircrafts; various doors and windows, building; various electrical cabinets, generators, metal plates

- Reduce Wind Noise and Road Noise: The Top Bulb design creates a tighter seal around your vehicle doors, helping block wind noise, dust, rain and outside elements for a quieter driving experience.
- Weather-Resistant: This rubber seal strip provides good protection from heat, extreme weather damage, and corrosion. High temperature resistance & cold resistance, ultraviolet protection
- Safe and Premium: Premium EPDM foam rubber drowns out noise, eliminates vibration, and protects your vehicle, RV, boat, or home from outside elements. Effectively play a role in Noise Reduction, Waterproof, Dustproof & Soundproof & Windproof
- car door seal strip vehicle weather seal auto door gasket truck door seal rv door seal soundproof car seal wind noise blocker door edge trim rubber automotive insulation strip
- Easy to Install: No adhesive required. Easy to cut out to the desired size, the push on decorative seal fits tightly allowing for quick installation and creates a finished edge seal that is long-lasting. The trim bulb seal fits 1/16"-2/25" edge, bulb diameter is 0.55"
SEOCONTENT-START
Bulletin Number: 12-241-22; Date: 10/07/22 Page 1 of 5 SERVICE INFORMATION BULLETIN Continued… CAUTION: VEHICLE SERVICING PERFORMED BY UNTRAINED PERSONS COULD RESULT IN SERIOUS INJURY TO THOSE PERSONS OR TO OTHERS. Subaru Service Bulletins are intended for use by professional technicians ONLY. They are written to inform those technicians of conditions that may occur in some vehicles, or to provide information that could assist in the proper servicing of the vehicle. Properly trained technicians have the equipment, tools, safety instructions, and know-how to do the job correctly and safely. If a condition is described, DO NOT assume that this Service Bulletin applies to your vehicle, or that your vehicle will have that condition. Subaru of America, Inc. is ISO 14001 Compliant ISO 14001 is the international standard for excellence in Environmental Management Systems. Please recycle or dispose of automotive products in a manner that is friendly to our environment and in accordance with all local, state and federal laws and regulations. APPLICABILITY: All Models SUBJECT: Trunk Weather Strip Installation NUMBER: 12-241-22 DATE: 10/07/22 INTRODUCTION: This Service Information Bulletin announces installation tips for installing the trunk lid weather strip. This information will help ensure proper installation and prevent any unwanted water intrusion. The following tips are to be used in conjunction with the information supplied in the applicable Service Manual. The information outlined below is broken down by body style. SERVICE PROCEDURE / INFORMATION: REMINDER: Customer satisfaction and retention starts with performing quality repairs. The service procedures for trunk lid weather strip replacement remain unchanged. Always refer to the applicable Service Manual and review the full requirements of the repair being performed. The Service Manual procedures contain information critical to performing an effective repair the first time, every time. This includes but is not limited to important SAFETY precautions, proper inspection criteria, necessary special tools, required processes and related one-time-use parts needed for a complete and lasting repair. Refer to STIS: EXTERIOR BODY PANELS > Weather Strip ATTENTION: GENERAL MANAGER 0 PARTS MANAGER 0 CLAIMS PERSONNEL 0 SERVICE MANAGER 0 IMPORTANT – All Service Personnel Should Read and Initial in the boxes provided, right. © 2022 Subaru of America, Inc. All rights reserved. Installation Tips for Sedan Models (WRX is Shown): Locate the trunk lid center hole, the weather strip center mark, and the center welding line located on the weather strip. When installing the new seal, confirm the trunk lid center hole, the weather strip center mark and the welding line are all aligned with one another as shown below. Confirm the entire weather strip is fully seated onto the body flange in all areas. CAUTION: Any improper fitment can cause unwanted water intrusion. ALWAYS inspect the installation closely when completed to confirm proper fitment and alignment. Continued… Bulletin Number: 12-241-22; Date: 10/07/22 Page 2 of 5 Installation Tips for Coupe Models (BRZ is Shown): Locate the trunk lid center hole, the weather strip center mark, the center welding line located on the weather strip. When installing the new seal, confirm the trunk lid center hole, weather strip center mark, and the welding line are all aligned with one another as shown below. Confirm the entire weather strip is fully seated onto the body flange in all areas. CAUTION: Any improper fitment can cause unwanted water intrusion. ALWAYS inspect the installation closely when completed to confirm proper fitment and alignment. Continued… Bulletin Number: 12-241-22; Date: 10/07/22 Page 3 of 5 Installation Tips for Wagon Models (Outback Wilderness is Shown): Locate the the welding line on the weather strip. Locate the center of the rear gate between the inner portion of the left and right gate hinge. When installing the new seal, confirm the center of the gate lid and the welding line are aligned with one another as shown below. Confirm the entire weather strip is fully seated onto the body flange in all areas. CAUTION: Any improper fitment can cause unwanted water intrusion. ALWAYS inspect the installation to confirm proper fitment and alignment. Continued… Bulletin Number: 12-241-22; Date: 10/07/22 Page 4 of 5 Bulletin Number: 12-241-22; Date: 10/07/22 Page 5 of 5 IMPORTANT REMINDERS: • SOA strongly discourages the printing and/or local storage of service information as previously released information and electronic publications may be updated at any time. • Always check for any open recalls or campaigns anytime a vehicle is in for servicing. • Always refer to STIS for the latest service information before performing any repairs.
SEOCONTENT-END
This product presentation was made with AAWP plugin.