
NHTSA ID Number: 10232509
Manufacturer Communication Number: 1215213
Summary
Door Mirror Loose / Vibrating
NUMBER: 12-152-13
DATE: 06/18/13
| APPLICABILITY: | 2013MY BRZ |
| SUBJECT: | Door Mirror Loose / Vibrating |
INTRODUCTION
Should you receive a customer concern of looseness or vibration in either of the door mirrors, a design change has been made to the 3 mirror head mounting holes in the mounting base. In addition, a new retaining bolt and tightening torque specification are now used to secure the mirror head to the mounting base. This Bulletin addresses how to repair the existing mirror assembly on the car by replacement of the three mounting screws with revised fasteners and instructions.
COUNTERMEASURE IN PRODUCTION
Revised door mirror assemblies were incorporated into production December 28, 2012, starting with the following VIN:
| STARTING VIN | PRODUCTION DATE |
| D*606352 | December 28,2012 |
PART INFORMATION
| PART NAME | NEW PART NUMBER | DESCRIPTION |
| Mirror Bolt Flange | 91032CA000 | Mounting Bolt (qty. 3 required) |
MATERIAL NEEDED:
Loctite #243 (BLUE) medium-strength thread locking compound
SERVICE PROCEDURE / INFORMATION
- F ollow the procedure outlined in the applicable Service Manual for removing the mirror assembly. After removing the mirror assembly, remove the 3 Phillips screws which hold the mirror head to the base as circled in the photo below.
NOTE: This service procedure applies only to mirror heads secured to their mounting base with Phillips screws. If you find the new hex-head bolts are already in place, diagnose the cause of the loose mirror head and repair or replace accordingly.
Arrow indicates where to look for the three Phillips screws.
IMPORTANT: Avoid damaging the Phillips drive portion of the screws by using a good No. 2 size Phillips screw driver. They are installed with a thread locking compound and may require some extra force to remove.
- Apply thread locking compound to the bolt threads as shown above. Follow the instructions on the product packaging for proper curing time. Install and torque the 3 mounting bolts to 4 Nm, (35.4 inch-pounds).
- Reinstall the mirror assembly in the reverse order of removal.
ADDITIONAL REFERENCE INFORMATION ONLY
The part number information below for the mirror assemblies has been provided for reference only when replacement is required. Always confirm this information with your Parts Department before ordering.
| PART NAME | NEW PART NUMBER | DESCRIPTION |
| R View Mir Unit | 91036CA081 | Manual, w/ heater, R/Hand |
| 91036CA091 | Manual, w/ heater, L/Hand | |
| 91036CA141 | Manual, w/out heater, R/Hand | |
| 91036CA151 | Manual, w/out heater, L/Hand |
1 Affected Product
Vehicle
| MAKE | MODEL | YEAR |
| SUBARU | BRZ | 2013 |
1 Associated Document
Manufacturer Communications
NUMBER: 12-152-13
DATE: 06/18/13
MC-10232509-9999.pdf 646.805KB
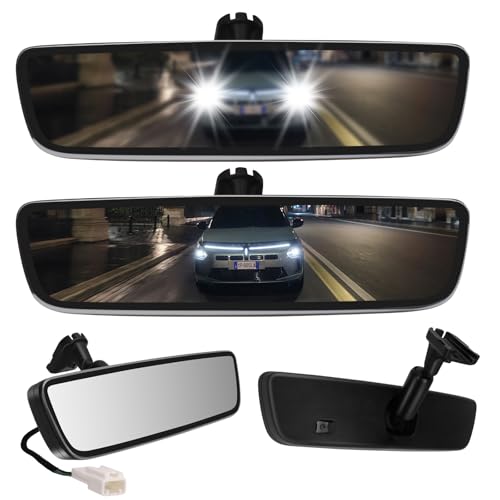
- Auto-Dimming Electrochromic Technology — Automatically darkens when bright headlights hit the rearview mirror, eliminating blinding glare instantly. No more flipping a manual tab. Safer night driving in one upgrade.
- True Universal Fit — Comes with a sliding metal bracket that adapts to most OEM button-style mounts. If your original mount doesn't match, simply swap to the included alternative metal base. Extended cable provides extra length for trucks, vans, and SUVs.
- Premium Frameless Design — Ultra-slim, sleek edge-to-edge glass with no plastic bezel. Looks OEM-pro and gives your interior a modern, clean finish
- DIY Installation (2 Options) — If your vehicle has a pre-wired plug , simply connect the plug-and-play harness and you're done. No plug? No problem — use the included extended cable and wiring kit to hardwire to your ACC fuse or dome light. Everything included: mirror, sliding bracket kit, alternative base, extended cable, wire ties, trim cover, and wrench.
- Why Upgrade from a auto dimming rear view mirror? — A basic rearview mirror costs $20-40 and does nothing. For a few dollars more, your auto-dimming mirror actively works for you every night — reducing eye strain, improving reaction time, and making every drive safer. Fits most vehicles from 2000 to present day.

- These mirrors eliminate the glare of headlights behind you for safer nighttime
- Mirror automatically dims as it detects glare
- The brighter the glare, the more the mirror dims
- Dimensions - 12 x 6.5 x 4.75 in.
- Gentex Auto-Dimming Rear View Mirrors

- AUTO_DIMMING: Automatically darkens to eliminate glare
- FRAMELESS DESIGN: Enhanced aesthetics to complement any vehicle interior
- CAR_TO_HOME AUTOMATION: Control garage doors, gates, home lighting, and more
- INTEGRATED HOMELINK 5: 99% compatibility with garage door openers and security gates
- COMPATIBILITY: Compatible with any wedge mount vehicle along with others using adapters (GENMM1, GENMM2, GENMM3)

- 1.【4.3-inch screen】: Our car rearview mirror display is a 4.3-inch color screen with a resolution of 480*272 and a 16:9 display format; the brightness of 500 cd/m2 ensures clear visibility even in bright sunlight.
- 2.【Auto-dimming function】: The HD is equipped with an automatic dimming function, which can adjust the brightness according to the ambient light conditions and automatically turn on the rearview camera screen when reversing. With an accurate distance scale line display, it can park and reverse correctly, making parking and reversing more convenient and .
- 3.【ABS shell】Our interior rear view mirror made of high-quality and materials. ABS shell, not only ensures its service life, but also adds a stylish and modern feel to your car interior.
- 4.【Practicality】Our 4.3-inch rearview mirror automatic dimming display is designed to provide high-definition and automatic dimming reversing images, solving the problem of poor rearview effect of the car and ensuring a safer parking and reversing experience.
- 5. 【Package List】The package contains 1 car rearview mirror monitor, 1 video cable and power cable, 1 extra cable cover, 1 English manual, 1 bracket and 5 screws, providing everything you need for easy and worry- installation.

- Auto-Dimming
- Integrated Compass
- Homelink integration
- Back Lit Buttons
SEOCONTENT-START
Bulletin Number: 12-152-13; Date: 06/18/13 Page 1 INTRODUCTION Should you receive a customer concern of looseness or vibration in either of the door mirrors, a design change has been made to the 3 mirror head mounting holes in the mounting base. In addition, a new retaining bolt and tightening torque specification are now used to secure the mirror head to the mounting base. This Bulletin addresses how to repair the existing mirror assembly on the car by replacement of the three mounting screws with revised fasteners and instructions. COUNTERMEASURE IN PRODUCTION Revised door mirror assemblies were incorporated into production December 28, 2012, starting with the following VIN: STARTING VIN PRODUCTION DATE D*606352 December 28,2012 PART INFORMATION PART NAME NEW PART NUMBER DESCRIPTION Mirror Bolt Flange 91032CA000 Mounting Bolt (qty. 3 required) MATERIAL NEEDED: Loctite #243 (BLUE) medium-strength thread locking compound NUMBER: 12-152-13 DATE: 06/18/13 APPLICABILITY: 2013MY BRZ SUBJECT: Door Mirror Loose / Vibrating SERVICE BULLETIN ATTENTION: GENERAL MANAGER q PARTS MANAGER q CLAIMS PERSONNEL q SERVICE MANAGER q IMPORTANT – All Service Personnel Should Read and Initial in the boxes provided, right. Continued… CAUTION: VEHICLE SERVICING PERFORMED BY UNTRAINED PERSONS COULD RESULT IN SERIOUS INJURY TO THOSE PERSONS OR TO OTHERS. Subaru Service Bulletins are intended for use by professional technicians ONLY. They are written to inform those technicians of conditions that may occur in some vehicles, or to provide information that could assist in the proper servicing of the vehicle. Properly trained technicians have the equipment, tools, safety instructions, and know-how to do the job correctly and safely. If a condition is described, DO NOT assume that this Service Bulletin applies to your vehicle, or that your vehicle will have that condition. SUBARU OF AMERICA, INC. IS “ISO 14001 COMPLIANT” The international standard for excellence in Environmental Management Systems. Please recycle or dispose of automotive products in a manner that is friendly to our environment and in accordance with all local, state and federal laws and regulations. Bulletin Number: 12-152-13; Date: 06/18/13 Page 2 SERVICE PROCEDURE / INFORMATION 1. Follow the procedure outlined in the applicable Service Manual for removing the mirror assembly. After removing the mirror assembly, remove the 3 Phillips screws which hold the mirror head to the base as circled in the photo below. NOTE: This service procedure applies only to mirror heads secured to their mounting base with Phillips screws. If you find the new hex-head bolts are already in place, diagnose the cause of the loose mirror head and repair or replace accordingly. IMPORTANT: Avoid damaging the Phillips drive portion of the screws by using a good No. 2 size Phillips screw driver. They are installed with a thread locking compound and may require some extra force to remove. Continued… Do not remove (Original M5 Phillips head screw) (Replacement bolt) M5 hexagon head bolt with flange 12mm 12mm Chamfer Arrow indicates where to look for the three Phillips screws. Bulletin Number: 12-152-13; Date: 06/18/13 Page 3 2. Apply thread locking compound to the bolt threads as shown above. Follow the instructions on the product packaging for proper curing time. Install and torque the 3 mounting bolts to 4 Nm, (35.4 inch-pounds). 3. Reinstall the mirror assembly in the reverse order of removal. ADDITIONAL REFERENCE INFORMATION ONLY The part number information below for the mirror assemblies has been provided for reference only when replacement is required. Always confirm this information with your Parts Department before ordering. PART NAME NEW PART NUMBER DESCRIPTION R View Mir Unit 91036CA081 Manual, w/ heater, R/Hand 91036CA091 Manual, w/ heater, L/Hand 91036CA141 Manual, w/out heater, R/Hand 91036CA151 Manual, w/out heater, L/Hand WARRANTY / CLAIM INFORMATION For vehicles within the Basic New Car Limited Warranty period, this repair may be claimed using the following information: LABOR DESCRIPTION LABOR OPERATION # FAIL CODE LABOR TIME One Door Mirror Assembly Repair A916-123 XBE-48 0.4 Both Door Mirror Assemblies Repair A916-124 0.7 NOTE: Up to $1.00 can be claimed in Sublet for thread locking compound.
SEOCONTENT-END
This product presentation was made with AAWP plugin.