| “This site contains affiliate links for which OEMDTC may be compensated” |
NUMBER: 02-160-15
DATE: 04/23/15
| APPLICABILITY: | All Models with FA and FB Engines, 2011MY and Later |
| SUBJECT: | Revised Cylinder Block Measuring Procedures |
INTRODUCTION
This Service Information bulletin provides revised procedures for inspection and measurement of the cylinder block assembly to determine whether or not replacement is necessary. Read through and understand this information completely before proceeding with any repairs to the cylinder block.
NOTE: The revised specifications have been added to the applicable Service Manuals. Always refer to STIS for the very latest service information.
TOOLS REQUIRED:
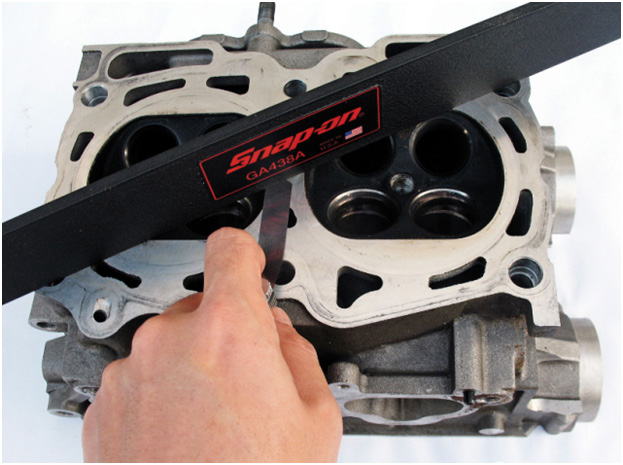
- Precision Straight-Edge and Feeler Blade (Gauge) Set
The photos below show the main tools required to perform the block measuring procedures accurately. (Although this photo shows a cylinder head gasket surface being checked for straightness, a similar procedure is used when checking the block deck surface.
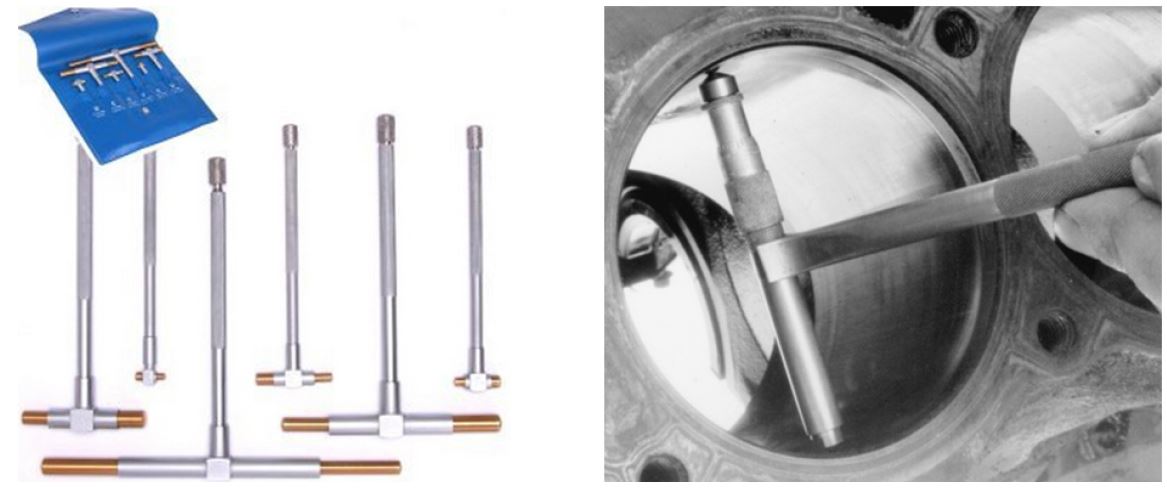
- Telescoping (“T”) Gauge Set and 4” Micrometer
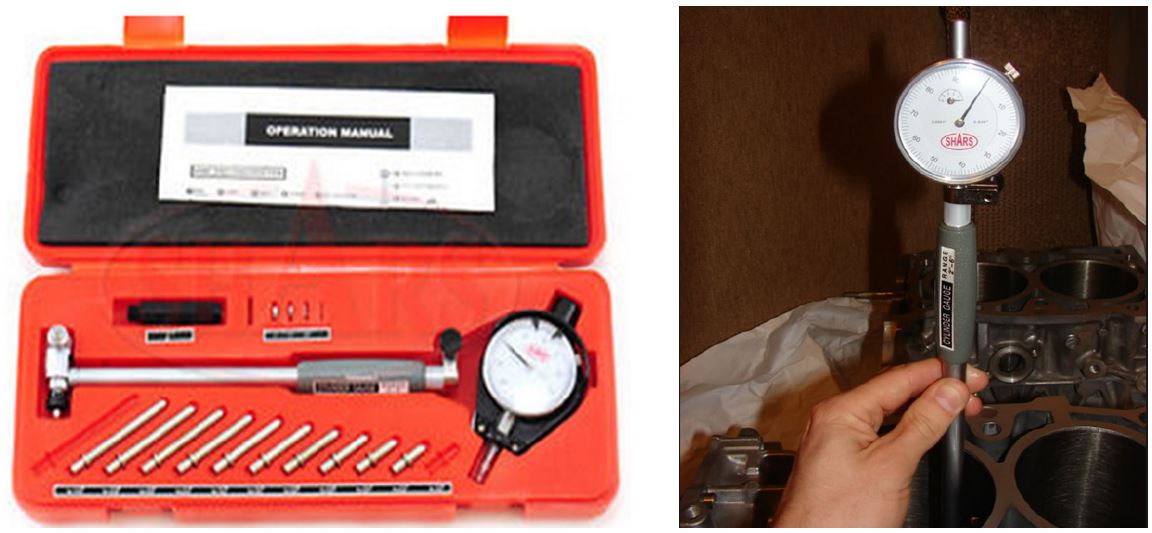
More economical than the Dial Bore Gauge Set shown below, “T” gauges may be used in conjunction with a 4” micrometer to accurately measure both the out-of-round and taper (referred to in the Service Manual as “Cylindricality”) dimensions of the cylinder bores.
A Dial Bore gauge is the easiest and quickest way to measure cylinder bores accurately although significantly more expensive to purchase than a set of “T” gauges.
STEP 1 – Before attempting any measurements, perform a thorough cleaning and careful visual inspection of the block. Look for any cracks, scoring, or other damage that would make it unsuitable for reuse.
If your inspection reveals damage which renders the block unsuitable for reuse, repair the vehicle with the applicable remanufactured or replacement short block assembly.
IMPORTANT: If the block passes initial inspection, prepare a preliminary estimate for the anticipated overhaul repair costs. If the estimate totals 90% or more of the cost to install a replacement short block assembly, proceed with replacement instead of overhauling the original cylinder block. Refer to Section 8.4.8 of the Policies and Procedures Manual for more information. The Assembly Repair vs. Replacement Worksheet is available to download from the Forms (Section 17) of the Manual, pg. 17.3 or from Subarunet in the Forms section of the Service link. This form must be completed for any repairs that are partially or fully paid for by Subaru of America, Inc. or Subaru
 Added Security.
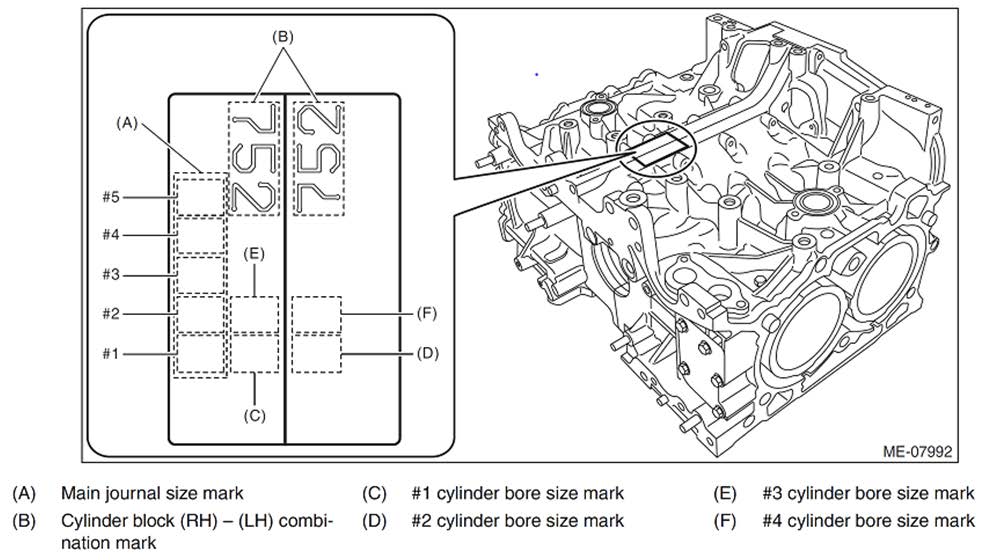
If repairs appear as they will be cost-effective (less than 90% of replacement cost), continue with the following measurement procedures. These measurements should be performed at room temperature (about 68 degrees). If the ambient temperature is higher, it will be necessary to chill the block evenly then perform your measurements before it warms back up significantly. A non-contact thermometer can be used to monitor the block temperature during this process. Any questionable measurements should be repeated after re-chilling if necessary. Similarly, if the block is colder than this temperature, allow it warm evenly to this temperature before performing your measurements. The clearance specifications provided in this bulletin are the same between FA and FB engines, turbo and NA models. Individual component size dimensions will vary based on application and the information stamped into the block at the areas shown in the illustration below.
STEP 2 – Measure the head gasket (deck) surface for warpage.
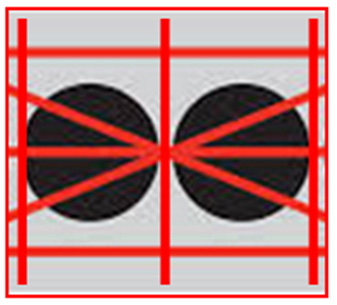
After CAREFULLY cleaning the head gasket surfaces, inspect the top sealing surfaces of the cylinder liners closely for evidence of compression leakage and/or coolant loss. Using a precision straight-edge and feeler blades, check the deck surfaces for warpage in all 8 directions as shown in the illustration on the right.
If the warpage measures less than .25mm (.001”), the deck surface is within specifications. If the measurement exceeds the specification, the block will need to be split to in order to determine the block (deck) height measurements. Block height is measured from the mating surface of the block halves
to the head gasket /deck surface. Although the standard height is 205.0mm (8.071”), the minimum height specification is 204.9mm (8.067”), a difference of .1016mm (.004”). Regardless of the height dimension, if the warpage is more than .1016mm (.004”), the block is no longer serviceable. If the deck surface is determined to be within specifications, proceed to STEP 3.
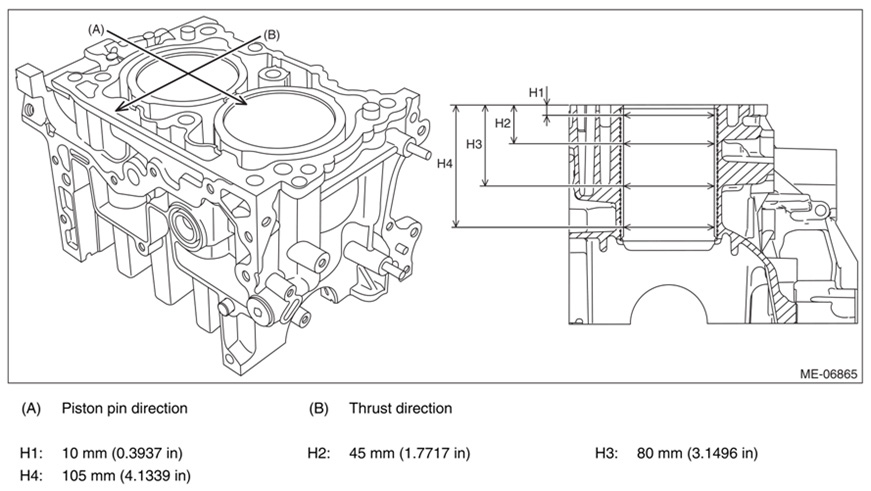
STEP 3 – With the block split and at a temperature of 68 F, measure the cylinder bores for excess taper (cylindricality) and out-of-roundness.
Measure the cylinder bores in both the piston pin (A) and thrust (B) directions and at the 4 specified heights as per the illustrations below.
Calculate the amount of taper or “cylindricality” (C) at each measurement height shown in the illustration above using the formula below:
IMPORTANT NOTE: The “limit” specifications provided are radius dimensions (1/2 of the diameter).
C= [(L) – (S)] ÷ 2
(L) = the largest value measured for cylinder inner diameter
(S) = the smallest value measured for cylinder inner diameter
| MEASUREMENT HEIGHT | ACTUAL MEASUREMENT | |
|---|---|---|
| (A) | (B) | |
| H1 | ||
| H2 | ||
| H3 | ||
| H4 | ||
Limit: .03 mm (.0012”)
Calculate the amount of out-of-roundness (R) at each measurement height shown in the illustration above using the formula below:
R= [(A) – (B)] ÷ 2
- = the larger value (difference) between the measurement results taken in the wrist pin direction and the thrust direction of the cylinder bore as shown in the illustration above.
- = the smaller value (difference) between the measurement results taken in the wrist pin direction and the thrust direction of the cylinder bore
| MEASUREMENT HEIGHT | ACTUAL MEASUREMENT | |
|---|---|---|
| (A) | (B) | |
| H1 | ||
| H2 | ||
| H3 | ||
| H4 | ||
Limit: .03 mm (.0012”)
If any results are beyond specification, replace the shortblock assembly.
STEP 4 – Measure the piston to cylinder wall clearance.
Using a micrometer, measure the piston diameter across the skirt areas (perpendicular to the wrist pin) as shown in the illustration below.
Subtract each piston’s diameter measurement from the corresponding cylinder’s largest bore size measurement to determine the clearance value. The specification for maximum allowable piston to cylinder wall clearance is .01 – .03mm (.00039 – .00118”). At this point, if any of the pistons are found to be out of specification (or have excessive clearance) all 4 must be replaced and the cylinder block bored and finish-honed as required to achieve the specified clearance.
VERY IMPORTANT: Always establish what the sublet charges for the machine work will be. Be sure to account for any additional labor charges parts which may need to be replaced if the cylinder block has to be split (e.g. additional gaskets, seals, o-rings, engine bearings, piston rings, etc.). Confirm the revised overhaul cost total still remains less than the 90% of the assembly replacement threshold before proceeding further. In the majority of these cases, if machine work to the block is determined to be necessary, the expense usually pushes the estimate over the 90% making it a more cost-effective repair to replace the short block assembly instead of overhauling it. Machine work should only be necessary when surface measurements exceed the listed specification. Normal machining as a matter of course is not recommended as duplication of factory machined surface roughness is rarely duplicated which can conpromise the sealing effectiveness of the related gaskets.
REMINDER: SOA strongly discourages the printing and/or local storage of service information as previously released information and electronic publications may be updated at any time.
Always refer to STIS for the latest service information before performing any repairs.
