| “This site contains affiliate links for which OEMDTC may be compensated” |
NUMBER: 12-185-15R
DATE: 05/21/15
REVISED: 01/07/2016
| APPLICABILITY: | 2015-2016MY Legacy and Outback Models |
| SUBJECT: | Wind “Rushing” or “Fluttering” Sound from “B” Pillar Area |
INTRODUCTION
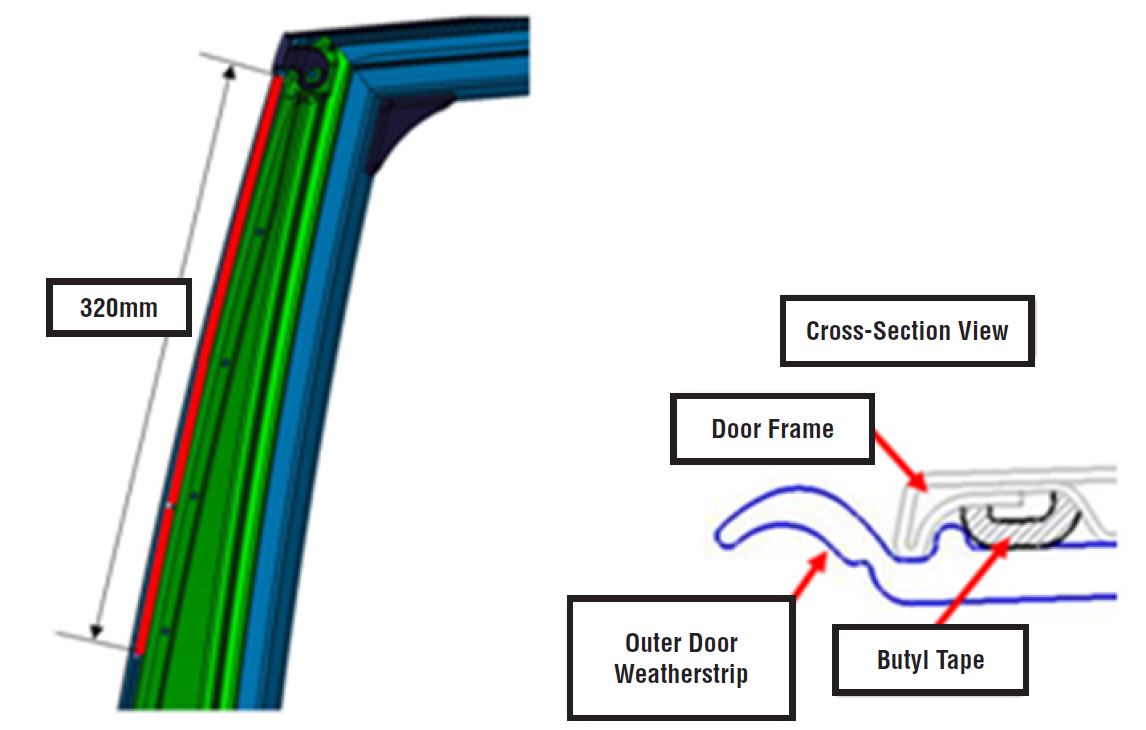
This bulletin provides a repair procedure to address a wind rushing and / or fluttering-type sound originating from the “B” pillar area of the vehicle. The sound is usually reported to be more prevalent when crosswinds are present and / or at highway speeds. The procedure involves the installation of a longer, 320mm piece of butyl adhesive to secure the upper front corner area of the rear door frame weatherstrip. To address customer concerns of a wind rushing sound coming from the front and / or rear door sash area, see TSBs 12-176-14R and 12-177-14R.
PART INFORMATION
The part number for the 320mm length of butyl tape is: SOA635138.
SERVICE PROCEDURE / INFORMATION
Road test vehicle to verify the sound is coming from “B” pillar area. Once confirmed, verify which side, left, right or both and continue with repair procedure.
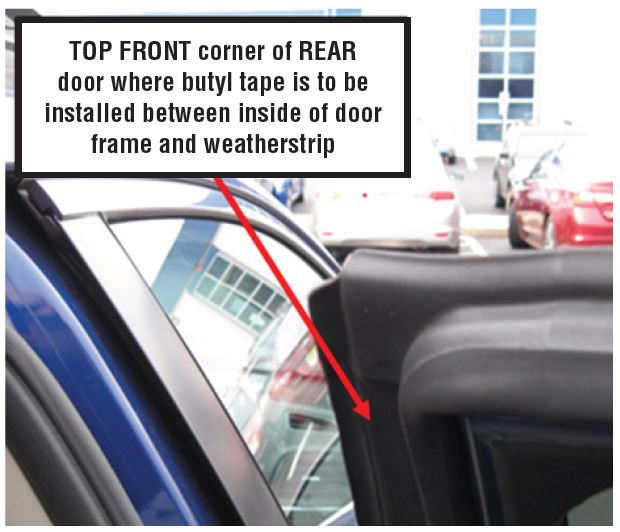
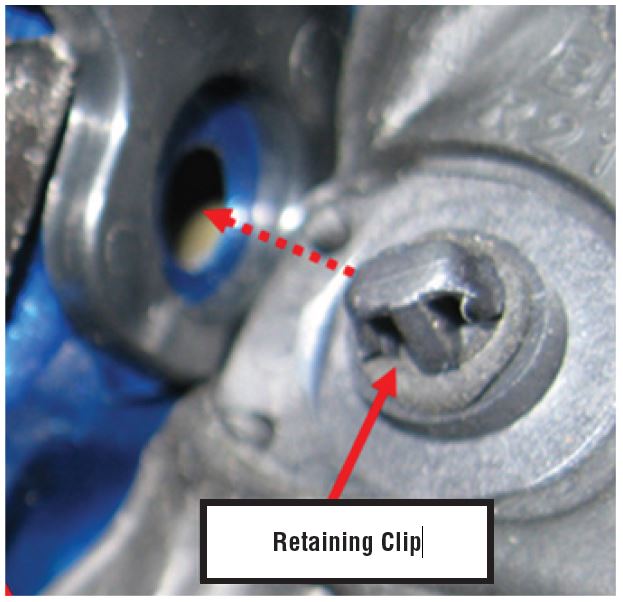
Use a plastic trim tool to release the plastic retaining clip located at the top front corner of the door. CAREFULLY pull back the weatherstrip to gain access to the area where the butyl tape will be applied.
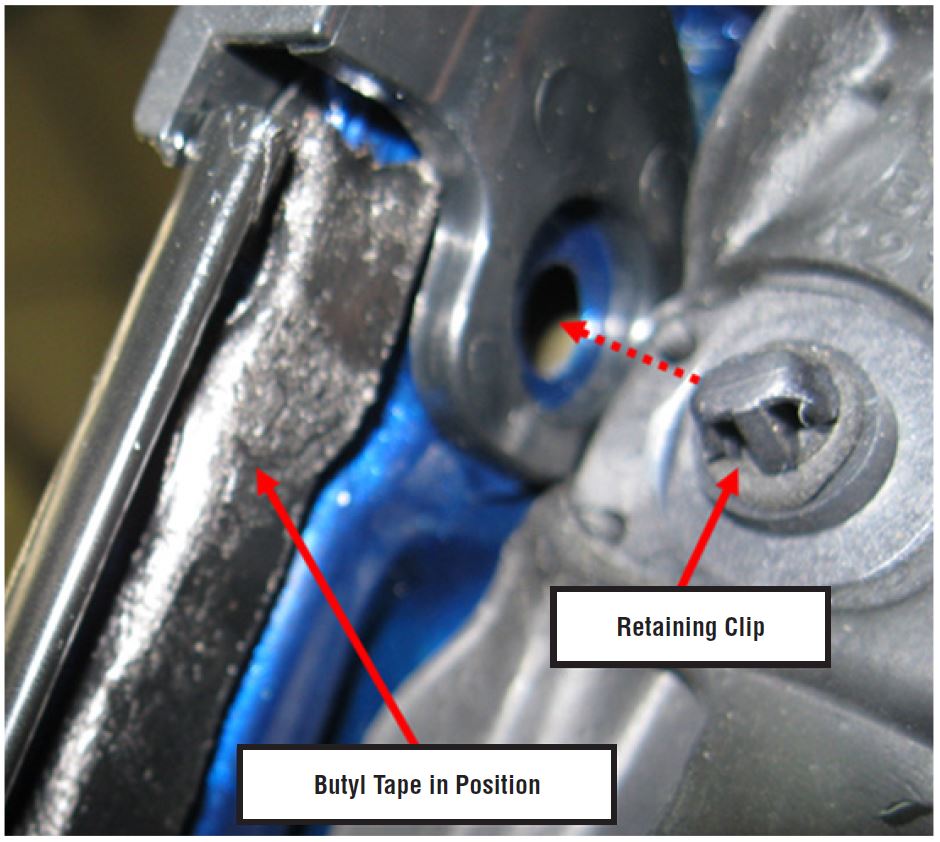
If you find a piece of butyl tape already installed (approximately 80mm in length) from a prior repair, it will need to be CAREFULLY removed. If there is already a 320mm long piece of butyl tape installed, the sound is likely coming from another source and no further repair should be attempted in this area. If the butyl tape needs to be removed, always clean the area where the new tape will be applied with a mild solvent on a clean shop cloth afterward. After drying the area completely, apply the new 320mm length of butyl tape to the door frame as indicated in the illustrations and photo below.
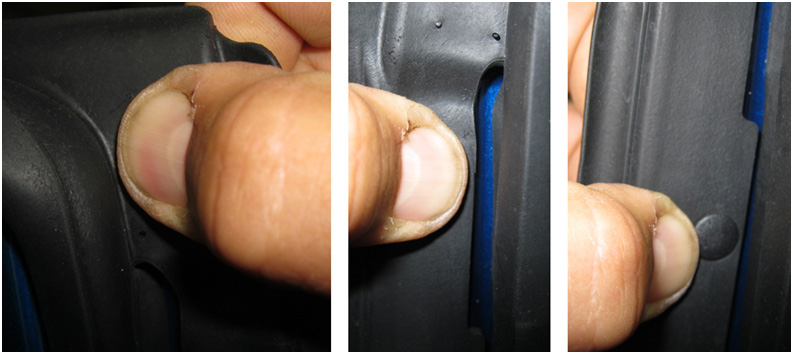
After the butyl tape is applied, refit the door frame weatherstrip and make sure the retaining clip “clips” back into the hole as shown to properly secure and position it. Work the weatherstrip onto the butyl tape with your thumbs making sure it is smooth and any bumps or high spots have been worked out.
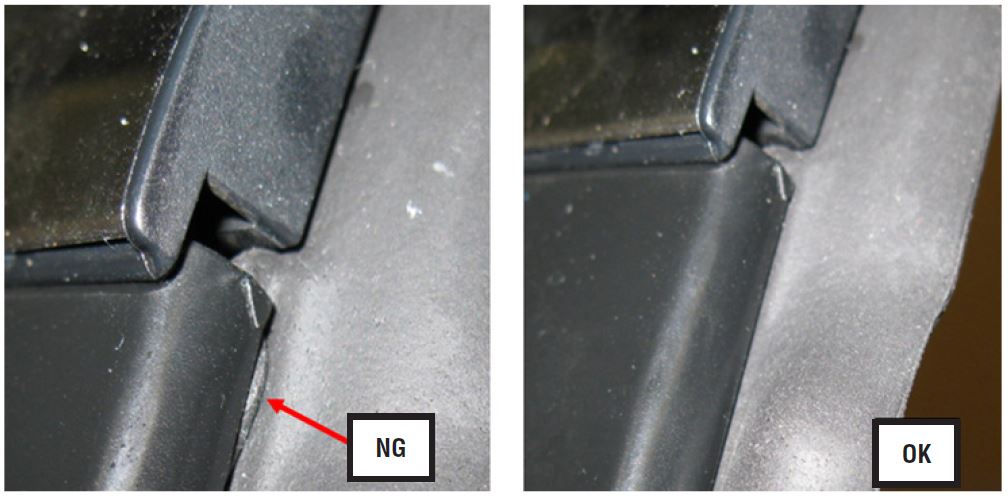
To complete the procedure, always make sure the front edge of the weatherstrip is properly tucked in behind the chrome outer molding as shown in the photos below.
WARRANTY / CLAIM INFORMATION
For vehicles within the Basic New Car Limited Warranty period, this repair may be claimed using the following information:
| LABOR DESCRIPTION | LABOR OPERATION # | FAIL CODE | LABOR TIME |
|---|---|---|---|
| R Door Weather Strip Wind Noise Repair, One Side | A914-713 | WBG-25 | 0.3 |
| R Door Weather Strip Wind Noise Repair, Both Side | A914-714 | 0.4 |
REMINDER: SOA strongly discourages the printing and/or local storage of service information as previously released information and electronic publications may be updated at any time.
Always refer to STIS for the latest service information before performing any repairs.
 Loading...
