| “This site contains affiliate links for which OEMDTC may be compensated” |
NUMBER: 05-60-15R
DATE: 07/27/15
REVISED: 06/13/16
| APPLICABILITY: | 2006-2009MY Legacy Spec B and 3.0R Limited Models with Bilstein Front Struts |
| SUBJECT: | Rattling Sound from Front Suspension While Driving Inspection Method for Loose Strut Retaining Nut |
INTRODUCTION
This bulletin provides an inspection method for the threaded portion of the front strut piston rod. If you receive a customer concern of a rattling sound in the front of the vehicle while driving and inspection results of the related suspension components are inconclusive, the strut retaining top nut torque should be checked using the following procedure.
SERVICE PROCEDURE / INFORMATION
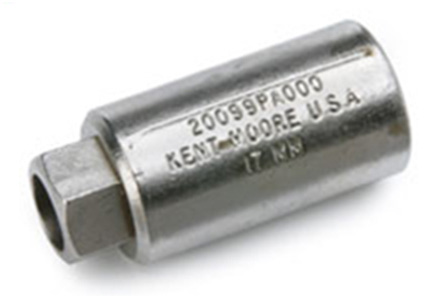
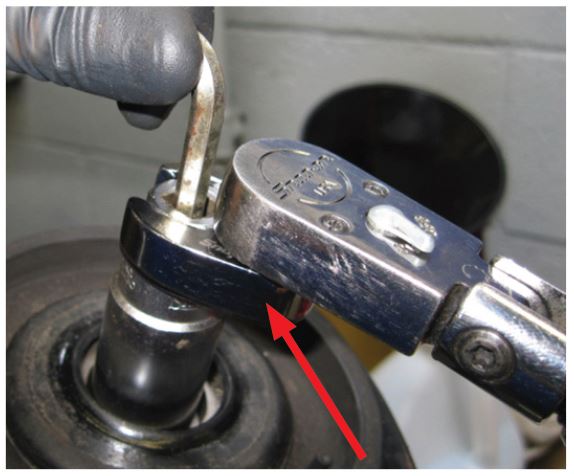
Use the special tool as shown to remove and tighten the locking nut; a 17mm Strut Lock Nut Wrench, p.n. 20099PA000 (SOA Essential Tool).
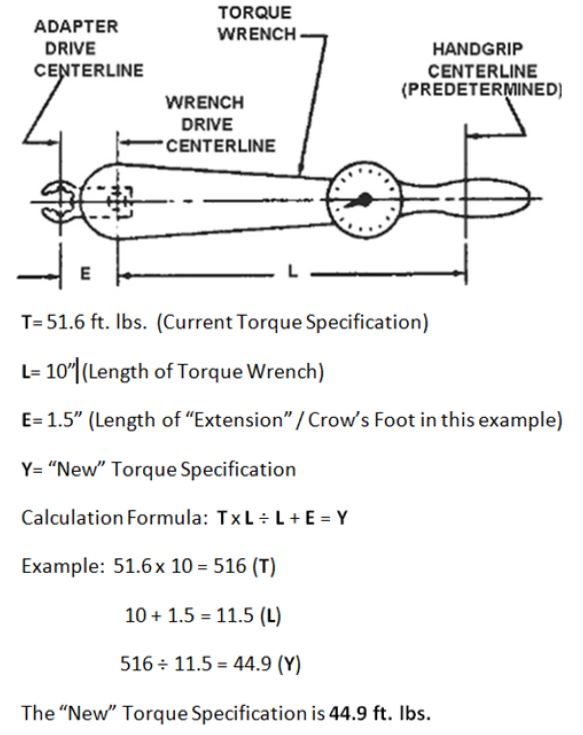
IMPORTANT NOTE: When using an extension which increases the overall “length” of the torque wrench, the torque values applied will change. Refer to the illustration and calculation formula provided on the last page of this bulletin for determining the revised torque specification when using an extension like a Crow’s Foot wrench shown in the example photo above.
- Check the torque of the top retaining nut.
- If the nut torque exceeds 25Nm (18.4 ft. lbs.), torque the nut to 70 Nm (51.6 ft/lbs.) and proceed to Step #2.
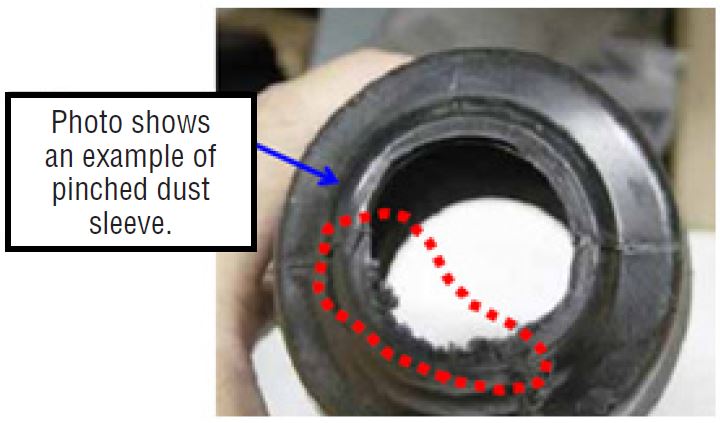
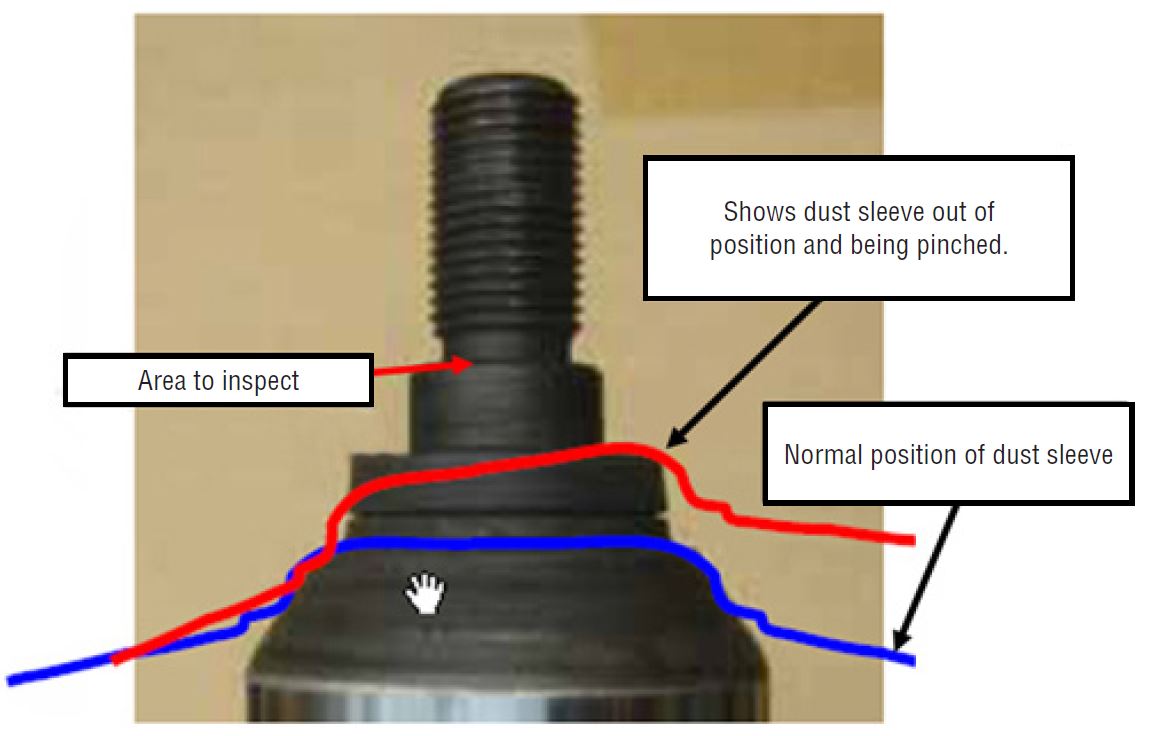
- Using the special tool shown above, if the nut torque is less than 25Nm (18.4 ft. lbs.), either the strut piston dust sleeve is out of position and being pinched or, there may be a crack in the threaded portion at the top of the strut piston. Proceed to Step #3.
- Remove the front wheel assembly then try to rotate the dust sleeve around the strut piston.
- If the dust sleeve does not turn easily, the strut assembly will need to be disassembled for closer inspection.
- If you are able to turn it easily, the procedure is complete. Further inspection to determine the source of the sound is necessary.
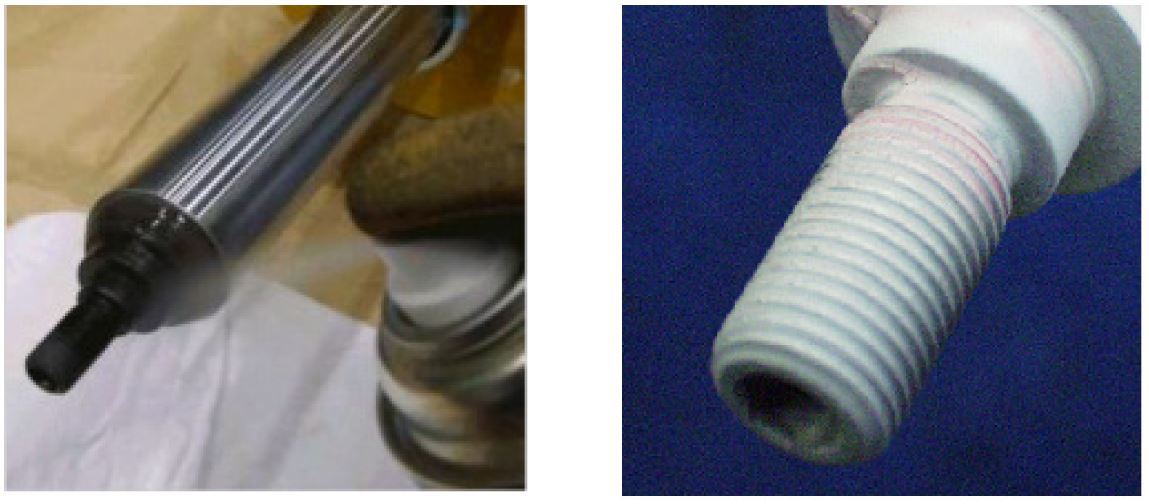
- Once the strut has been disassembled, the area indicated in the photo above will need to be inspected closely for cracking.
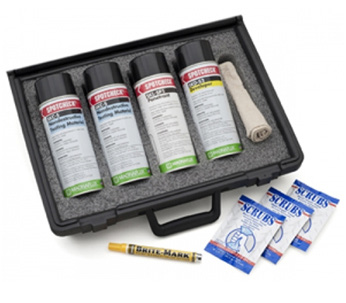
The photo below shows a Magnaflux Spotcheck SK-416 Penetrant Inspection Kit, which can be purchased from industrial equipment suppliers such as MX Industrial, (215) 322-8909 for $99.00 (plus shipping), or online at: www.mxindustrial.com.
Magnaflux Spotcheck SK-416 Penetrant Inspection Kit
PENETRANT CHECKING PROCEDURE:
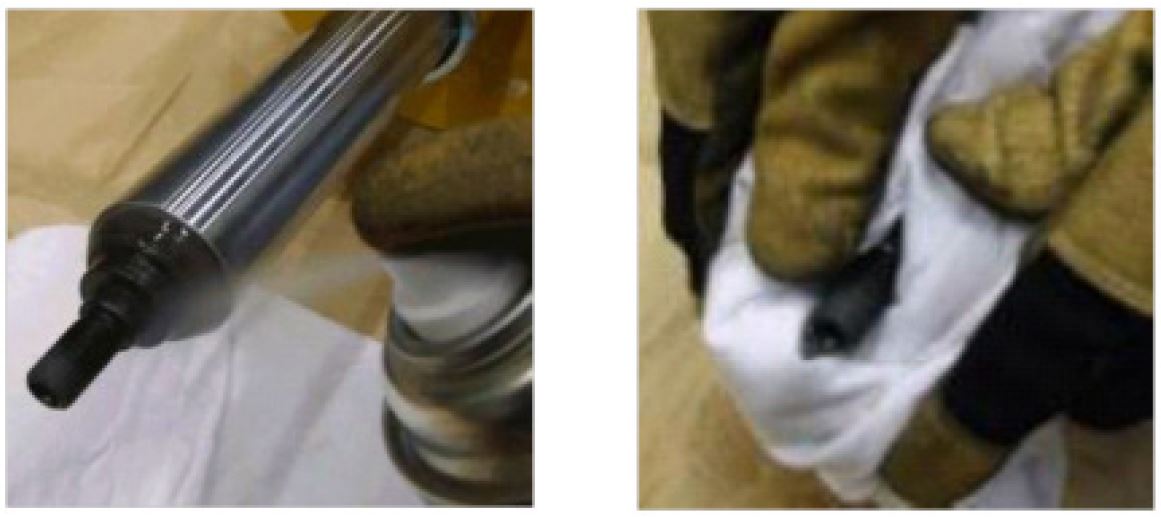
(3-1) Clean the area to be inspected thoroughly of any dirt or grease with the cleaner.
(3-2) Apply penetrant evenly to the inspection area then allow to dwell (penetrate) for about 10 minutes.
(3-3) Remove any excess penetrant with a clean shop cloth sprayed with cleaner. DO NOT spray cleaner directly on the part. Otherwise, any defect the process is trying to show may be rinsed clean. (NOTE: some penetrant will remain in the threads.)
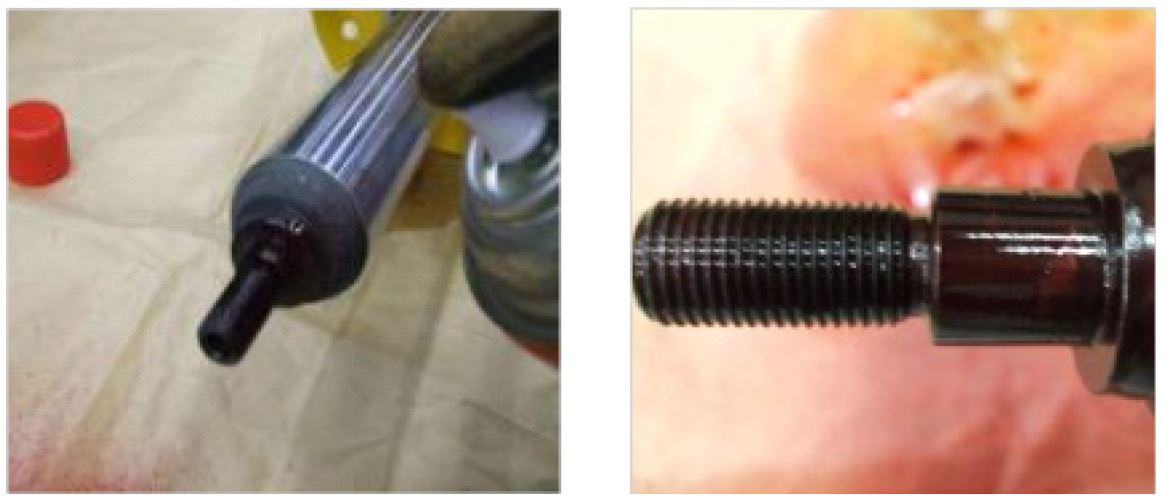
(3-4) Apply the developer evenly to the threaded area and allow it to dry. The bolt will appear like it is coated with white powder as shown in the photo on the right.
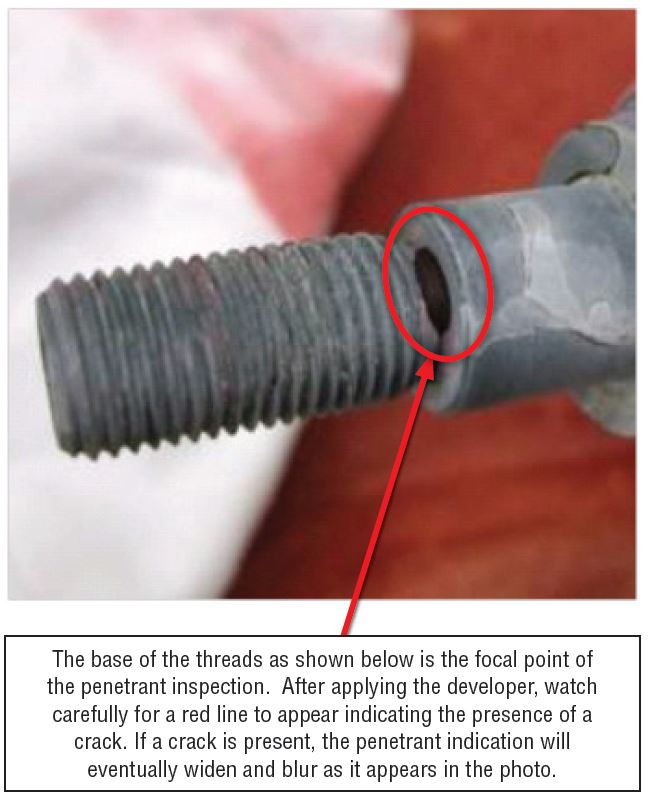
(3-5) Check the developer for penetrant seepage. The strut in the photo below requires replacement.
The base of the threads as shown below is the focal point of the penetrant inspection. After applying the developer, watch carefully for a red line to appear indicating the presence of a crack. If a crack is present, the penetrant indication will eventually widen and blur as it appears in the photo.
(3-6) If the penetrant inspection reveals no cracking, wash away any remaining penetrant materials thoroughly with the cleaner and wipe dry with a clean shop cloth. If a crack is found, replace the strut.
- Reassemble the strut assembly following the procedure in the applicable Service
Manual. NOTE: be sure to use a NEW self-locking top nut, part number 902350027 and torque it to 70 Nm (51.6 ft. lbs.).
IMPORTANT: To insure proper tightening torque of the nut and tension on top portion of the strut assembly are achieved, the special strut mount socket tool, part number 20099PA000 and a 6mm hex key wrench to hold the strut piston firmly must be used as shown on pg. 1.
- Road test the vehicle to verify any change to (or elimination of) the original condition. If the sound is gone, the repair is complete. If the sound persists, further inspection to determine the source will be necessary.
WARRANTY / CLAIM INFORMATION
For vehicles within the Basic New Car Limited Warranty period or with an active Added Security Classic or Gold Service Agreement, this repair may be claimed using the following information:
| LABOR DESCRIPTION | LABOR OPERATION # | FAIL CODE | LABOR TIME |
|---|---|---|---|
| FRONT STRUT OVERHAUL- ONE | B611-201 | NBZ48 | 2.0 |
| FRONT STRUT OVERHAUL- BOTH | B611-204 | 2.4 |
NOTE: Labor times provided include penetrant inspection and 4-wheel alignment.
Revised Torque Specification Calculation Formula:
REMINDER: SOA strongly discourages the printing and/or local storage of service information as previously released information and electronic publications may be updated at any time.
Always refer to STIS for the latest service information before performing any repairs.
