| “This site contains affiliate links for which OEMDTC may be compensated” |
NUMBER: 02-159-15
DATE: 02-04-15
| APPLICABILITY: | All Subaru Models Models |
| SUBJECT: | New Silicone Gasket Remover Product Announcement and Silicone Sealants; Precautions, Reminders |
INTRODUCTION
This bulletin provides new product information along with some reminders and proper precautions to take when removing and applying silicone-type sealants during engine component repairs and replacements.
PART INFORMATION
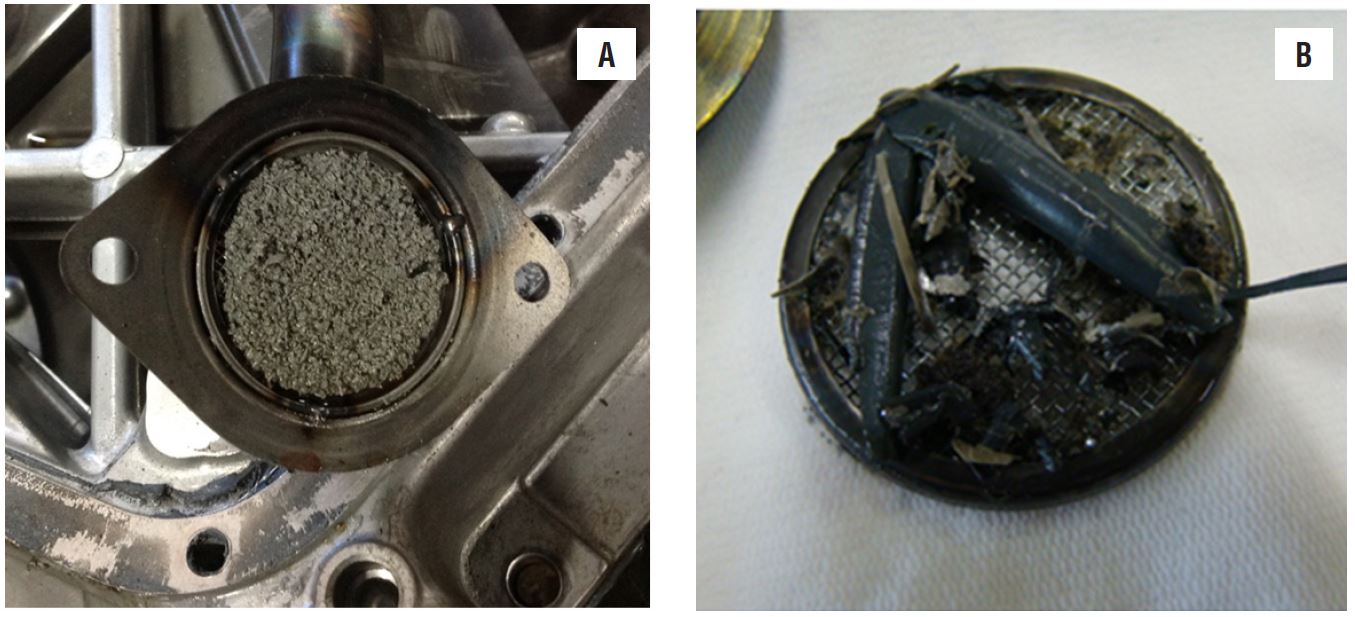
Always refer to the Recommended Materials Service Bulletin no. 01-167-08R on STIS for the latest information on recommended sealants, where they are intended to be used along with the appropriate alternatives and / or equivalents. It is critical to use the proper sealant for each application while following the instructions provided closely in order to avoid leakage or incomplete curing after reassembly. Using the incorrect sealant for the specific repair being performed may lead to internal or external leaks. Other consequences include collection and circulation of loose material in the oil sump which can lead to restriction or blockages in oil supply and / or passages as seen in the photos shown.
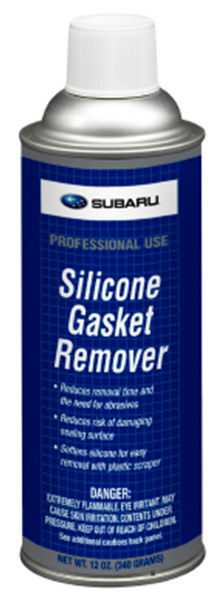
Recently, a new product has been added to the Genuine Subaru Automotive Chemicals line-up; Silicone Gasket Remover, P/N SOA868V9175. Extensive in-house testing of this new product has produced excellent results. It minimizes the need for abrasives and reduces the risk of damage to sealing surfaces. After application, best results are achieved when allowing the product to remain on the silicone and be absorbed for 20 – 30 minutes. CAUTION: Always wear protective safety glasses when using this product.
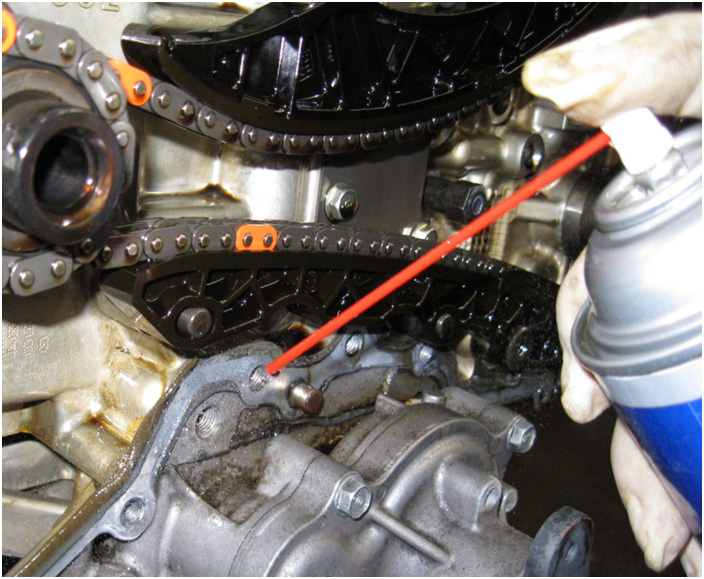
IMPORTANT: The product directions recommend protecting plastic parts and painted surfaces from overspray. For this reason, do not spray the product directly onto any plastic components (e.g. timing chain guides, valve body solenoid / harness connectors, etc.) and take precautions to prevent this kind of contact. Always use the red spray tube to control the application and reduce overspray. Familiarize yourself with and closely follow the instructions and precautions listed on the can’s label before use.
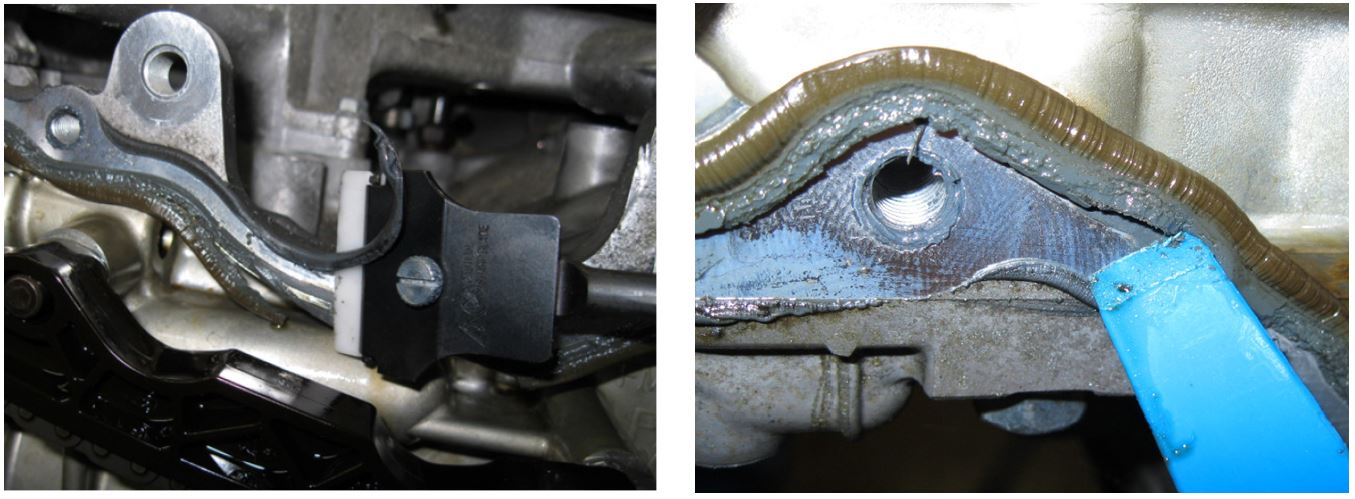
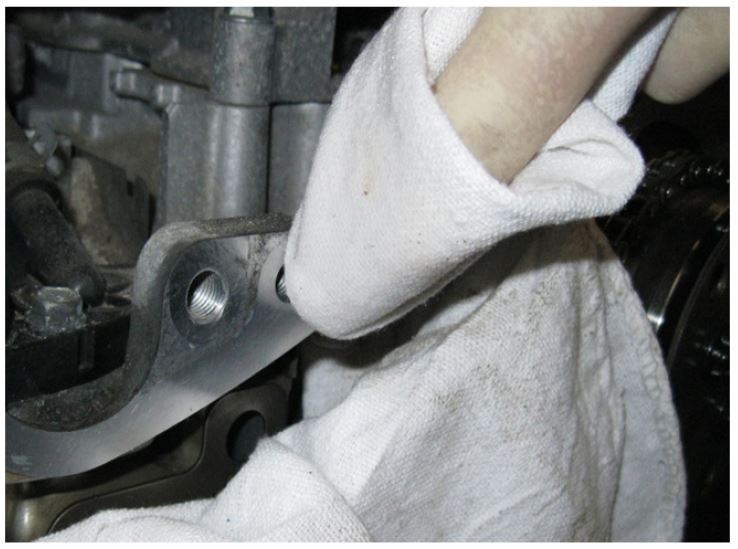
After 20-30 minutes, the silicone will become softer and more pliable. The strength of the silicone’s bond is also greatly reduced making it much easier to remove. Proceed by using a plastic scraper (e.g. a sharpened plastic trim tool or plastic razor blade) first as shown in the photos below. Once the bulk of the material has been scraped away, use a fresh shop cloth with Silicone Remover on it to wipe away any residual sealant. A final wipe using another fresh shop cloth with a mild solvent (e.g, brake cleaner) applied will clean away any remaining silicone remover leaving behind a clean, smooth surface ready for fresh sealant. Another benefit of this new product is it eliminates the need to use over-aggressive abrasive pads or surface conditioning discs which can easily remove material and damage machined sealing surfaces. This often results in low or uneven spots and voids which can lead to recurring leaks.
NOTE: The use of steel razor blades, scrapers or putty knives can also easily damage machined aluminum sealing surfaces. Their use is not recommended.
IMPORTANT: Always remove any puddles or collection points of the Silicone Gasket Remover which may have accumulated during its use. Any residual remover left behind may have an adverse effect on the freshly applied sealant. This new product contains a citrus-based solvent which over time, can swell, soften or craze rubber and plastic components it comes in contact with. Avoid contact between the product and these kinds of materials.
SERVICE PROCEDURE / REMINDERS
- Always follow the Service Manual recommendations and/or TSB 01-167-08R for the proper sealant or equivalent product to use for the specific repair being performed.
- Different types of sealants are used for specific purposes and repairs. Using the wrong type sealer for a specific repair can have serious and expensive consequences.
- Always follow the instructions on the package and pay close attention to set-up and cure times as they will vary between different products.
- Many sealants have expiration dates. Always check for “use by” dates and dispose of any expired sealants. Once sealants are opened, even if plugged or capped, the usable life of the product begins to diminish. If the sealant has been open for a significant period of time and you are unsure of how long it has been opened or, if the material appears questionable in any way, dispose of the remaining sealant and use a fresh product.
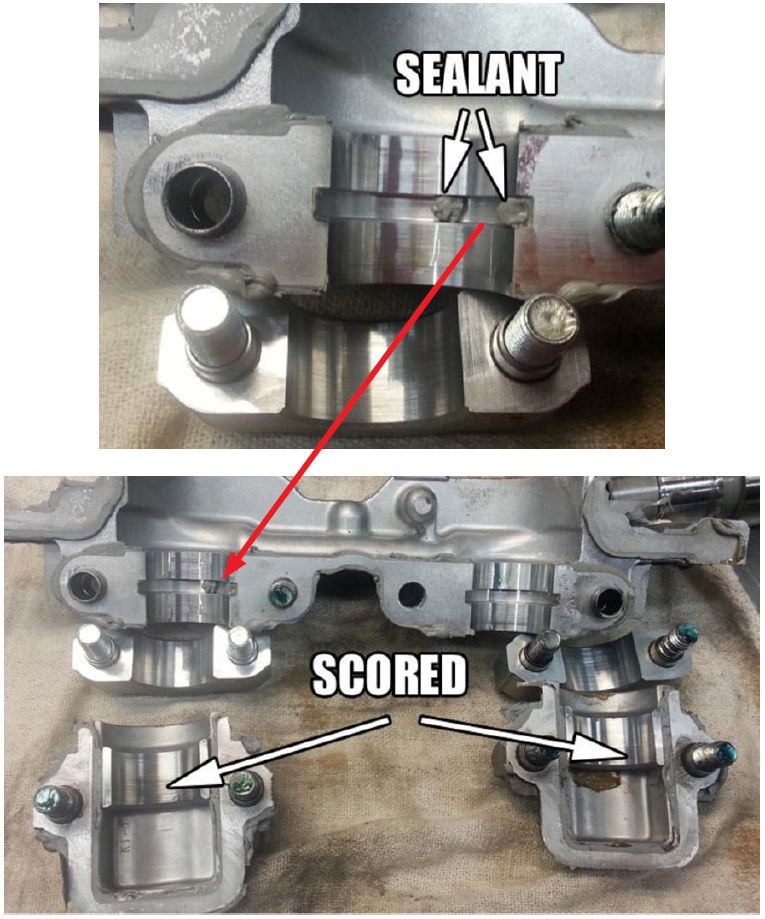
- Using an incorrect or excessive amount of sealant can cause engine damage and/or failures. More is NOT always better. Photo “A” below shows an example of what can happen when too much or the wrong type of sealer is used. Over time, the excess sealant works loose and eventually ends up in the oil pan, restricting or clogging the oil pick-up screen and / or other internal oil passages as shown in camshaft carrier photos “C” and “D” below. A restricted oil supply can cause premature or excessive engine component wear, overheating damage from lack of lubrication, or in an extreme case, engine failure.
- When removing engine components which have been installed using silicone sealants, always make sure ALL the old sealant has been completely removed before reassembly. When removing old sealant, take proper precautions to ensure none has been left behind. In addition, cover or otherwise block open passages as necessary to prevent small pieces of removed sealant from getting into areas where it may end up restricting oil or coolant passages and cause major component damage later. Photo “B” below shows an example of what can happen when proper precautions are not taken and old, loosened, or removed sealant is left behind inside the engine.
- To get the best results, mating components must be thoroughly cleaned of contaminants and dried before applying new sealant and reassembling them.
Following these reminders and hints along with using the new Silicone Gasket Remover product as directed can help increase productivity while at the same time, reduce the chances of repeat failures and / or comebacks.
REMINDER: SOA strongly discourages the printing and/or local storage of service information as previously released information and electronic publications may be updated at any time
- Always refer to STIS for the latest service information before performing any repairs.
